2006 Buell Lightning: Fuel System 4-113
HOME
Fuel Pump Wire Harness Replacement
1. Remove fuel pump assembly from tank. See REMOVAL
in this section.
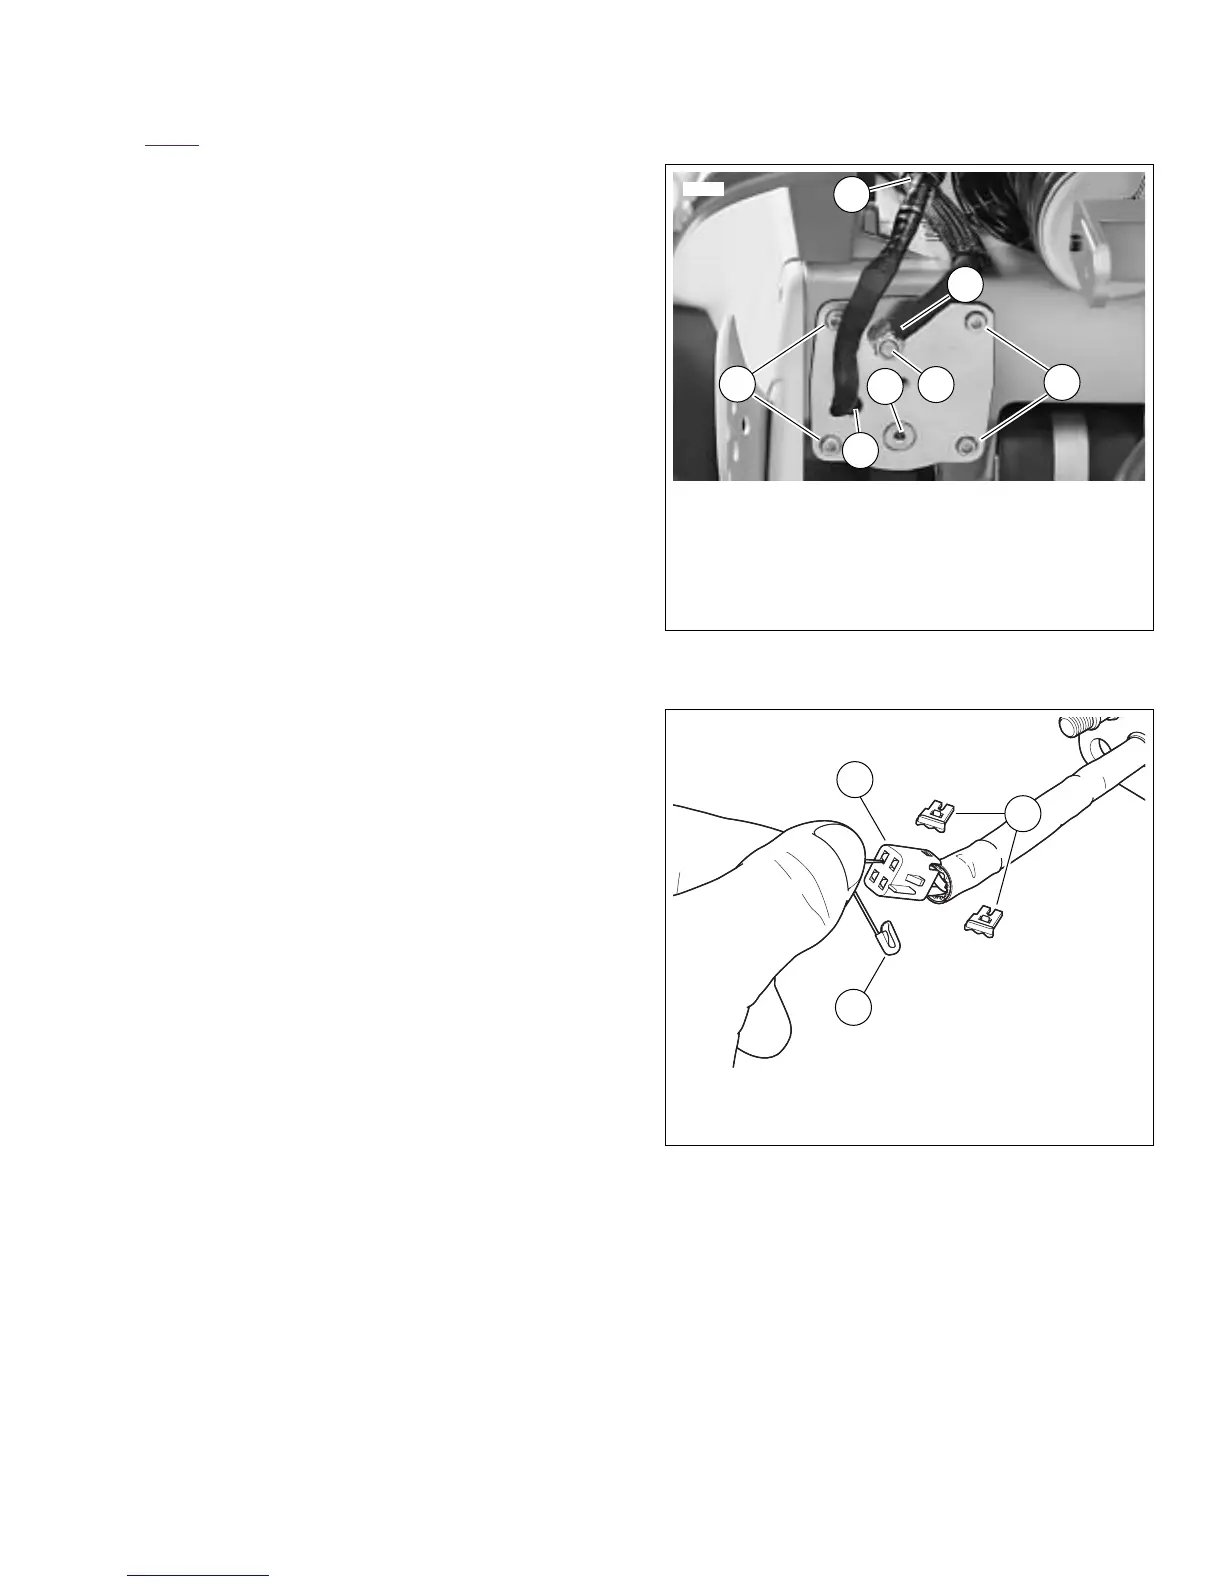
2. See Figure 4-97. Disconnect fuel pump connector (5)
and low fuel level sensor connector (6).
3. See Figure 4-99. Remove terminals from fuel pump con-
nector [86].
4. See Figure 4-97. Remove ground screw (12).
NOTE
Note positions of wires in connector for correct assembly.
5. Disassemble fuel pump connector [86].
a. See Figure 4-100. Remove connector clips (3).
b. Insert push pin/safety pin (1), into connector as
shown.
c. Bend terminal tab towards connector pin and pull
wire from opposite side of connector.
d. Repeat for all wires.
6. From outer side of fuel pump assembly, push wire har-
ness through assembly.
7. Lubricate new o-rings with clean engine oil. From inner
side of fuel pump assembly, push new wire harness into
assembly.
8. See Figure 4-97. Insert new fastener (12), through
ground wire terminal and secure to bracket (9). Tighten
to 18-22 in-lbs (2.0-2.5 Nm).
NOTE
After installing terminals, pull slightly on wire to make sure it
is seated. If necessary, bend tab on terminal to aid in seating
wire.
9. Install terminals into proper locations of fuel pump con-
nector [86]. Install connector clips.
10. See Figure 4-97. Connect low fuel level sensor connec-
tor (6).
11. Connect fuel pump connectors (8). Connectors are two
different sizes.
12. Install fuel pump assembly. See INSTALLATION in this
section.
Figure 4-99. Fuel Pump Wire Harness Location
Figure 4-100. Fuel Pump Connector Disassembly