2006 Buell Lightning: Drive/Transmission 6-15
HOME
7. Install primary cover. See 6.2 PRIMARY COVER.
8. Adjust Clutch. See 1.8 CLUTCH.
9. Fill with FORMULA+ TRANSMISSION AND PRIMARY
CHAINCASE LUBRICANT. See 1.8 CLUTCH.
11WARNING1WARNING
Connect positive (+) battery cable first. If positive (+)
cable should contact ground with negative (-) cable con-
nected, the resulting sparks can cause a battery explo-
sion, which could result in death or serious injury.
(00068a)
10. Connect negative battery cable to battery terminal.
Tighten fastener to72-96
in-lbs
(8-11 Nm).
After installing seat, pull upward on front of seat to be
sure it is in locked position. While riding, a loose seat can
shift causing loss of control, which could result in death
or serious injury. (00070a)
11. Install seat. See 2.43 SEAT.
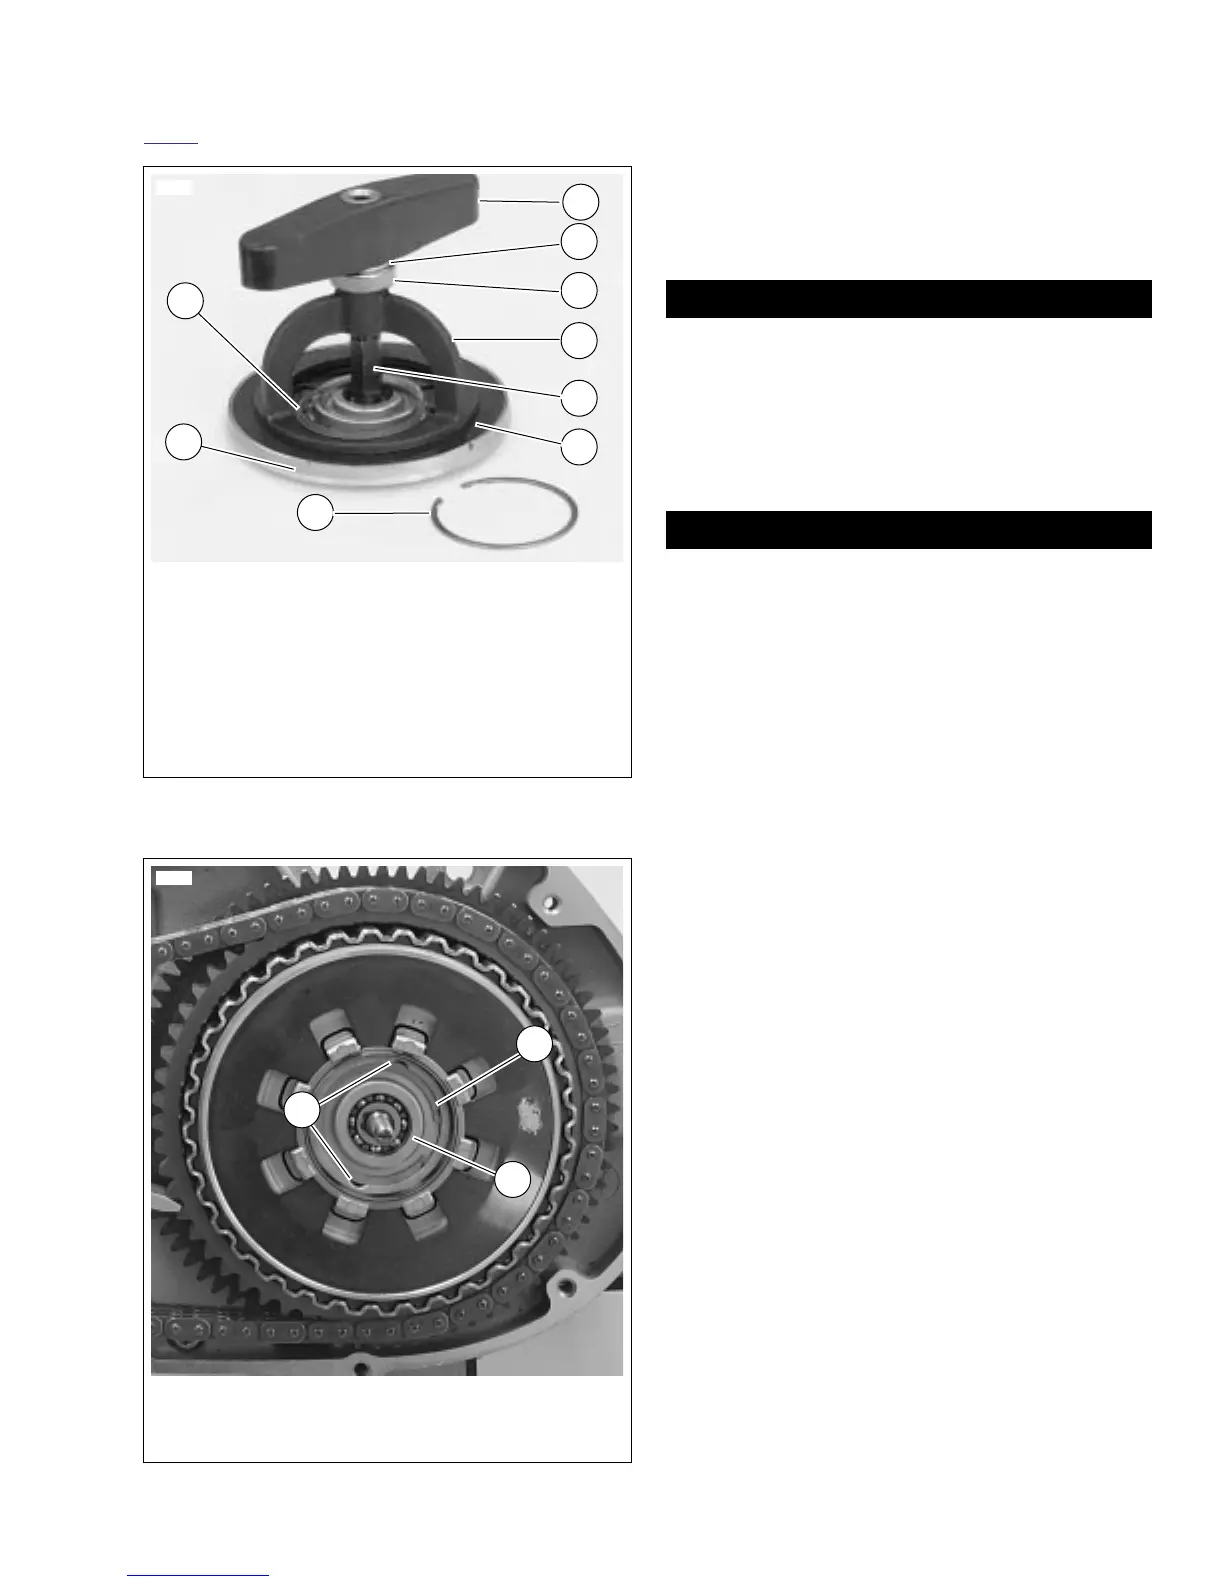
Figure 6-22. Pressure Plate Assembly
Figure 6-23. Clutch Adjusting Screw Assembly and
Retaining Ring
6250
1. Tool handle
2. Washer
3. Bearing
4. Bridge
5. Forcing screw
6. Diaphragm spring
7. Snap ring
8. Pressure plate
9. Spring seat
1
3
2
9
8
7
4
6
5
8815
1. Adjusting screw assembly
2. Retaining ring
3. Tab recesses
2
1
3