Cellwatch Frontier System Installation & User Manual
Section II – User Guide-74
Viewer Password – The login password for the viewer account on the system. This account has
access to view the system but cannot make changes.
Upload Settings
A settings file can be uploaded to the system if desired. The file ends in settings.yaml and includes
device settings such as network settings, commissioning data, DNP3 settings among others.
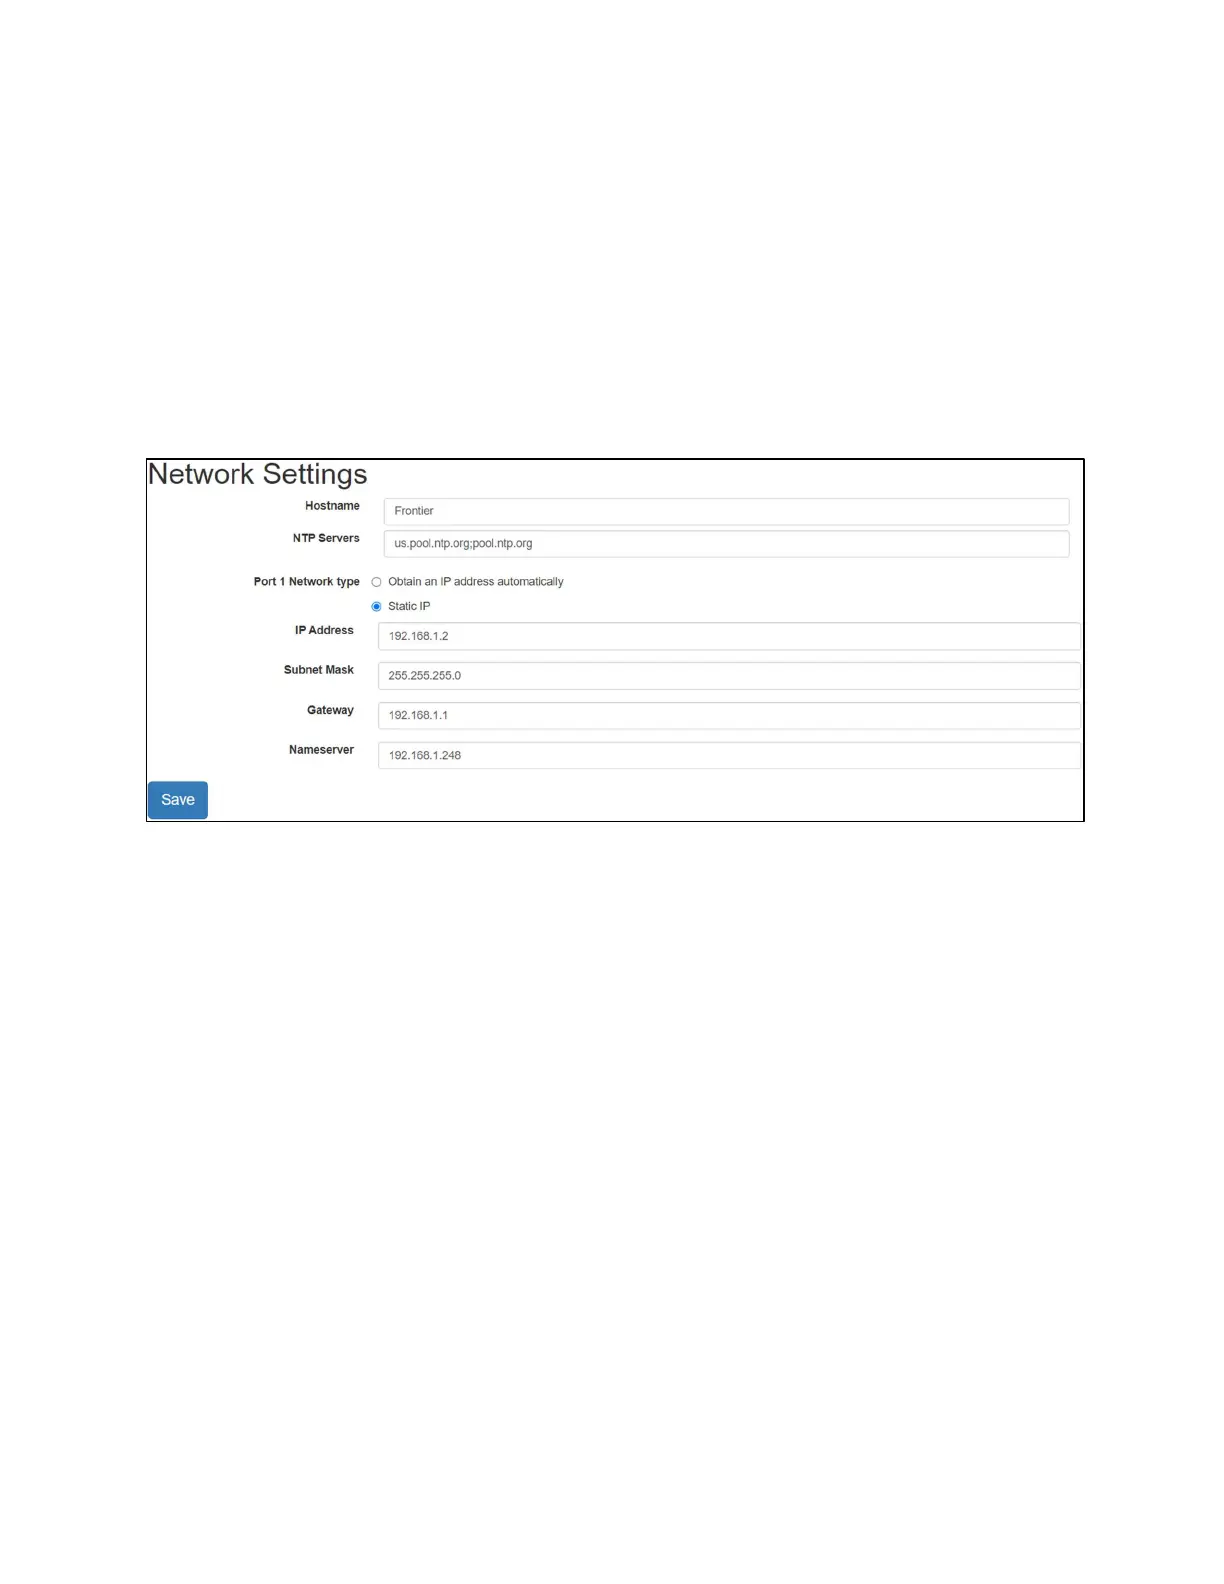
Network Settings
The Network Settings page allows users to adjust the IP settings of the device as well as configure NTP
(Network Time Protocol) servers.
The Network page has options for changing the Frontier device hostname, configuring one or more NTP servers (separated by a
semi-colon), and configuring Frontier for use on a network.
Configure a Dynamic IP (DHCP Enabled)
Select Obtain an IP address automatically to allow the Frontier unit to automatically request an IP
address from the network. Pressing Save will store the new IP address for the Frontier unit. Frontier will
readdress itself to an IP distributed by the network.
Users will be required to restart and log into the Frontier device once this setting is changed. It is best to
perform this operation if you know what IP will be assigned by the network administrator or if
connected via the USB service port.
Configure a Static IP (DHCP Disabled)
Select Static IP and fill in the information provided by the network administrator. IP Address, Subnet
Mask, and Gateway are required to properly configure a static IP. Nameserver is only mandatory if
required by the network.
Users will be required to restart the device and log into the Frontier device again. Following an IP
address change, the user will need to access the device at the newly configured IP address.