Control Testing and Quality Control
153
The first steps in this quality control test are identical to the procedure described before, see
page 144. The following description therefore starts at the main menu.
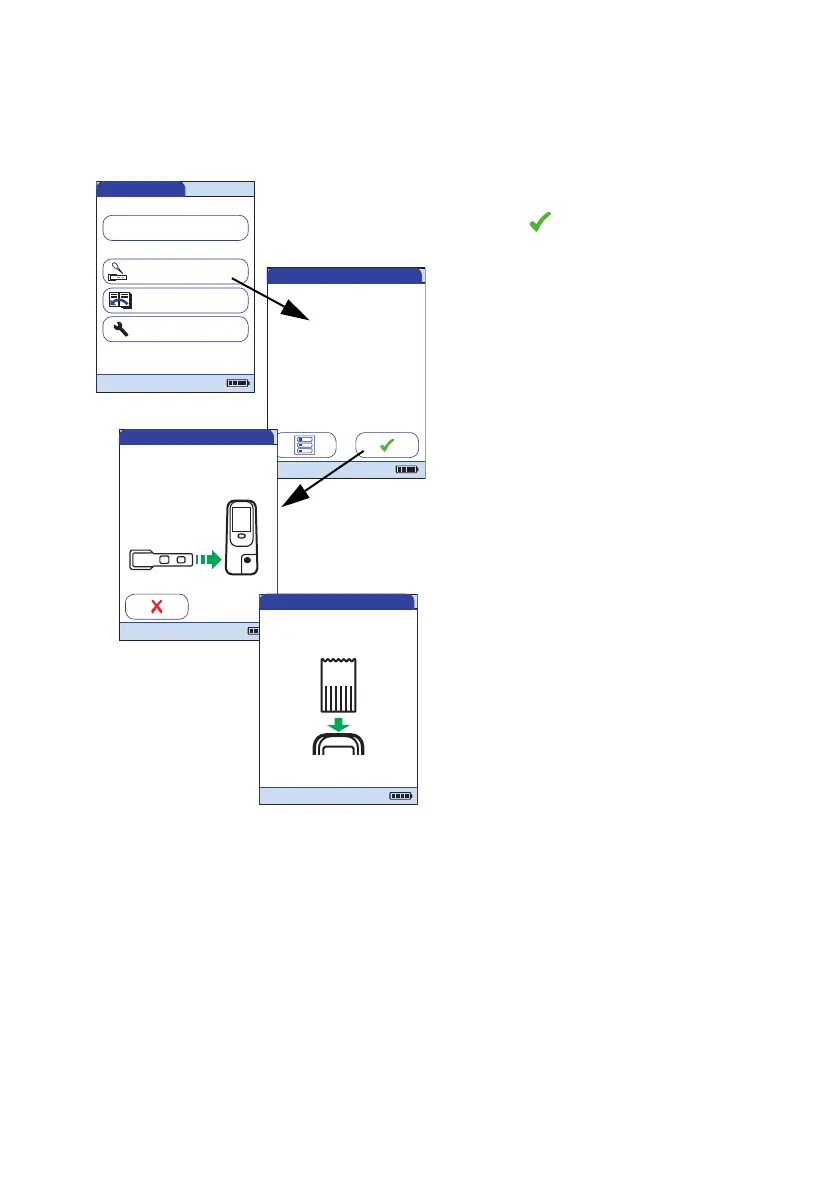
3 Touch Control Test.
4 Touch in the QC Status screen to con-
tinue with quality control test. The test
strip icon prompts you now to insert a test
strip.
5 Remove the test strip from its IQC test
strip container.
6 Insert the test strip as described before,
see page 145.
7 If you are using a new lot of IQC test strips
and have not inserted the code chip yet,
you must do so now. If you have used the
test strips already, skip this step.
Main Menu
Control Test
Review Results
Setup
Patient Test
QC!
09:15 am
04/19/2016
QC Test - QC Status
CK-MB
QC Status
Myo
DDimer
- Pass
- Pass
- Pass
Trop T
proBNP
- Locked
- Locked
04/19/2016
QC Test - Ins. Strip
Insert Strip
JONES, TOMOp:
04/19/2016
QC Test - Ins. Chip
IQC
JONES, TOM
Par:
Op:
Inser
t Code
Chip
04/19/2016
QC