3. Lay the computer on its side with the rear facing toward you.
4. Remove the front bezel (
Front Bezel on page 45).
5. Remove an expansion cards (
Expansion Cards on page 50).
6. Disconnect the power, and data cables from the back of all installed drives.
7. Disconnect all cables from the system board.
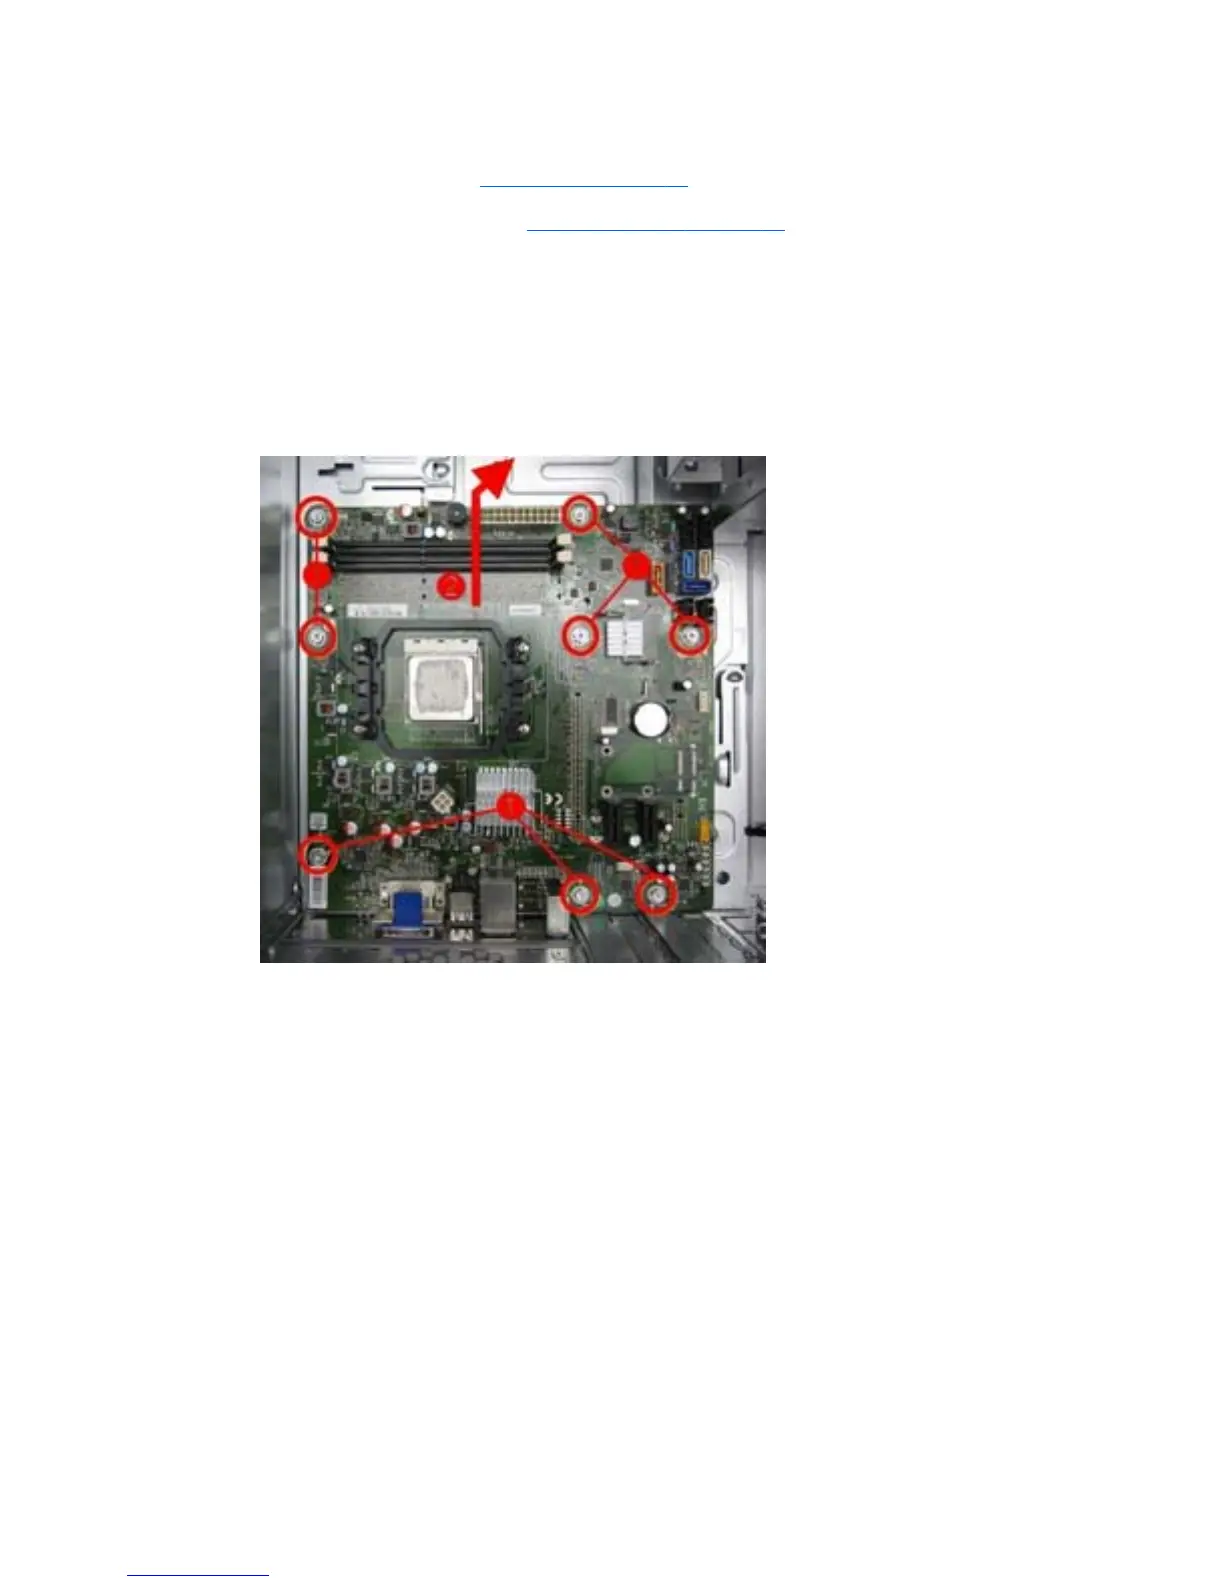
8. Remove the eight screws that secure the system board to the chassis (1).
9. Slide the system board toward the front of the chassis, and then lift it up and out of the chassis
(2).
To install the system board, reverse the removal procedure.
Note the following when installing a system board:
●
To insure correct installation while fastening the first two screws, press the system board firmly
in place against the rear I/O panel so that the system board screw holes are aligned to the
mounting holes in the chassis.
●
When installing a system board, align the ports on the rear of the system board to cutouts in the
rear of the chassis (keep EMI tabs on top of the connectors), and firmly slide toward the chassis
rear until system board screw holes are aligned to mounting holes in the chassis.
●
Ensure ground fingers make contact with the connectors on the system board and are not
damaged.
●
When installing the system board, recommended torque = 4-6 in-lbs.
System Board
73
 Loading...