5-12 Desktop Removal and Replacement
5.9 Mass Storage Devices
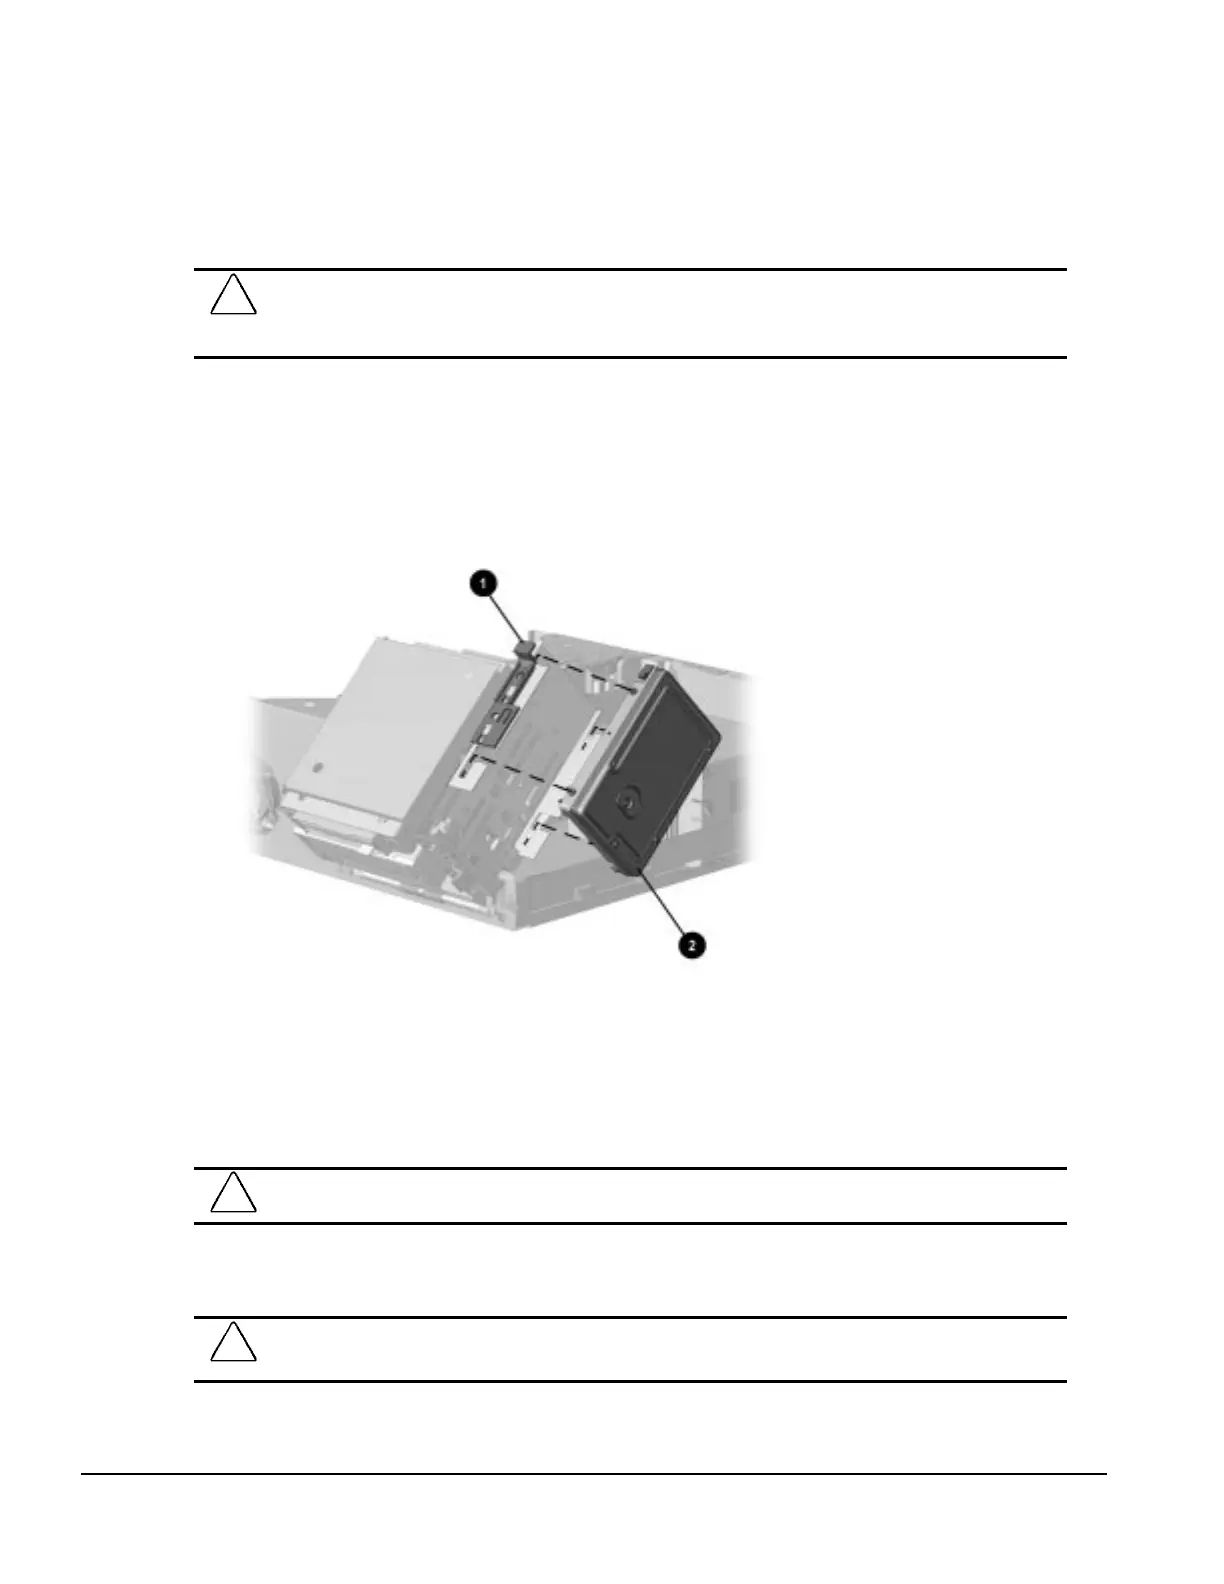
5.9.1 Side-Mounted Hard Drive Removal
1. Prepare the computer for disassembly (Section 5.4).
CAUTION:
When the computer is plugged into an AC power source, there is always voltage applied to the
system board. You must disconnect the power cord from the power source before opening the computer
to prevent system board or component damage.
2. Remove the system unit cover (Section 5.6).
3. Disconnect the P4 power cable and the flat ribbon data cable from the rear of the drive.
4. Grasp the top of the tilt drive cage and rotate it to its upright position.
5. Lift up on the green drive release latch that secures the drive in position 1, slide the drive to the
rear of the cage 2, then pull the drive out of the J-slot.
Removing the Side Mounted Hard Drive
When replacing the drive with a new one, install two guide screws on each side of the drive before
installing it into the drive bay. Extra screws are mounted on the front of the chassis.
To install a hard drive, ensure it is parallel to the drive cage befor reversing the removal
procedure.
CAUTION:
When installing the hard drive, do not damage the seal tape as this may void the warranty.
✎
Refer to Section 5.8 for proper power cable connections.
CAUTION:
When returning the drive cage to its normal position, use caution to prevent damaging the
data and power cables.

 Loading...