6-12 Minitower Removal and Replacement
6.8.2 5.25-Inch Drive Bay Device Removal
This section describes how to remove any drive from a 5.25-inch drive bay. To remove a 3.5-inch
drive from a 5.25-inch drive adapter, refer to Section 6.8.3.
1. Prepare the computer for disassembly (Section 6.3).
CAUTION:
When the computer is plugged into an AC power source, there is always voltage applied to the
system board. You must disconnect the power cord from the power source before opening the computer
to prevent system board or component damage.
2. Remove the access panel (Section 6.6).
3. Remove the front bezel (Section 6.7.1).
4. Disconnect the data and power cables from the rear of the drive.
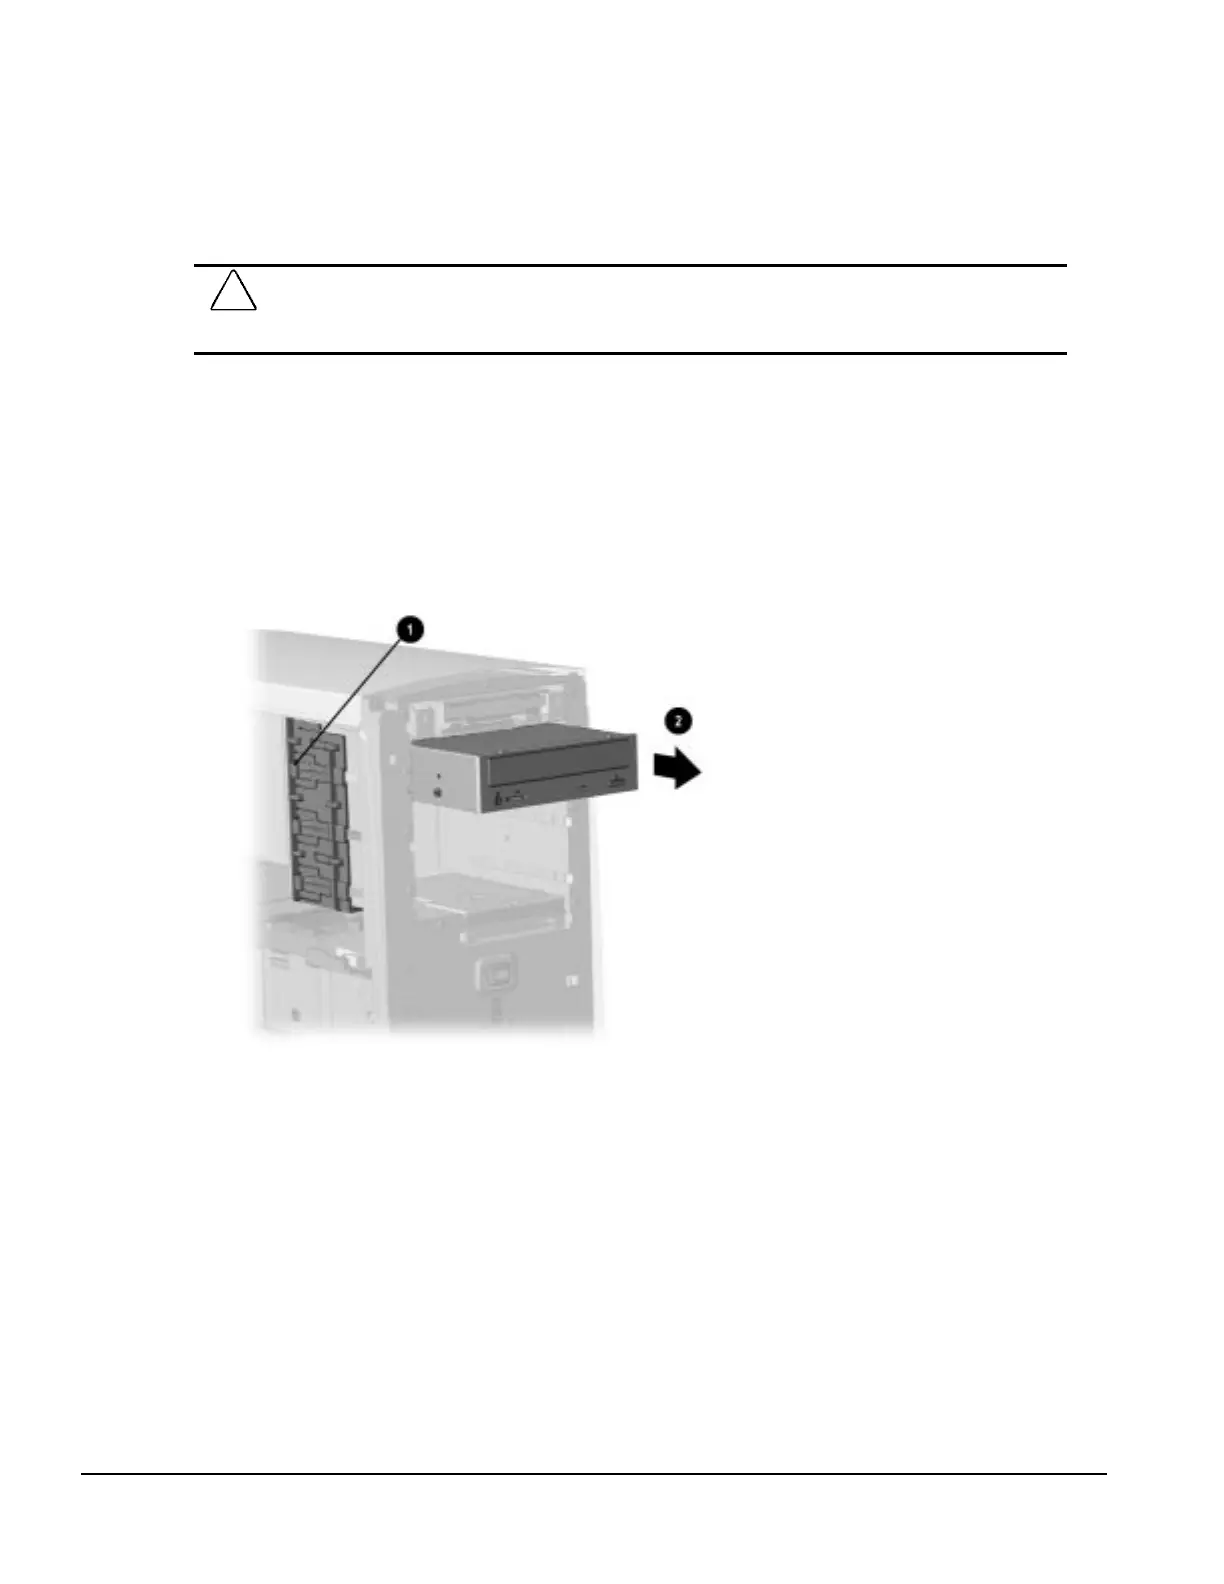
5. Push in on the green drive release tab that secures the drive in position 1, then slide the drive
out of the front of the drive cage 2.
✎
For removing a 3.5-inch drive from a 5.25-inch drive adapter, refer to Section
6.8.3.
Removing the Drive from the Drive Bay
When replacing the drive with a new one, install two guide screws on each side of the drive before
installing it into the drive bay. Extra mounting screws are located on the front of the chassis.
To replace the drive, reverse the removal procedure.
✎
If installing a second device on the primary controller, you must use an 80-
conductor Ultra ATA cable that supports the drive for optimal performance.
If installing a CD-ROM drive, ensure that the guide screws are placed in the lower
set of holes on the drive.

 Loading...