Compaq Deskpro EN Series of Personal Computers 6-35
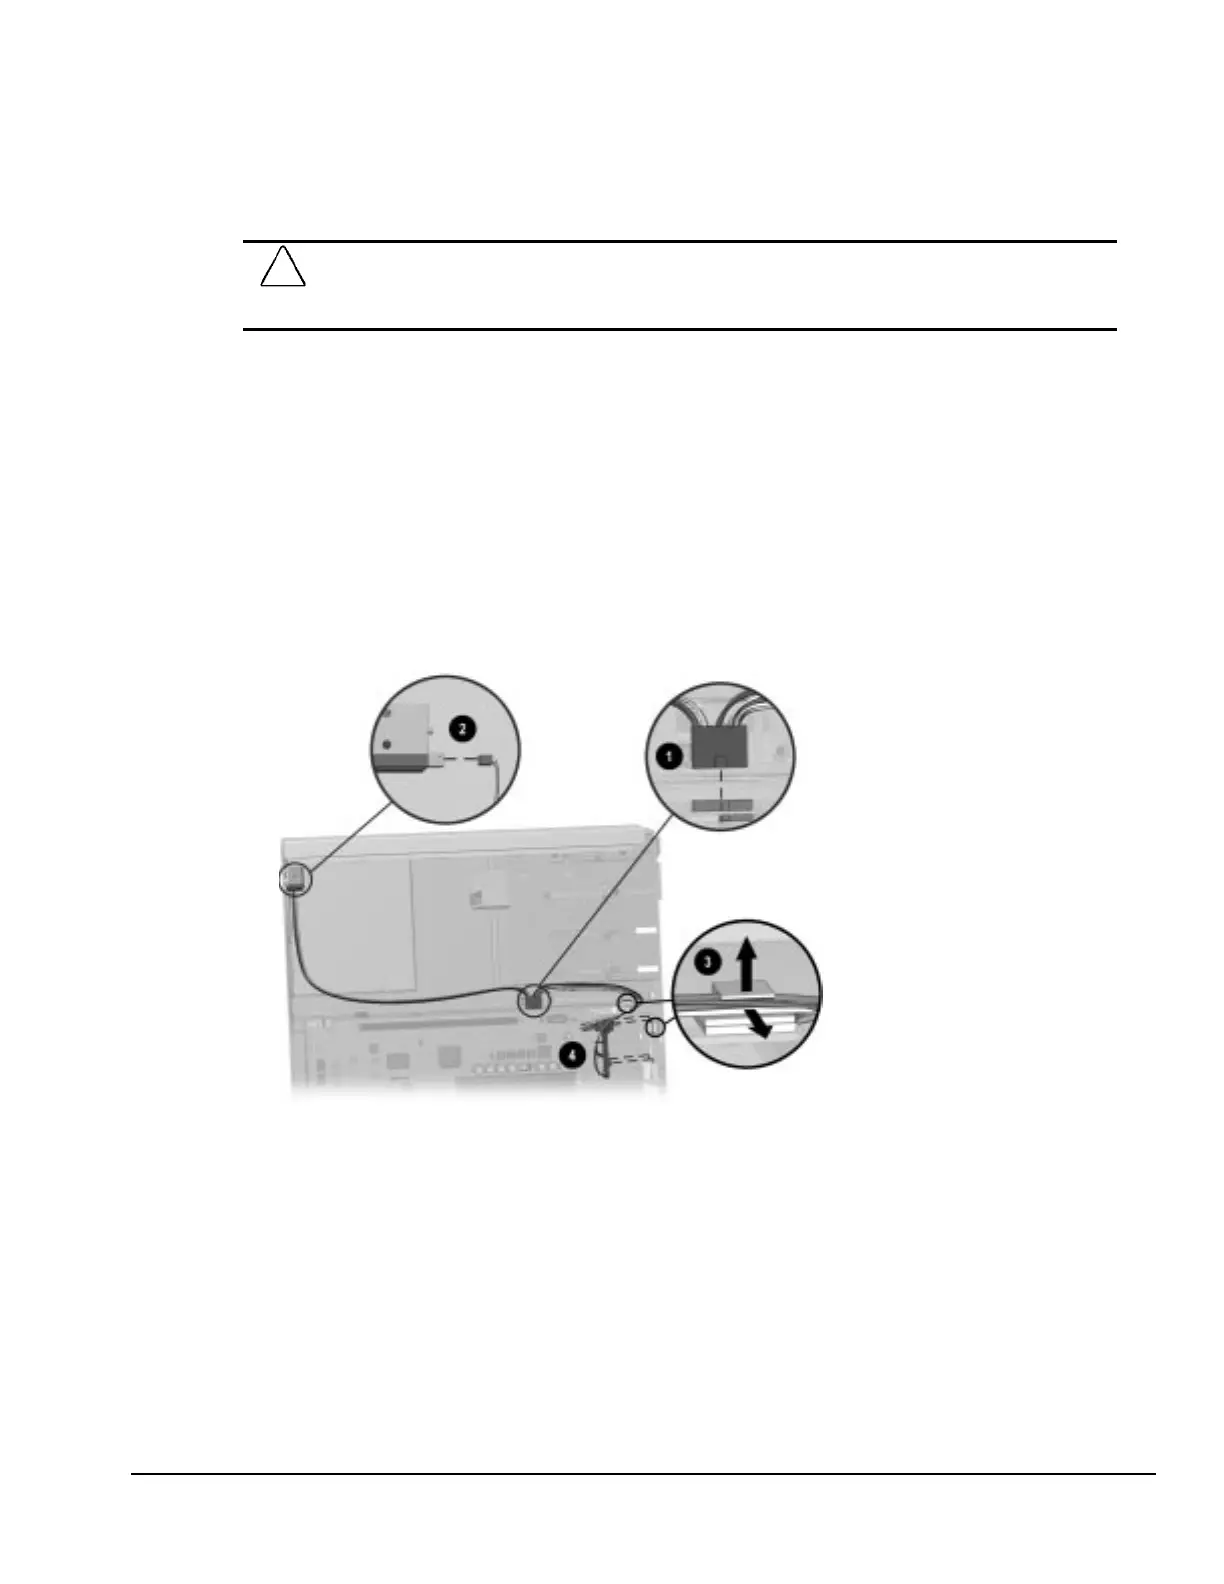
6.16.2 Power Switch Cable Assembly Removal
The power switch mounting bracket and status LEDs are a part of this cable assembly.
1. Prepare the computer for disassembly (Section 6.3).
CAUTION:
When the computer is plugged into an AC power source, there is always voltage applied to the
system board. You must disconnect the power cord from the power source before opening the computer
to prevent system board or component damage.
2. Remove the access panel (Section 6.6).
3. Remove the front bezel assembly (Section 6.7.1).
4. Disconnect the power switch cable from the P5 connector 1 on the rear of the riser board.
5. Disconnect the power switch cable from the cover lock solenoid 2.
6. Remove the expansion board cage (Section 6.10.3).
7. Unhook the cable from the drive cage side of the chassis brace 3.
8. Unhook the switch housing bracket from the chassis by squeezing the tab on the top of the
housing and lifting the assembly out of the slots in the front of the chassis 4.
✎
Details of step 8 are shown on the next page.
Removing the Power Switch Cable Assembly

 Loading...