34
To add a sequence
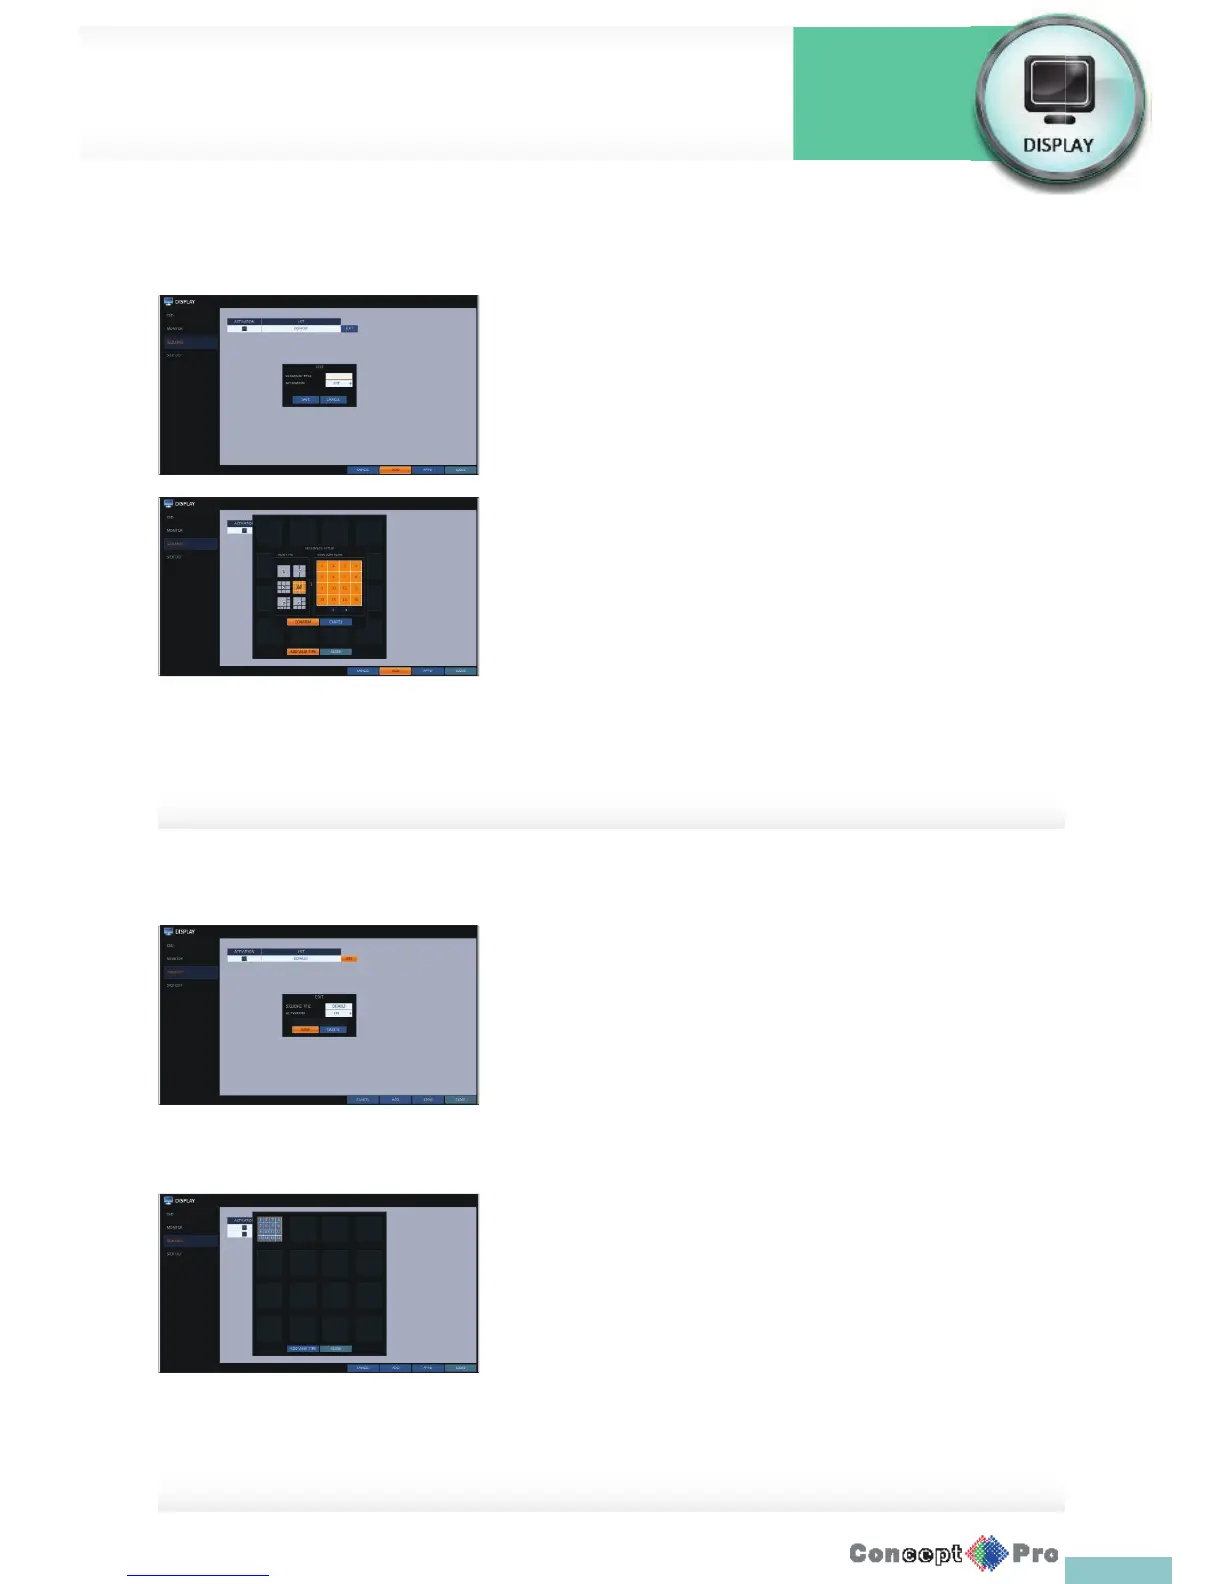
1. Click <ADD> in the bottom of the screen.
2. When the “ADD” dialog appears, enter a title using the virtual keyboard.
3. Enter the name of the sequence and click <SAVE>.
4. When the <ADD VIEW TYPE> dialog appears, click<ADD>.
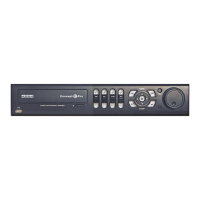
5. When the “SEQUENCE SETUP” dialog appears, select a split mode that
you want to add from <VIEW TYPE>.
6. If the selected split mode is CONFIGURE displayed on <VIEW >, select
a channel you want to display in each split screen.
7. Click <CONFIRM>. The set sequence mode is con rmed and will be
added to the Add Sequence list in order
8. When done, click <CLOSE> in the bottom of the screen.
After the sequence type is saved, you will return to the previous screen.
9. Place your mouse cursor over a desired tile of added
Sequence, right click on it or press the [ENTER] button of the remote
control to edit or delete it.
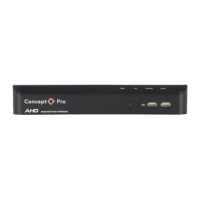
To edit a sequence
1. Select a sequence that you want to edit in the list.
2. The “EDIT” dialog appears.
3. Use the [pqtu/ENTER] buttons on the remote control or use the
mouse to edit the selected sequence.
> SEQUENCE TITLE: enter a new sequence name.
> ACTIVATION: specify the use of the sequence.
> MODIFY: change the settings of the sequence mode.
> DELETE: delete the selected sequence list.
> CANCEL: cancel the changes.
4. Pressing the <MODIFY> button will display the Edit Sequence window.
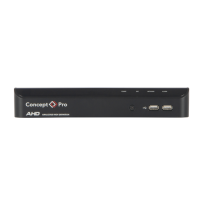
5. To change the existing settings, select a screen mode that you want
to edit and right-click to display the context menu. Then, select
<MODIFY>.
6. When done, click <CLOSE> to close the window.
7. To apply your changes, click <AP
Display Settings
System
Settings