100 8 Maintenance
When the Result was Fail
Perform K(Ve) Check after checking the followings and executing Mastering if the result was DET LL or
DET UL.
• Tested part
Check whether the tested part used for K(Ve) Check was same reference master part used for K(Ve)
Automatic Setup.
• Leak
Check the sealing surface for contaminants.
• If test results are not relatively consistent.
Normally extending Pressurization (CHG) timer or Equalization (BAL1) timer will help stabilize the
pressure and consequently the test result will be consistent.
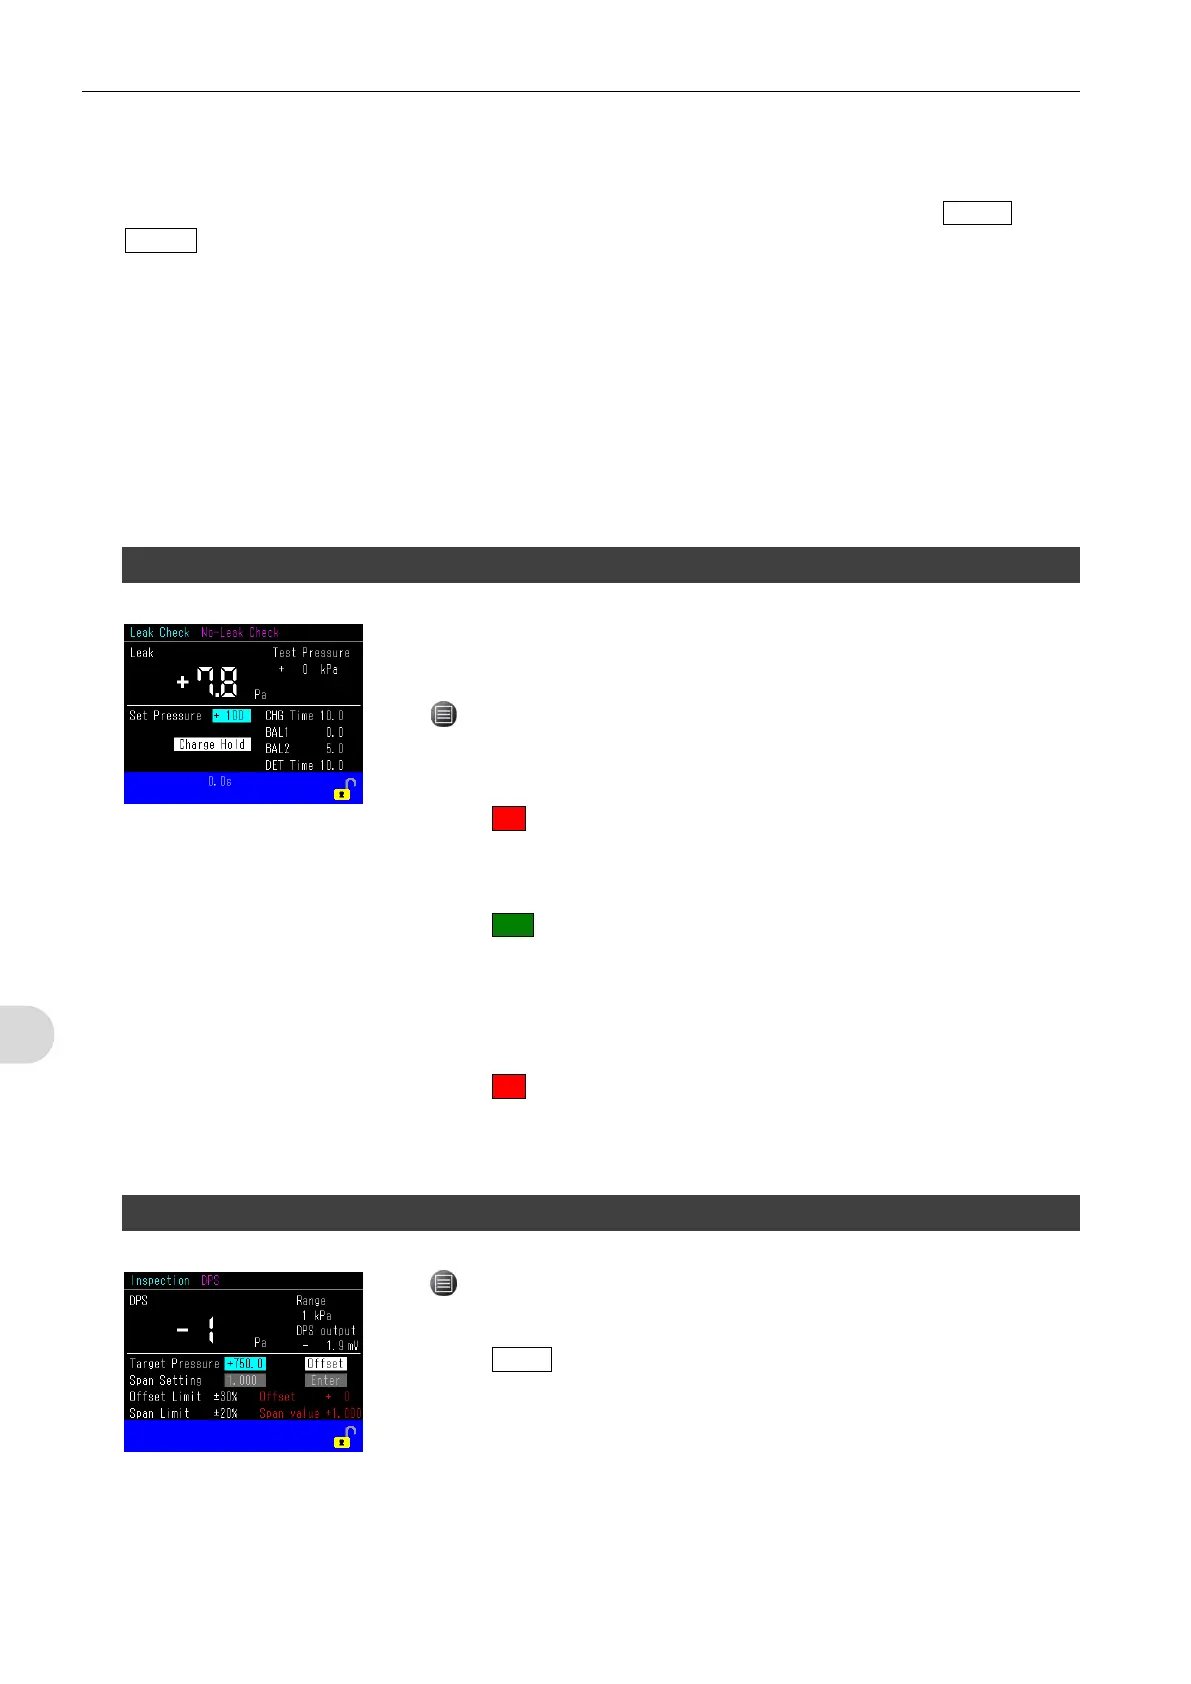
4.2 No-Leak Check
No-Leak Check is a leak check of LS-R700 itself.
1) Close the both WORK- and MASTER-side stop valves on the rear panel.
2) > Main Menu > Maint. > Inspection > Leak Check > No-Leak Check
3) Check whether the displayed test pressure is appropriate.
Go to: Charge Hold
4) Press ■ to cancel the Charge Hold.
5) If the test pressure is inappropriate, adjust it.
Go to: Set Pressure
6) Press ► to start a No-Leak Check.
7) Timers are fixed to the follows:
CHG=10.0s BAL1=0.5s BAL2=5.0s DET=10.0s
LS-R700 is not leaking if the result is within ±10 Pa.
If not, contact Cosmo for repair.
8) Press ■ to stop
9) Open the both WORK and MASTER side stop valves.
4.3 DPS Offset Adjustment
1) > Main Menu > Maint. > Inspection > Sensor > DPS
2) Check whether the sensor is open to the atmosphere.
3) Select Offset.
4) Check whether the reading is within the tolerance.
Contact Cosmo for repair if the DPS reading exceeds the Offset Limit.