Installation
3.3 Installation Method
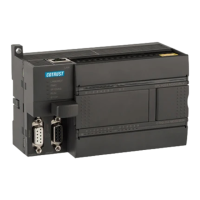
CTH200 PLC can be installed on standard DIN35 rail or panel.
Prerequisites
Make sure the equipment has been powered off before assembling and disassembling,
meanwhile, all related devices must also be powered off.
Don’t assemble and disassemble the CTH200 PLC and related devices with power,
otherwise can cause electric shock or malfunction, even serious damage, injury or
death.
First get the CTH200 PLC powered off, then replacing and installing correctly. Meanwhile the
direction and location must be correct when replacing modules, or it can result in damage, injury
or death.
Incorrect modules would cause CTH200 PLC program failure.
Install/Disassemble CPU and expansion modules
Following the installation method below:
Mounting on panel
1) Locate the open holes according to the dimensions on Figure 3-1;
2) Fix the modules on backplane with appropriate screws;
3) If expansion modules are used, connect the flat cable for expansion modules to the extended
port below the front cover.
Mounting on DIN rail
1) Fix the rail on backplane with 80mm distance.
2) Open the DIN clamp below the module, lock the module back on DIN rail.
3) If expansion modules are used, connect the flat cable for expansion modules to the extended
port below the front cover.
4) Spin the module to approach the DIN rail, then close the DIN clamp.
5) Check if the DIN clamp fit the rail closely.
6) Don’t push the front of module, you can push the open holes instead to prevent damage.
Mounting terminal strip
1) Open the front cover of the terminal position.
2) Make sure the module pins are alignment with the holes on terminal strip.
3) Push the terminal strip down into module and lock it up.
When mounting the CTH200 PLC vertically in high vibration environment, the DIN rail
blocks should be used, thus backplane mounting is highly recommended to achieve
high vibration protection.