INTRODUCTION
2
2.2.1 How To Setup/Configure the Scanner Network
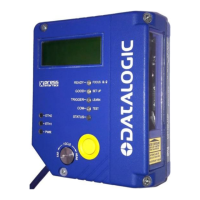
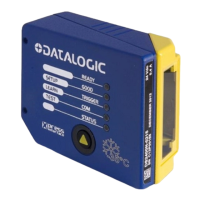
A complete ID-NET™ scanner network can be rapidly setup, as follows:
Mounting & Connection
1. Mechanically mount/install all the readers.
2. Wire ID-NET™ (refer to par. 3.3).
3. Connect the planned Master scanner to a PC by means of the Genius™
configuration software.
4. Power up the entire system.
Configuration
1. Program the role and address of each slave scanner using Genius™ (connect to
each scanner individually).
2. Configure the network through the Master scanner via Genius™ (see the Rapid
Guide to Configuration Network Setup in the Help On-Line):
a. open the “Local Device Network Settings” window and select the Master
Role and send the updated configuration to the device.
b. click on the “Express Network Setup” button to start the automatic net
detection.
c. once the procedure has been completed, a dialog box will appear asking
whether to send the configuration to the Master. Choose the "Yes" option to
complete this procedure.
The scanner network is ready.
NOTE
An alternative method of programming scanner address and role
assignment can be accomplished by using the “Connectivity
Programming Barcodes” (refer to the “ID-NET™ Setup Procedure
Using Programming Barcodes” document on the product CD).
19
 Loading...