AGC Designer’s Reference Handbook
DEIF A/S Page 145 of 168
Parameter descriptions
In chapter 10 each parameter description is structured according to the same principles. Under the
parameter title heading, the detailed parameter descriptions are illustrated and presented. First, a
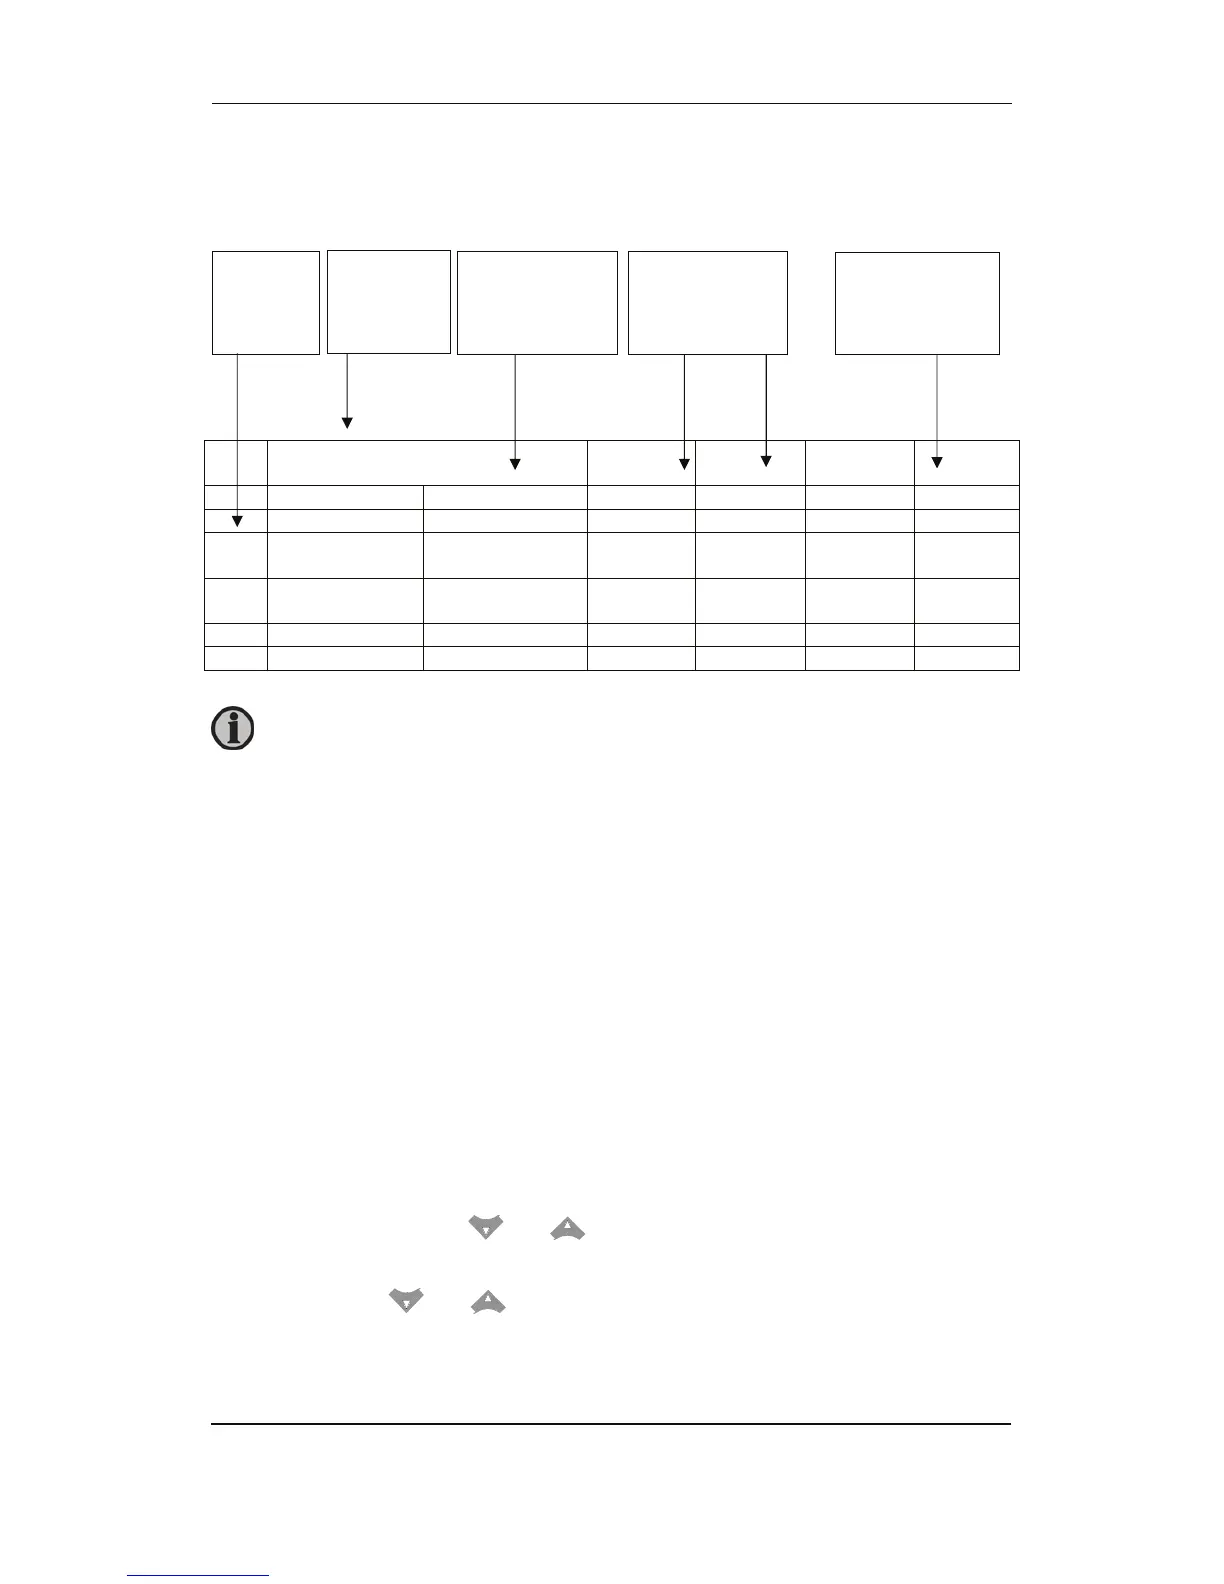
table indicating the parameter facts related to the individual parameter title is presented:
1010 Reverse power
No. Setting Min.
setting
Max.
setting
Third
setting
Factory
setting
1011 Reverse power Setpoint -50.0% 0.0% - -5.0%
1012 Reverse power Timer 0.1 s 100.0 s - 10.0 s
1013 Reverse power Relay output A R0 (none) R3
(relay 3)
- R0 (none)
1014 Reverse power Relay output B R0 (none) R3
(relay 3)
- R0 (none)
1015 Reverse power Enable OFF ON RUN ON
1016 Reverse power Fail class 1 5 - 3
The first column indicates the menu number in the display.
The second column indicates the changeable setting in the display.
The third and fourth columns indicate the minimum/maximum setpoint available for this setting.
The sixth column indicates the default setpoint of the unit from the factory. When it is necessary,
additional information will be supplied after the table in order to make the individual parameter
descriptions as informative as possible.
Setup
At this point of the process you will have located the specific parameter description that you were
looking for. Now, follow the menu structure presented earlier in this handbook in order to set up the
individual parameters. (In this overall example we have chosen to change the setpoint of the
parameter
1010 Reverse power).
Step 1: Enter the ‘setup’ menu via SETUP in the fourth display line in the entry window
Step 2: Enter the ‘protection’ menu via PROT in the fourth display line in the setup menu
Step 3: Enter the ‘setpoint 1’ menu via PROT1 in the fourth display line in the setup menu
Step 4: Use JUMP or the
and push-buttons to locate the selected parameter
Step 5: Enter the ‘setpoint’ menu via LIM in the fourth display line
Step 6: Enter password to change the setpoint
Step 7: Use the
and push-buttons to increase/decrease the setpoint setting
Step 8: Use the ’underscore’ to save the new setpoint setting
Menu
number
indicated
in display
Changeable
settings
indicated in
display
Min. – max.
setpoints
Default setpoint
from factory
Parameter
title and
menu
number
Small differences due to the character of the parameters may exist between the
individual tables.