◦ If the setting is text or a value, pressing OK displays the virtual keyboard to alter the setting.
◦ Make the required changes using the virtual keyboard.
◦ To confirm the changes, select Next
.
◦ If the setting is a selection, pressing OK displays an available list of selection options.
◦ Highlight the option required, by pressing Up
or Down .
◦ Select or unselect the option, by pressing OK .
◦ To confirm the setting, select Next
.
c. Once you have made all the required changes to the alarm settings, select Write .
◦ This saves the alarm setting to the controller. This does not save any other settings.
◦ The list of available alarms is shown again on the display.
3. To save the new setting to the controller, select Write .
• This only saves the selected alarm(s) and their settings to the controller. It does not save other I/O settings.
Clear all enabled alarm(s)
1. To clear all the selected alarms, select Clear
.
2. To save the new setting to the controller, select Write .
• This only saves the selected alarm(s) and their settings to the controller. It does not save other I/O settings.
7.8 Digital output (DO)
7.8.1 Configure I/O name
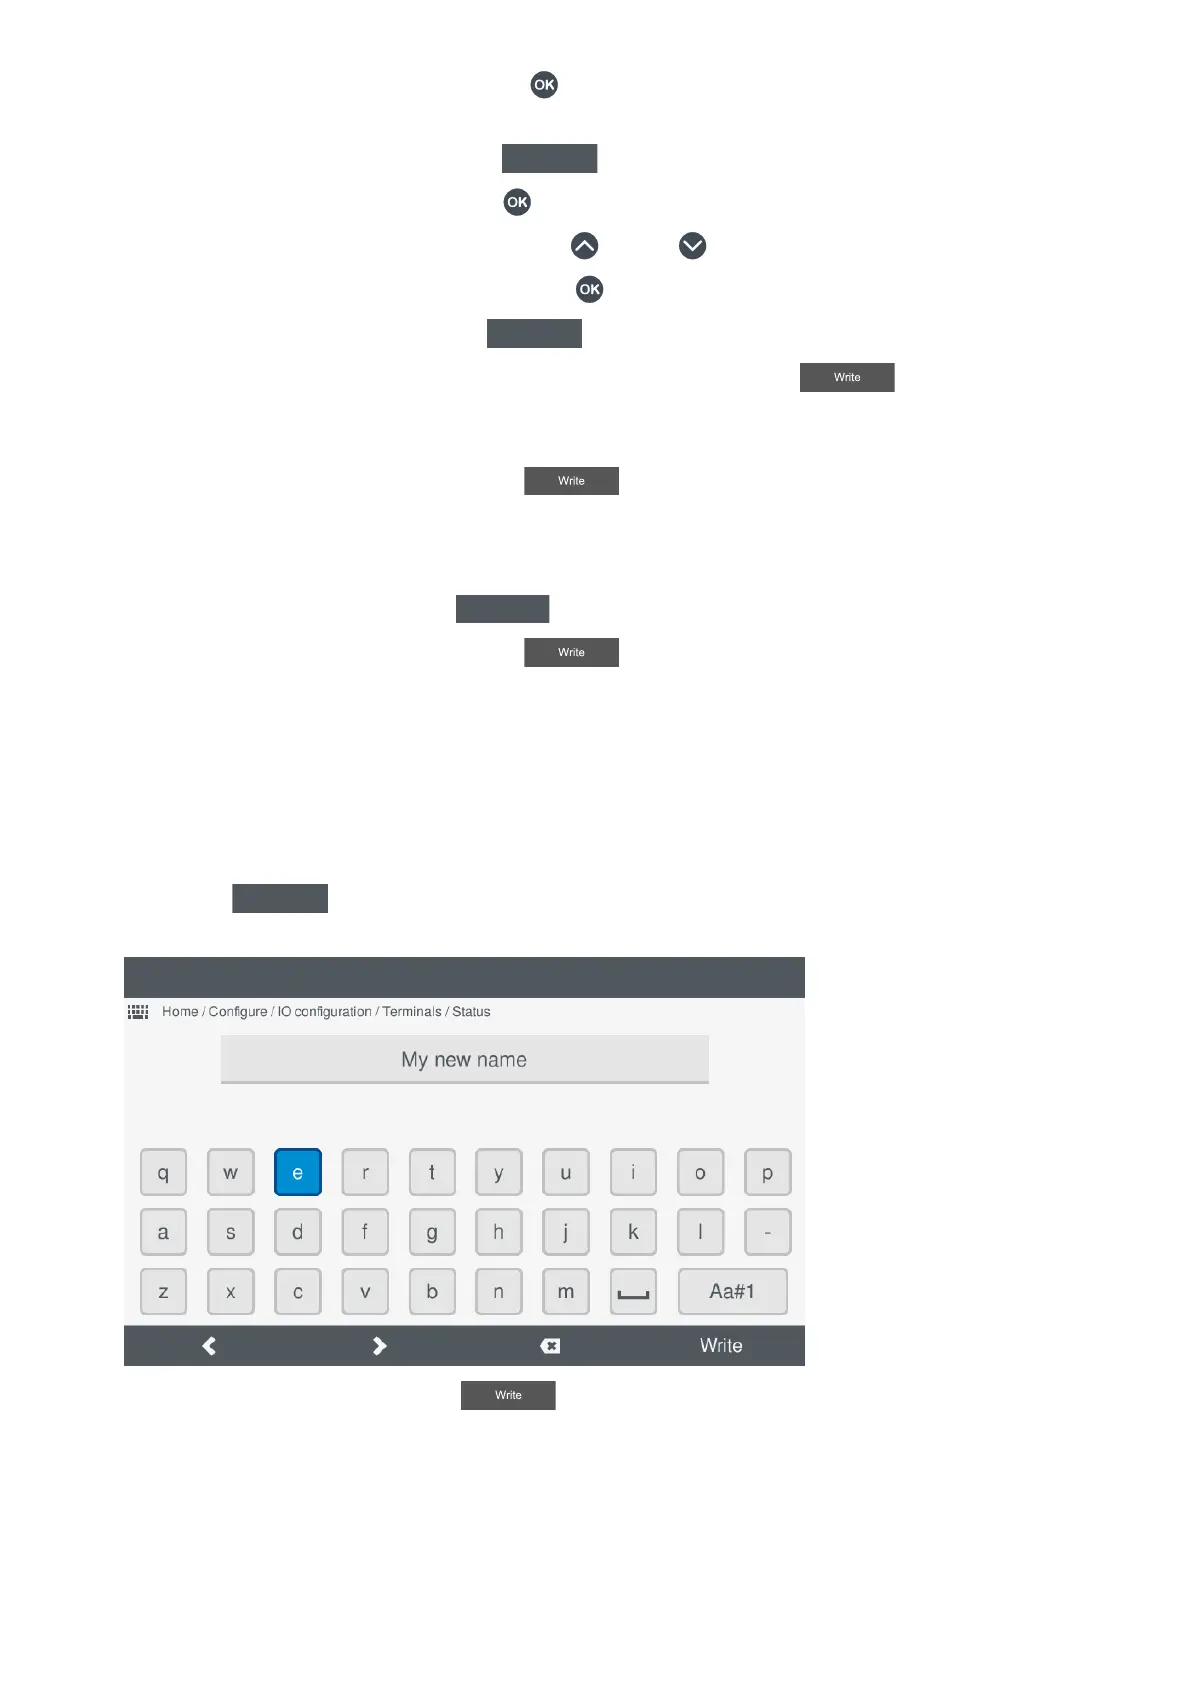
To rename the input or output name:
1. Select I/O name
.
• The virtual keyboard is displayed on screen to edit the I/O name.
•
2. Enter the required I/O name and select Write .
7.8.2 View or configure I/O relay
You can configure the setting for the relay. The current configure state for the relay is shown on the display. By default, all relays are
considered to be Normally open and in a De-energised state.
OPERATOR'S MANUAL 4189341099G UK Page 57 of 130