Operation Manual D900
49-MD900EN05
8
2. OPERATION
2.1. STARTING UP
Each of the following steps must be completed to start operating the scales:
STEP 1: Install the scales as described in paragraph 1.5. Installation of the scale and switch on as
described in paragraph 2.3. Switching on.
STEP 2: If the scales are being used for the first time, or you wish to program them again, the
memory should be deleted (see paragraph 3.6.3.4 Initialization of scale).
STEP 3: Select the working mode (receipt, label, self-service…) of the scale.
STEP 4: Assign each of the vendors who is to use the scales one of the 20 available memories, i.e.
register the employees (see sect. 3.2. Vendors).
STEP 5: Program the articles (see sect. 3.1 Articles).
STEP 6: Program the weighing scale communications, i.e., set up the scales as MASTER or SLAVE
and assign the corresponding address (see sect. 5.1.1.1 Master-slaves settings).
STEP 7: Select the receipt format or program a new one (see sect. 3.9.1 Receipt Formats).
STEP 8: Program printing parameters for receipt (see sect. 3.9 Receipt).
STEP 9: Set up the label formats (see sect. 3.8 Label).
STEP 10: Program printing parameters for Label (see sect. 3.8 Label).
Start to work with the scales, referring to section 2.4 Working Mode selection.
2.2. BASIC CONCEPTS
Working mode:
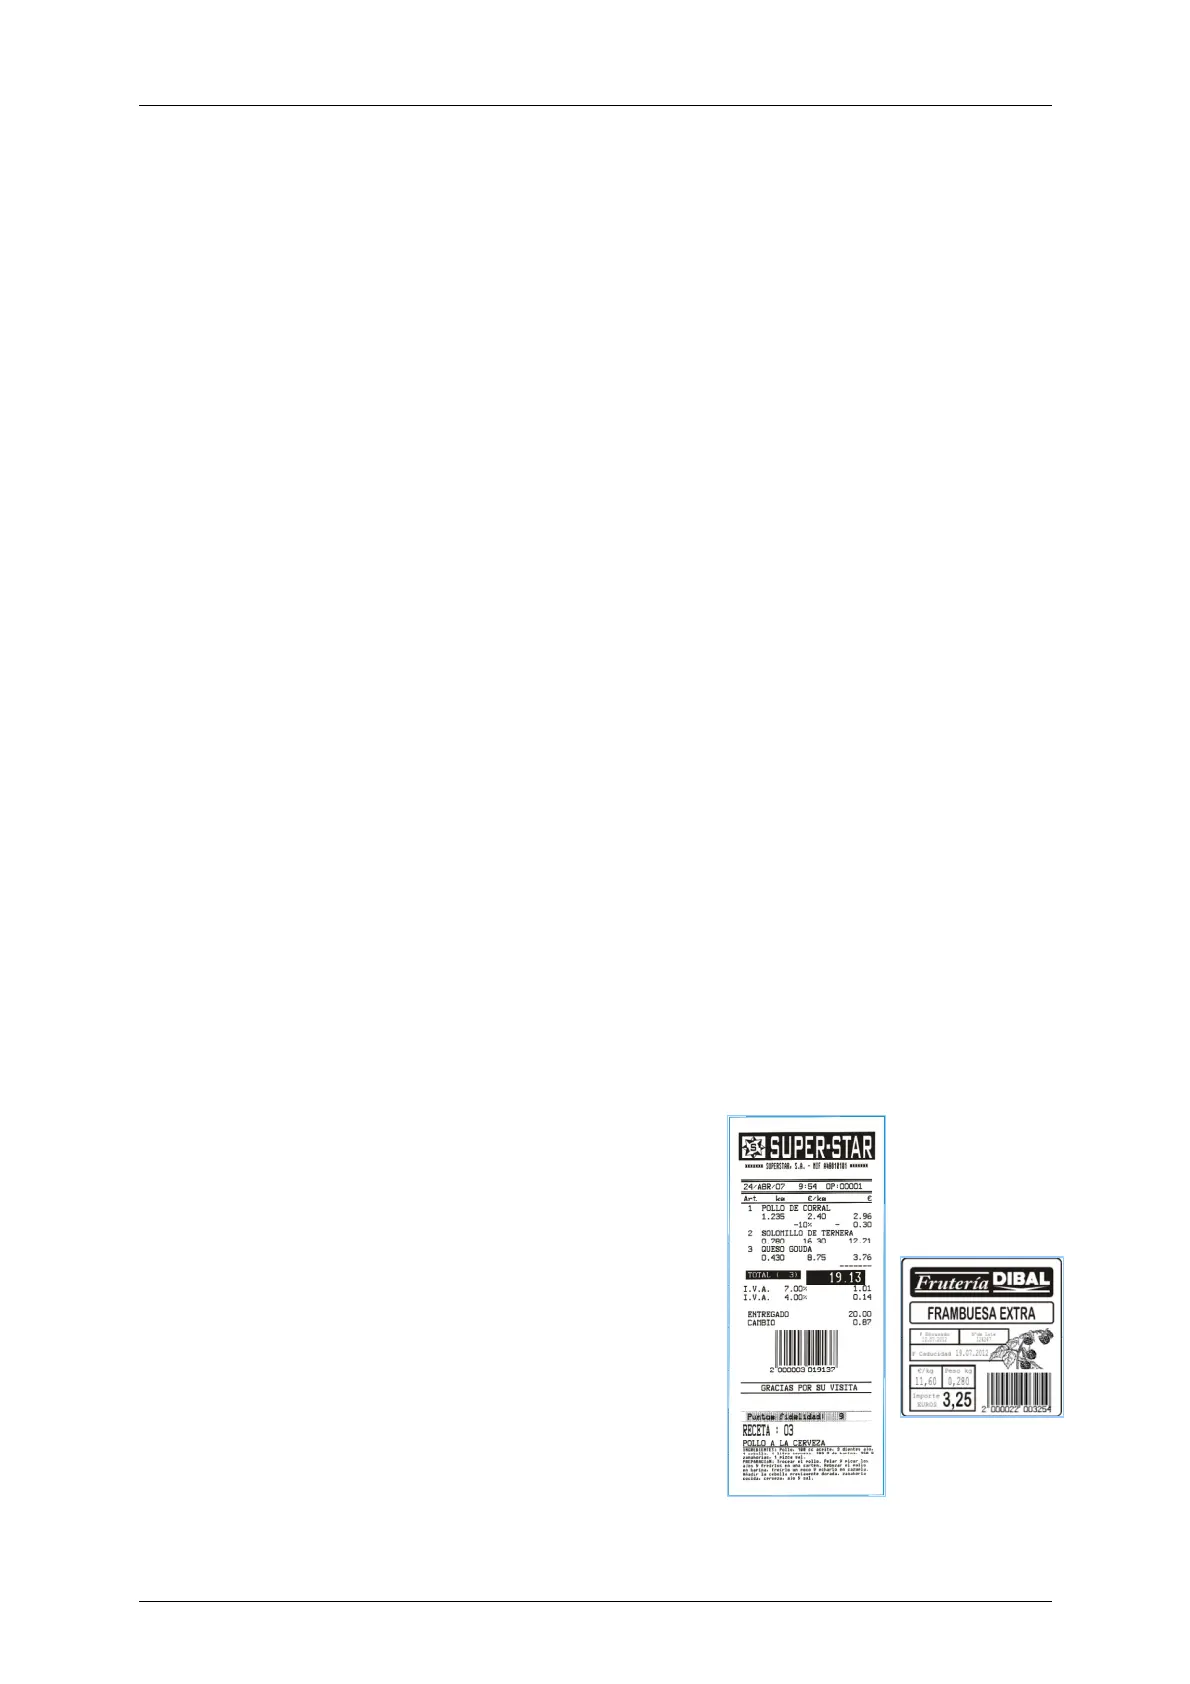
Receipt: This mode allows to make sales of different
articles and print a ticket with the total amount.
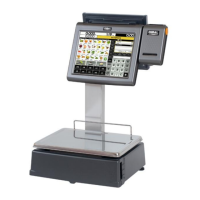
Label: The scale prints a label for every operation done.
It is also possible to work in Prepack Mode (Automatic
Weighing).
Self-Service: This working mode allows to print a label
without pressing any vendor key. The user must only place
the product on the plate and select the article by pressing its
key.
Receipt
Label