OPERATION
3-8 25257 Issue 3 November 2013
Automatic Cartridge Swap and Parallel Print
Cartridge Swap - allows two cartridges, placed side by side, to print from
alternate cartridges, allowing the operator to replace an empty cartridge from
one head while the production line continues to run, printing from the
second head.
The Cartridge Swap operates on a Master / Slave basis, with Print Head 1 as
the Master and Print Head 2 as the Slave. A print ratio of 5:2 will result in
Print Head 1 printing 5 times then Print Head 2 printing twice
Print Parallel - the same side by side cartridge arrangement as in Auto Swap
allows the first print to be overprinted with a second print, to produce a
higher contrast print.
Configuration
Configuration is almost exactly the same for both Auto Swap and Parallel
Printing.
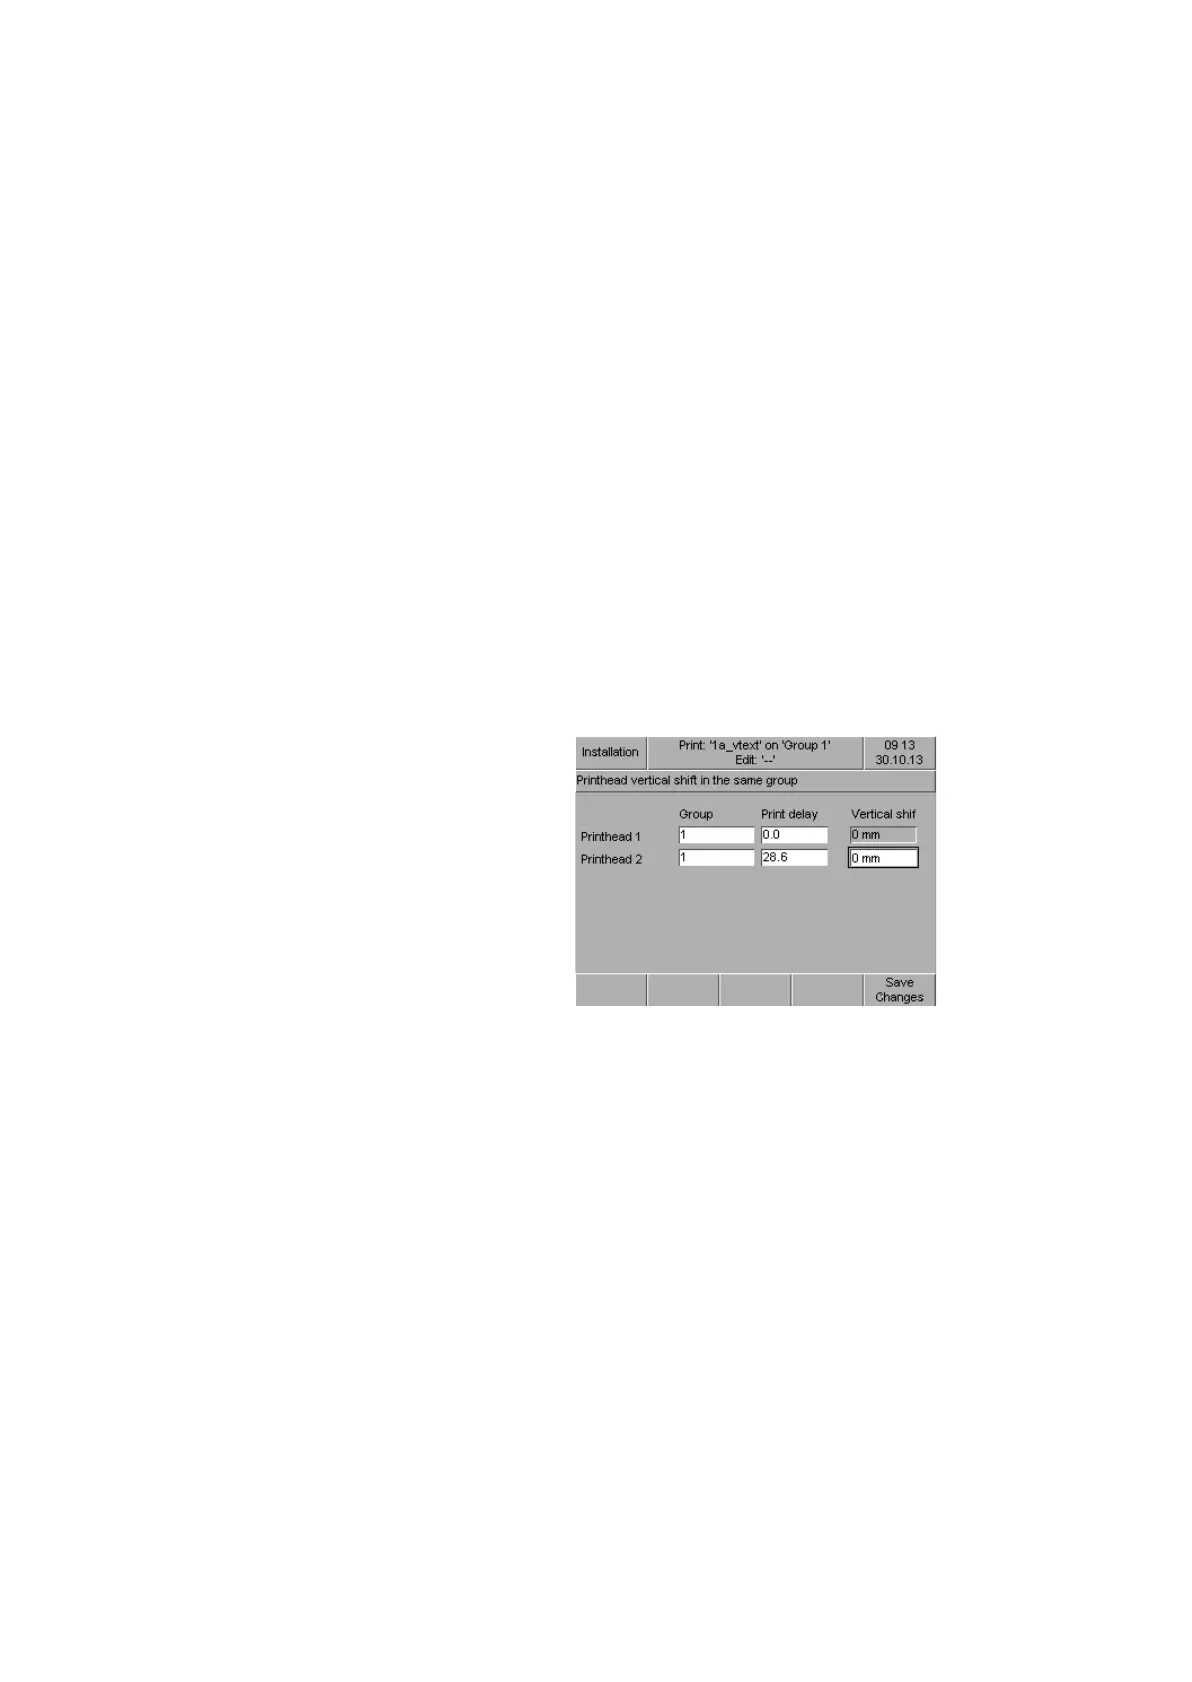
(1) Go to Service>Config>Assign Groups>Install Group
Both heads have to be assigned to one group, as you would for a twin head
stitched configuration:
A Print Delay must be applied so that
the print from each head is in the
same place on the substrate.
The Vertical Shift value for print head
2 sets the offset between the two print
heads; either 12.7 mm for stitched
printing, or 0 mm for Auto Swap and
Parallel Printing
Note: The value for print head 1 is
set permanently at 0 mm.
(2) Assign both print heads to Group 1.
(3) Apply a print delay of 28.6mm to print head 2 - this is an approximate
value and may have to be adjusted accordingly.
(4) Set print head 2 Vertical Shift value to 0 mm.
(5) Save Changes
(6) Reboot the controller.
 Loading...