Needle bar linkage
36 Service Instructions 827/827-M - 01.0 - 05/2019
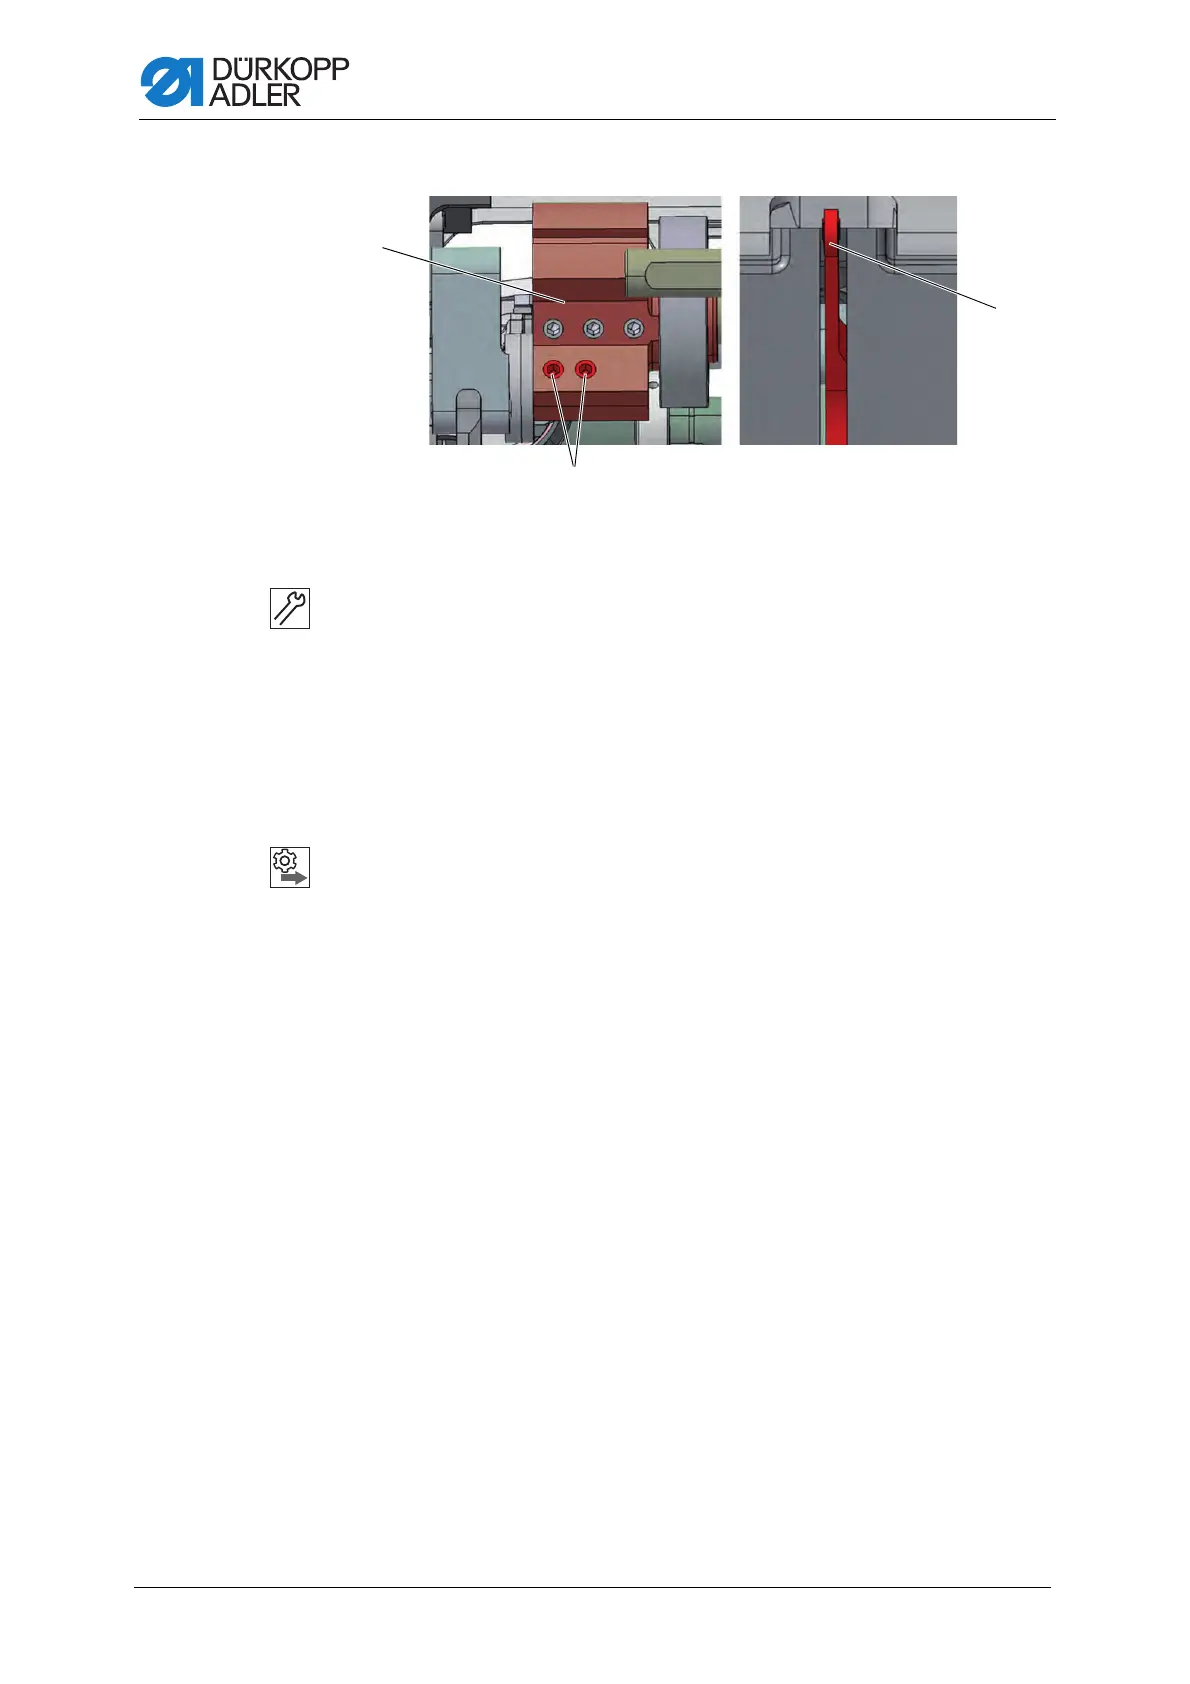
Fig. 21: Aligning the needle bar linkage sideways (2)
5. Loosen the threaded pins (6).
Make sure that the threaded pins stay on the surface.
6. Move the needle bar linkage (4) sideways such that the needle pierces
exactly in the center of the needle hole (3).
7. Push the set collars (2) inwards as far as they will go.
8. Tighten the threaded pins (1).
9. Align the thread lever (7) exactly in the middle of the slot.
10. Tighten the threaded pins (6).
Order
Then check the following adjustment:
• Looping stroke position ( p. 44)
• Distance between hook and needle ( p. 44)
(5) - Arm shaft crank
(6) - Threaded pins
(7) - Thread lever

 Loading...


