101
support@edgeovens.com
Technical Support: +1 (724) 628 3050
OPERATION
PREVENTATIVE MAINTENANCE
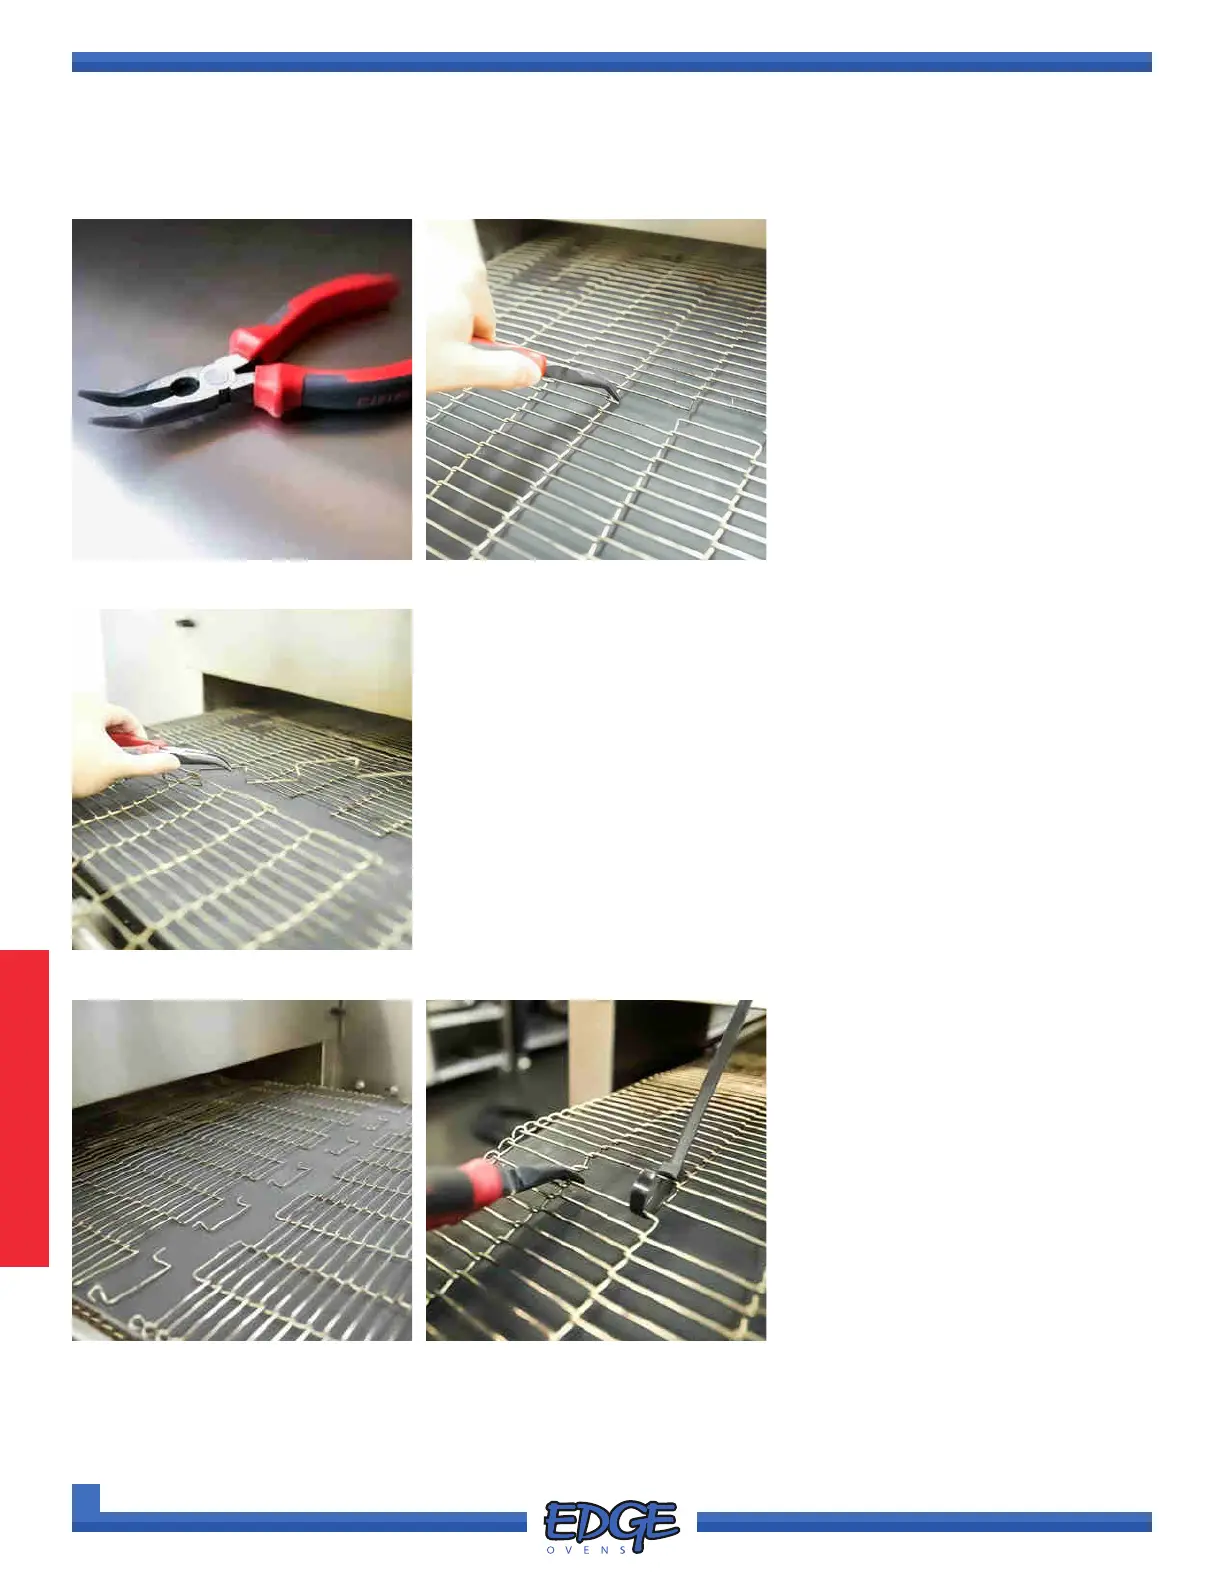
CONVEYOR BELT LINKAGE REMOVAL (CONTINUED)
FIGURE 3-41 FIGURE 3-42
9. Starting from the middle and
working outwards, remove the
master links from the conveyor
belting (Figure 3-42), using a pair
of bull-nose pliers (Figure 3-41).
Tip: Place the removed master
links on top of the oven lid in
the order and orientation you
removed them. This will make
it simpler to remember how to
reinstall them.
FIGURE 3-43
10. Using your bull-nose pliers, unthread a row of belt linkage, working
from left-to-right or right-to-left across the width of the belt (Figure
3-43).
Tip: Retain the removed row of belt linkage for future use, it can be
used to create master links should they be lost or damaged.
FIGURE 3-44
11. Align the separated ends of the
belting and install the previously
removed master links, starting
with the outermost edge links rst
and the central links second.
Tip: If you are struggling to align
or pull the separated ends of the
belting close enough together,
use two (2) or three (3) cable
ties to hold the belt in place and
tighten the cable ties to pull the
belt ends closer together.
FIGURE 3-45
12. Reinstall the conveyor drive chain, conveyor drive chain guard and all removed crumb pans and belt stops.