50
support@edgeovens.com Technical Support: +1 (724) 628 3050
INSTALLATION
MANIFOLD PRESSURE ADJUSTMENT
The MANIFOLD PRESSURE is to be adjusted to the region specications and gas type
provided earlier in this manual.
NOTICE
Damaged gas valves as a result of over adjustment are NOT covered under warranty.
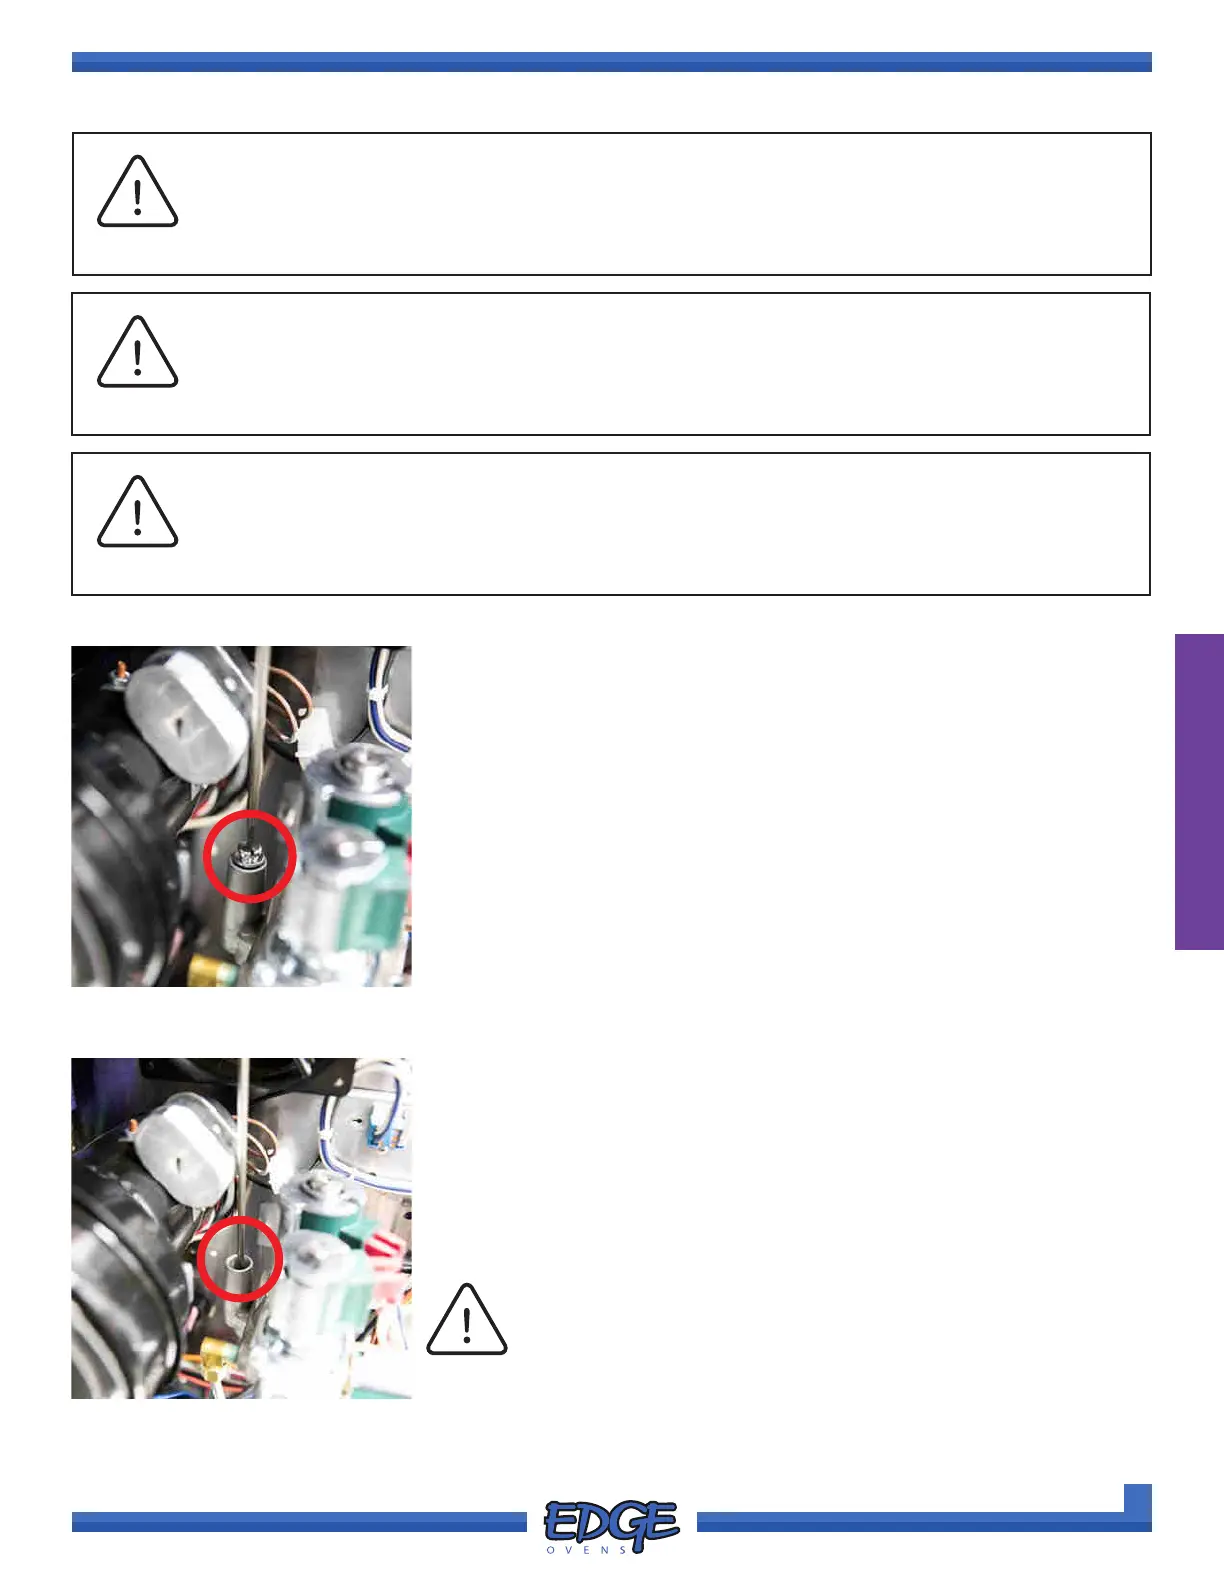
1. Remove the cap from the regulator spring (4) (Figure 2-121) and
connect your manometer to the MANIFOLD PRESSURE TAP. (Figure
2-116)
2. Turn the oven ON (Figure 2-117) and make a note of the pressure on
the manometer within 15 seconds of the MAIN blower motor spinning
up (Figure 2-118). This is the zero from which adjustments will be
made.
3. When the oven lights, make a note of the new pressure reading
(Figure 2-119). Before adjusting the manifold pressure subtract your
initial measurement, outlined in step 3, from the current pressure
reading. This will give you your true manifold pressure measurement.
FOR EXAMPLE:
Step 2 pressure: (-)0.25 inWC
Step 3 pressure: (+)4.00 inWC
(Step 3 Pressure) - (Step 2 Pressure) = True Manifold Pressure
(+)4.00 - (-)0.25 = 4.25 inWC
In this example a Natural Gas oven requires a manifold pressure
setting of 4.5 inWC, so based on the calculation above an increase in
pressure of 0.25 inWC is required.
4. Using a standard slotted screwdriver, rotate the regulator adjustment
nut clockwise (CW) to increase the pressure and counter-clockwise
(CCW) to decrease the pressure. (Figure 2-122)
NOTICE
Ensure the oven is cold before undertaking MANIFOLD PRESSURE adjustment. Before
commencing adjustment, oven temperature should be set to 500F/260C.
IMPORTANT
FIGURE 2-121
FIGURE 2-122
Apply a light downward pressure to the regulator
adjustment nut. The plastic adjustment nut can be damaged
by excessive force.
NOTICE
5. When adjustment is complete, turn off the oven, install the
REGULATOR SPRING CAP, disconnect your manometer and
tighten manifold gas tap screw.