106
support@edgeovens.com Technical Support: +1 (724) 628 3050
OPERATION
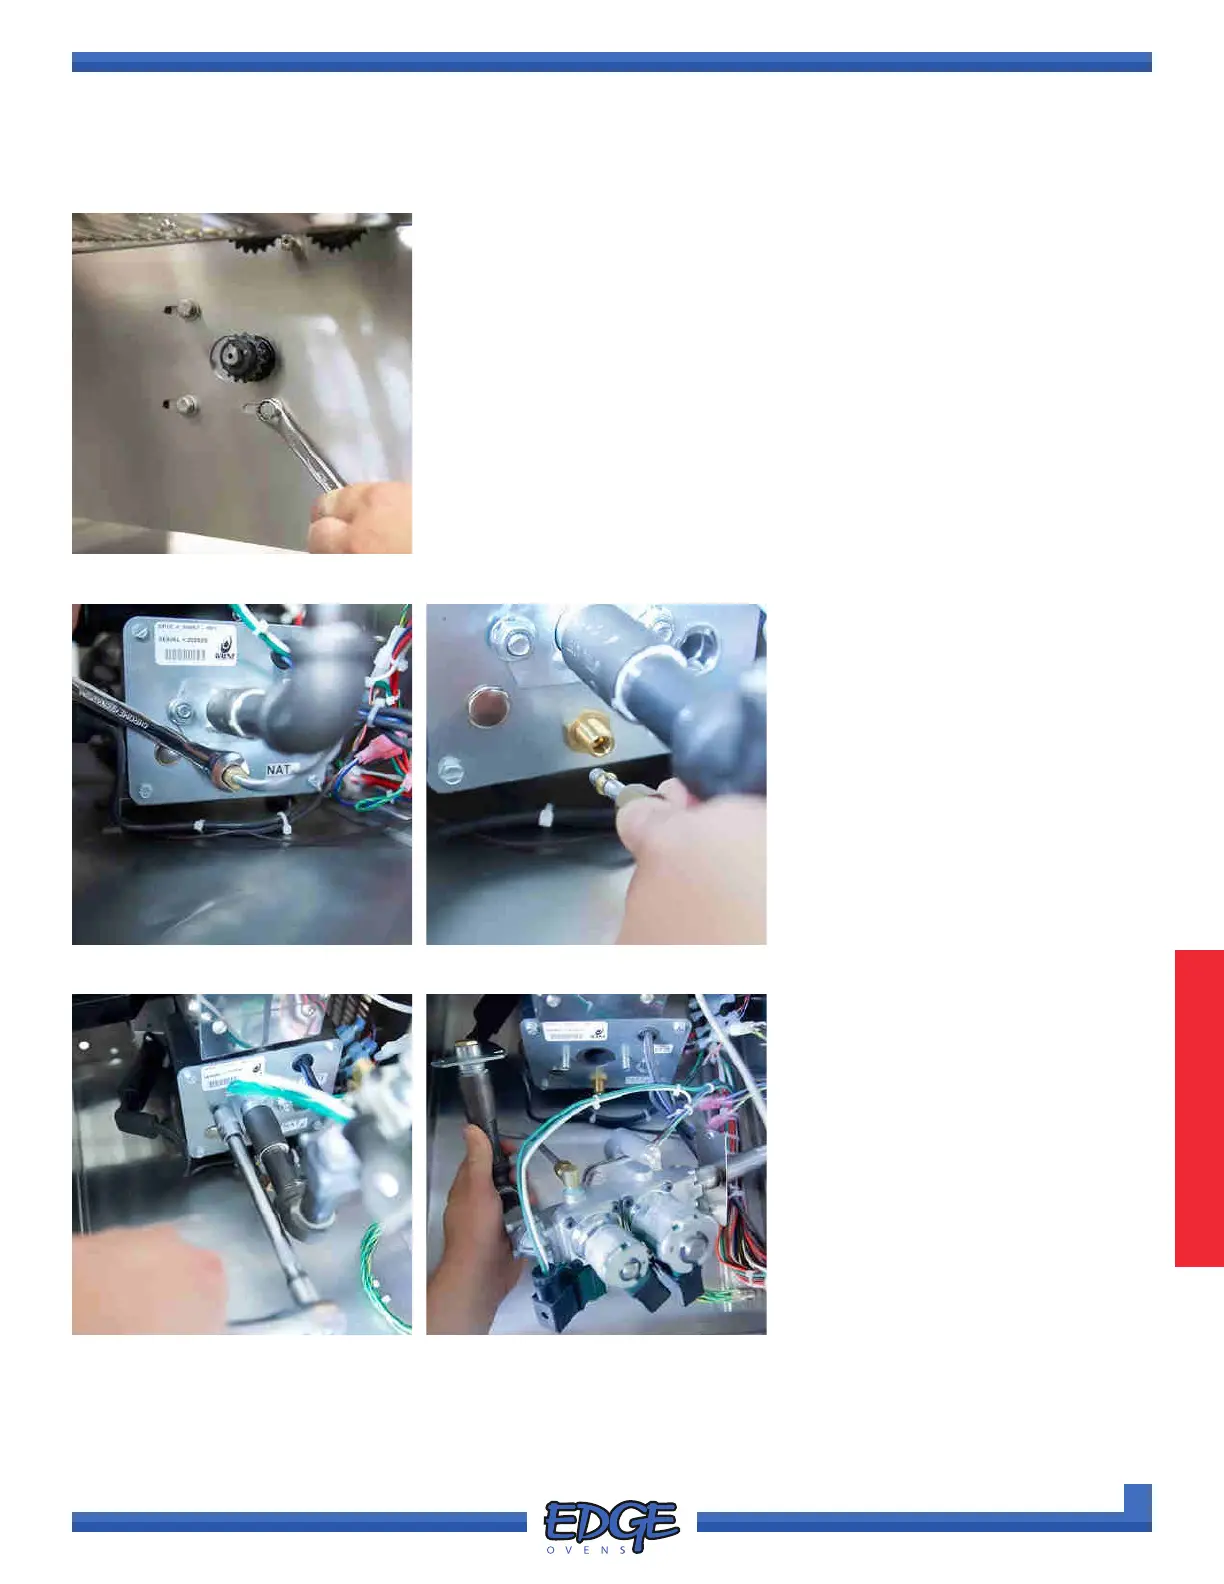
FIGURE 3-60
PREVENTATIVE MAINTENANCE
BURNER ASSEMBLY CLEANING (CONTINUED)
FIGURE 3-61
FIGURE 3-63
FIGURE 3-62
5. If the oven is equipped with a split-belt, unbolt the front most conveyor
motor using a 7/16” wrench and lay the motor away from the burner
(Figure 3-60).
6. Using a 1/2” wrench, disconnect
the aluminum pilot tube from
the burner assembly faceplate.
(Figure 3-61 & 3-62)
7. Using a 1/2” socket with long
extension and ratchet, remove
the two (2) 1/2” nuts, which
secure the gas valve train to
the burner face plate (Figure
3-63). The burner can now be
moved out of the way without
disconnecting any electrical
wires (Figure 3-64).
FIGURE 3-64