21
support@edgeovens.com
Technical Support: +1 (724) 628 3050
INSTALLATION
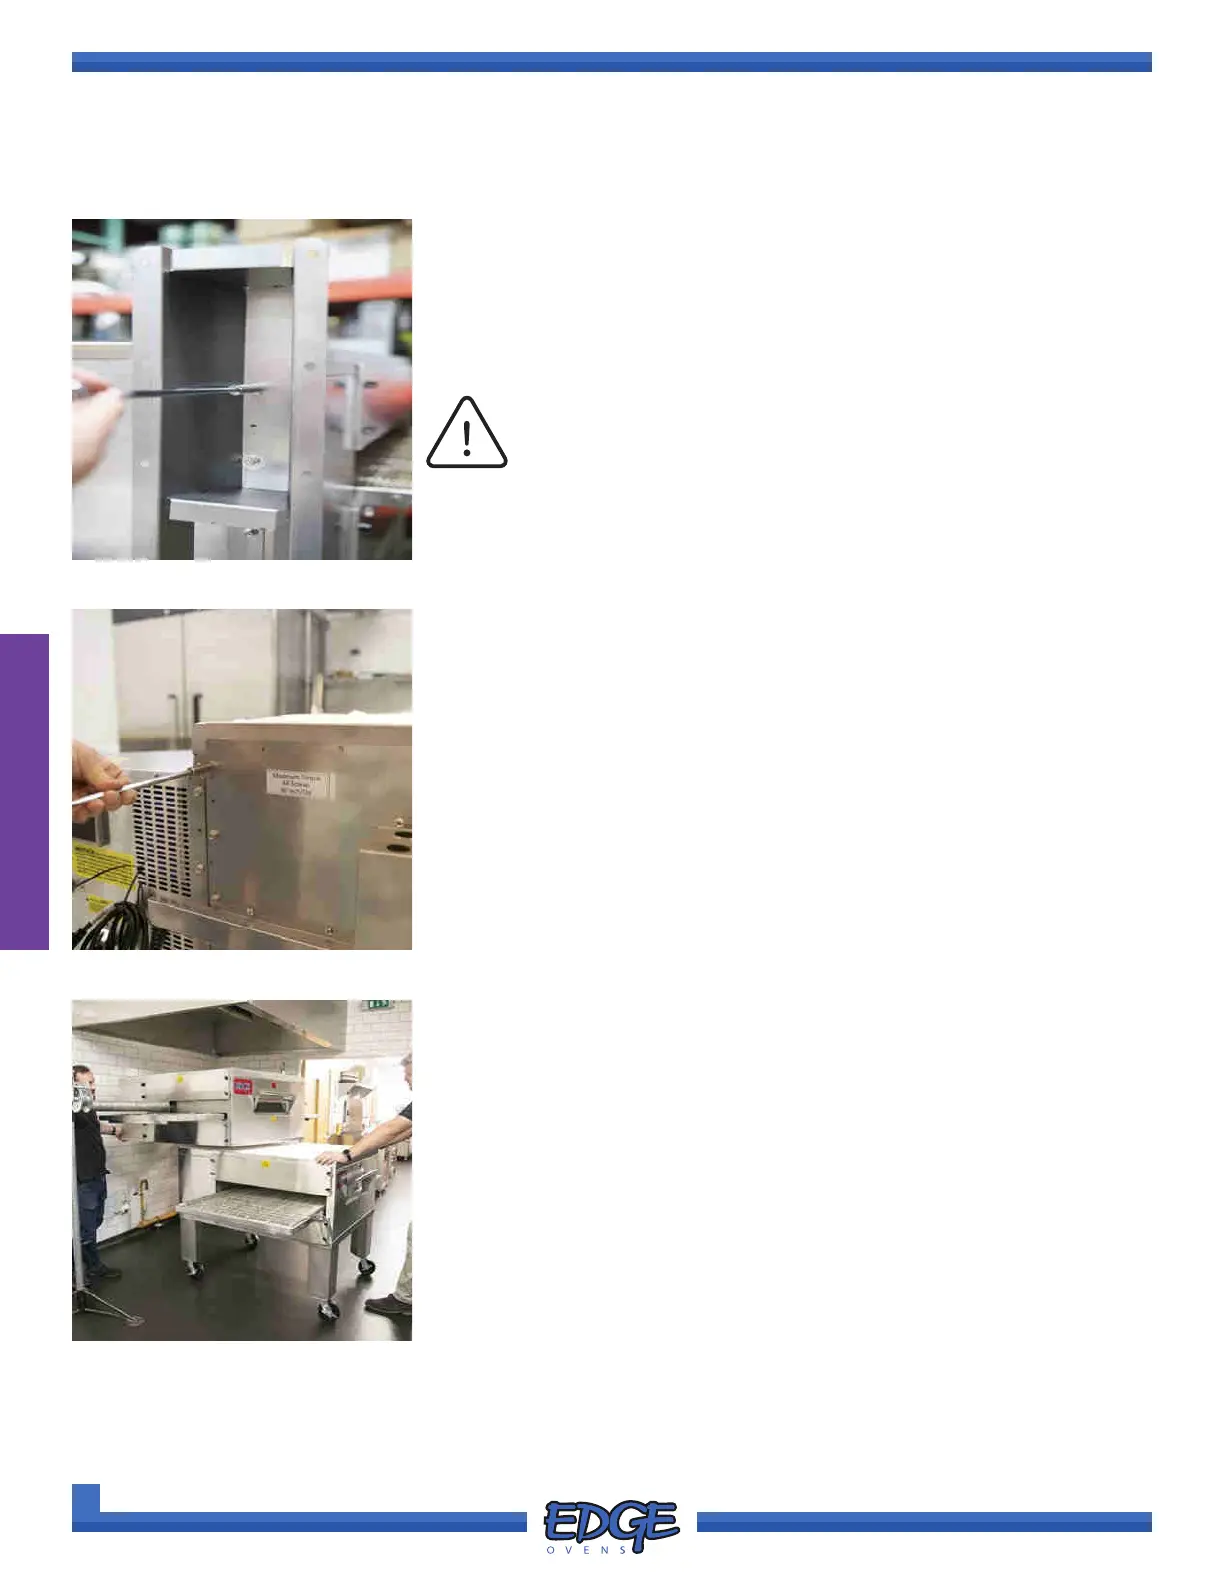
3. ORIGINAL DELIVERY SKID INSTALLATION ONLY. With a helper
maintaining control of the suspended oven, Use a 3/8” socket, ratchet
and long extension to remove and discard the oven support brackets
from the rear of the oven (Figure I). Each bracket requires the removal
of two (2) fastening 1/4” bolts, split locking washers and at washers.
(Figure 2-31)
OVEN ASSEMBLY
STACKING YOUR OVEN (CONTINUED)
FIGURE 2-31
FIGURE 2-32
4. ORIGINAL DELIVERY SKID INSTALLATION ONLY. Reinstall the
previously removed and retained 1/4” bolts, split locking washers and
at washers in the oven back. There should be in total ve (5) 1/4”
bolts, split locking washers and at washers on each side of the oven
back (Figure 2-32).
FIGURE 2-33
5. Slowly continue to raise the oven to a height that will allow the
previously assembled oven(s) to be pushed under the suspended
oven, continuing to support the suspended oven to avoid over rotation
Carefully maneuver the previously assembled oven beneath the
suspended oven.. (Figure 2-33)
NOTICE
Retain all removed bolts and washer for later use.