70Installation and Service Guide: Color Controller E-85
Replacing parts
the motherboard mounting screws to relieve tension on the motherboard, and then remove both cooling assemblies from
the motherboard as described in the following steps.
To remove a CPU cooling assembly
1 Shut down the E-85, remove all cables from the back, and then open the system (see page 48).
To access the CPU cooling assembly, you must remove the left panel.
2 Remove the CPU fan cable from its connector on the motherboard (see Figure 25 on page 47).
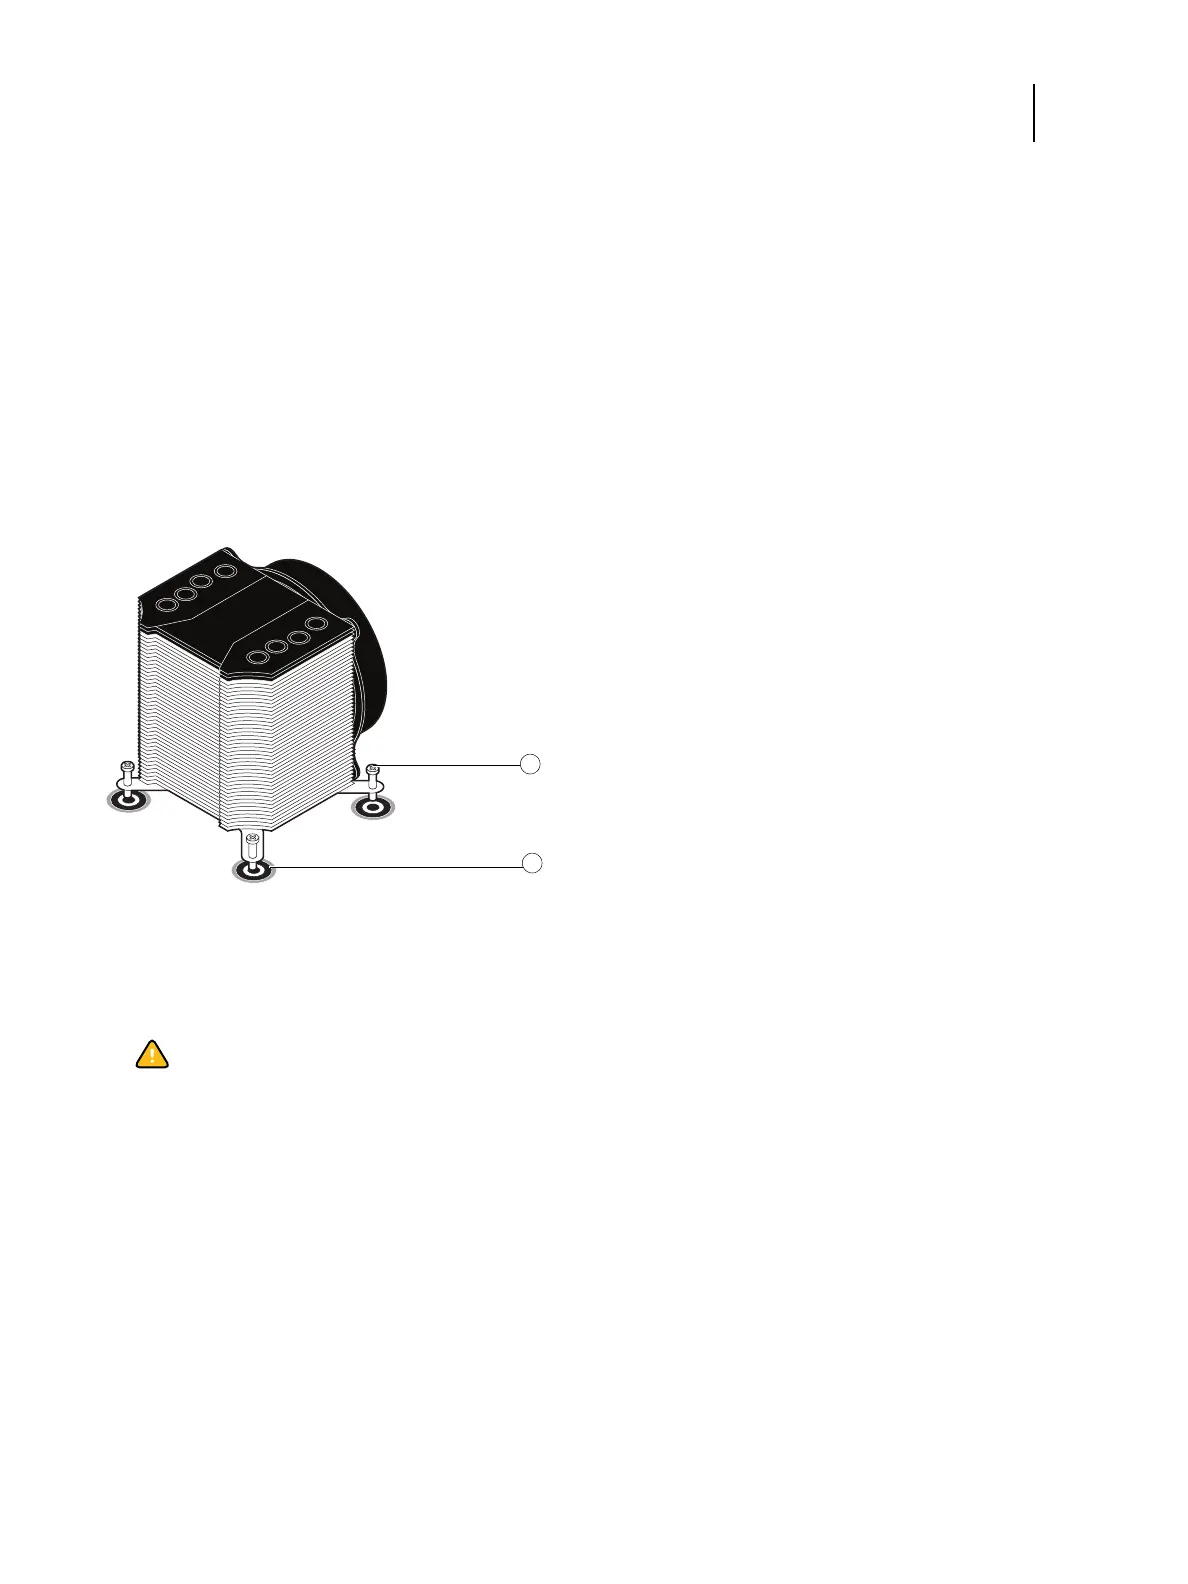
3 Loosen the four mounting screws that secure the CPU cooling assembly to the motherboard (see Figure 37).
Partially loosen each screw before loosening any one screw entirely.
Figure 37: Removing/replacing the CPU cooling assembly
4 Lift the CPU cooling assembly off the CPU.
First, carefully rotate the cooling assembly on top of the CPU, applying firm pressure to break the thermal seal. Then
lift the cooling assembly off the CPU.
To remove a CPU
Note: This procedure assumes that you have removed the CPU cooling assembly, as described on page 70.
1 Lift the CPU socket levers to release the socket cover (see Figure 38).
2 Carefully open the socket cover.
1 Mounting screw (1 of 4)
2 Mounting hole in motherboard (1 of 4)
Caution:Be aware that both the cooling assembly and the CPU may be very hot. Also, use caution when
removing the cooling assembly, as the thermal compound applied to the bottom of the heatsink may damage the
CPU if the heatsink is removed too forcefully.