71Installation and Service Guide: Color Controller E-85
Replacing parts
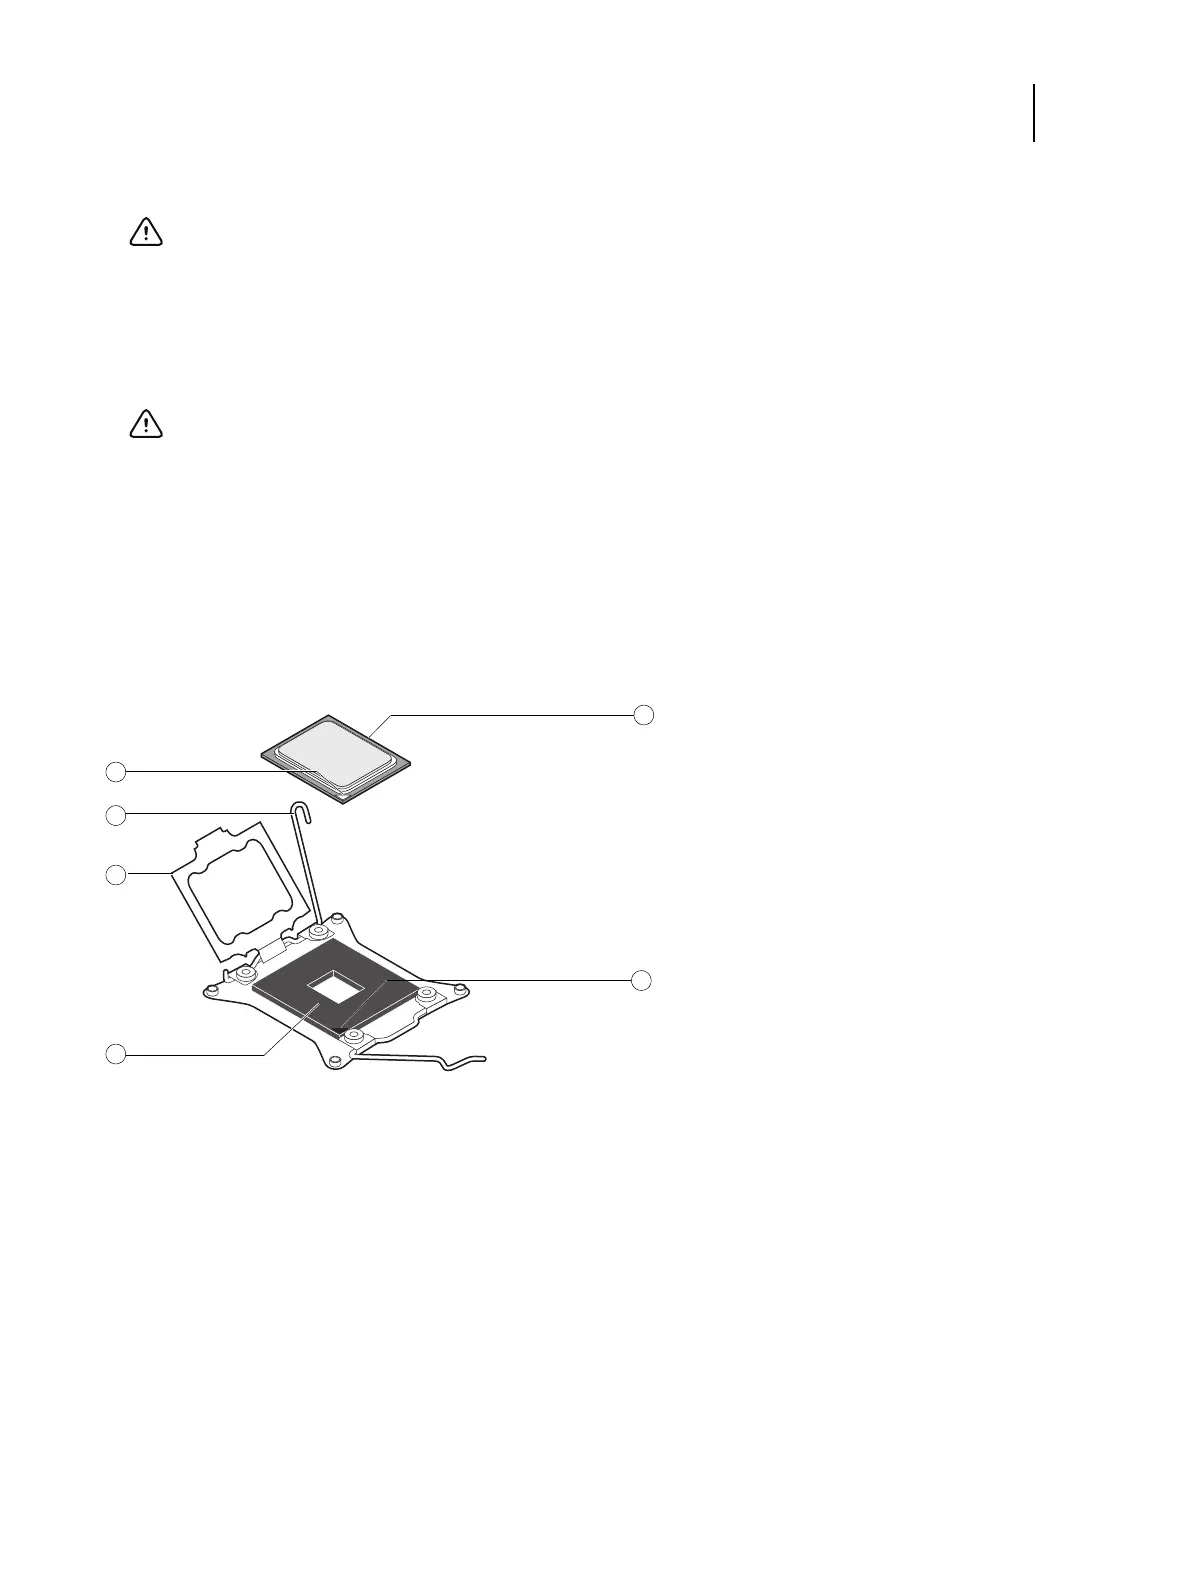
3 Grasp the CPU by its edges, gently lift it from the socket and place it on an antistatic surface.
To replace a CPU
1 Wipe the contact surface of the CPU chip with a clean, lint-free cloth to ensure proper contact with the new heatsink.
2 Insert the CPU into the socket. Make sure that you align the arrow indicating pin 1 on the CPU with the arrow on the
CPU socket.
3 Carefully close the socket cover, and lower the socket levers to secure the cover.
Figure 38: Replacing a CPU
To replace a CPU cooling assembly
Note: This procedure assumes that you have installed the CPU in the motherboard CPU socket, as described in page 71.
Important: You may have to insert a small, non-magnetic flathead screwdriver between the CPU and the socket
to partially disengage the CPU. Use caution when removing, handling, and setting aside the CPU, as the pins on
the underside can bend easily.
Important: If you removed the original CPU from the motherboard to install it on a new motherboard, be sure to
remove all thermal compound residue from the surface of the CPU and the base of the heatsink. It may help to
scrape all the residue off the surface using the flat edge of a non-conductive tool. Use a lint-free cloth moistened
with alcohol to clean the base of the heatsink.
1 Arrow on CPU indicates pin 1
2 Socket lever
3 Socket cover
4 CPU socket
5CPU
6 Arrow on socket indicates pin 1