79Installation and Service Guide: Color Controller E-85
Replacing parts
6 Press the latches on the sides of the hard disk drive and slide the hard disk drive assembly out from the chassis (see
Figure 42).
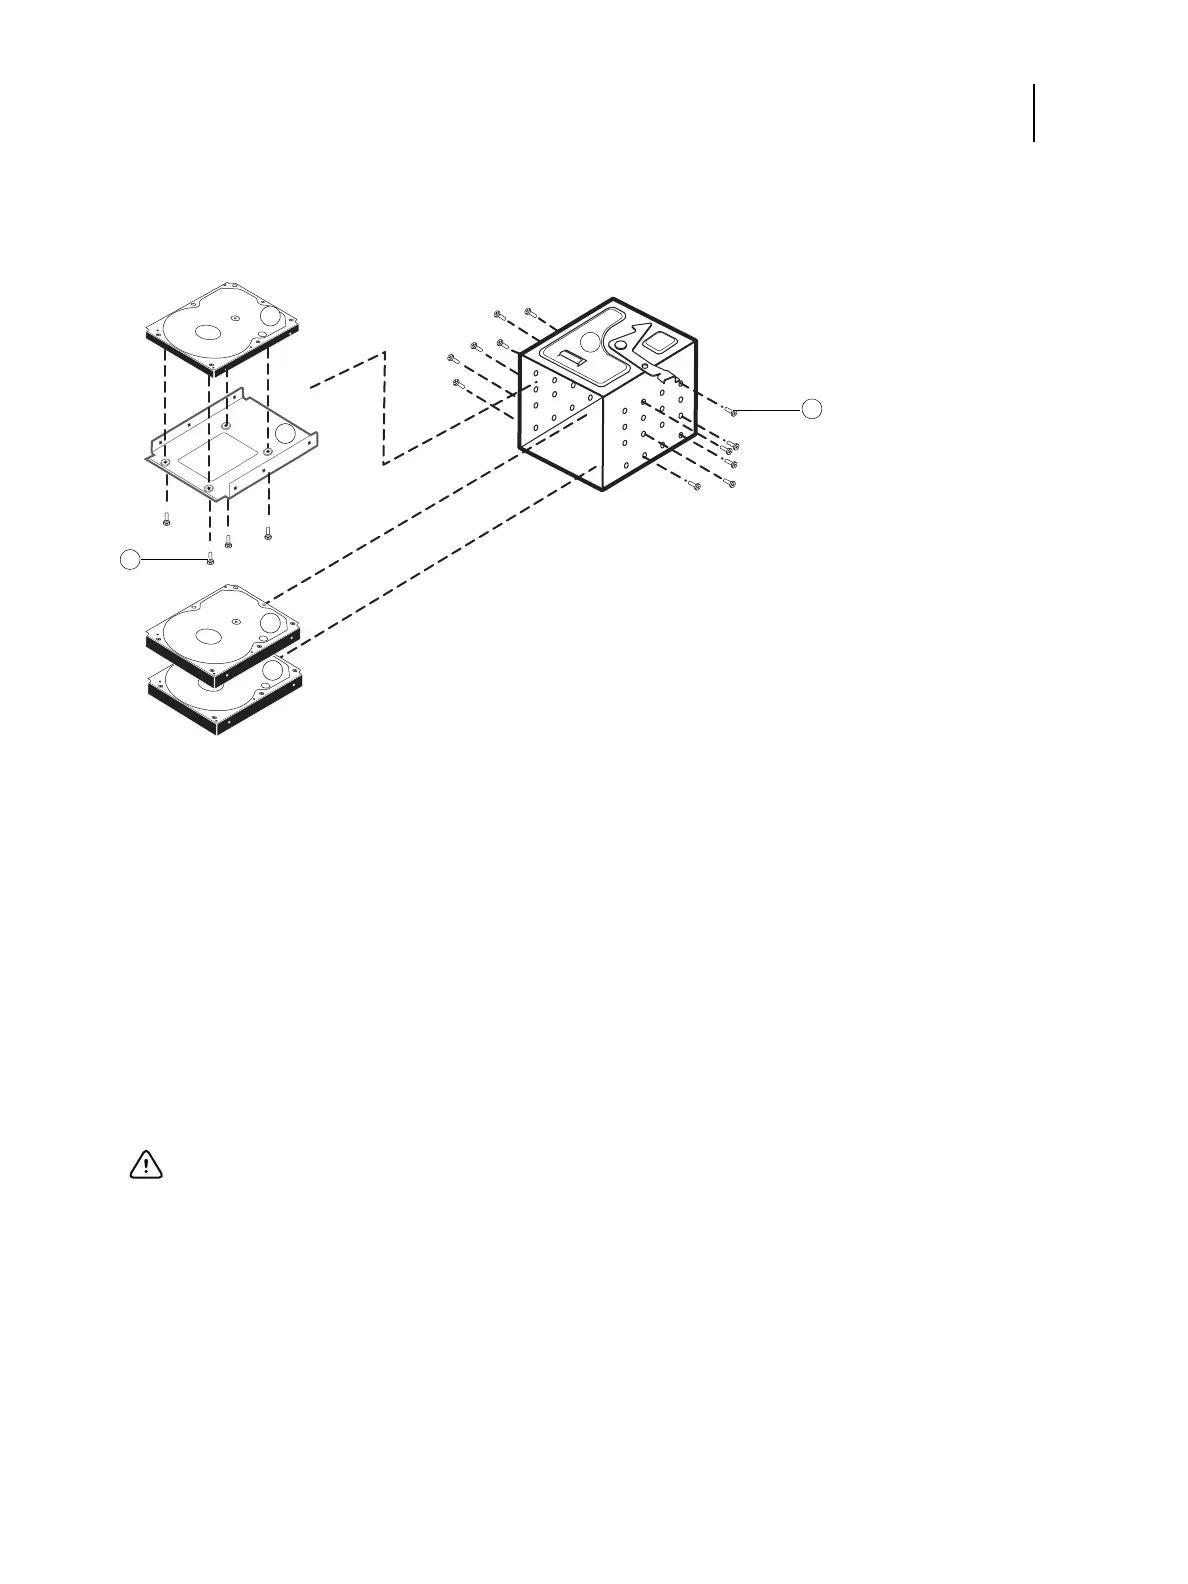
Figure 42: Removing/replacing the hard disk drive with sled
7 If you are replacing the old hard disk drive with a new hard disk drive, remove the four screws that secure the old hard
disk drive to its bracket, and remove the hard disk drive (see Figure 42).
Set the screws aside so you can replace them later.
Do not touch the drives with magnetic objects (such as magnetic screwdrivers), and avoid placing magnetic-sensitive
objects, such as credit cards and employee ID cards, near the hard disk drives.
If you are replacing the HDD1 (top), detach the HDD bracket by removing the four screws (see Figure 42).
8 Place the hard disk drive in an antistatic bag.
1 HDD1 (2.5 inch)
2 Mounting bracket for 2.5 inch HDD
3 Screws (1 of 4) for 2.5 inch HDD
4 HDD2 (3.5 inch)
5 HDD3 (3.5 inch)
6 HDD sled
7 Screws (1 of 12)
Important: Make sure to support the hard disk drive as you remove the screws. Do not loosen or remove the
screws on the hard disk drive covers. Loosening or removing these screws breaks the seal and voids the hard disk
drive warranty