Installing the K Chassis
Enterasys K-Series K6 Chassis Hardware Installation Guide 3-5
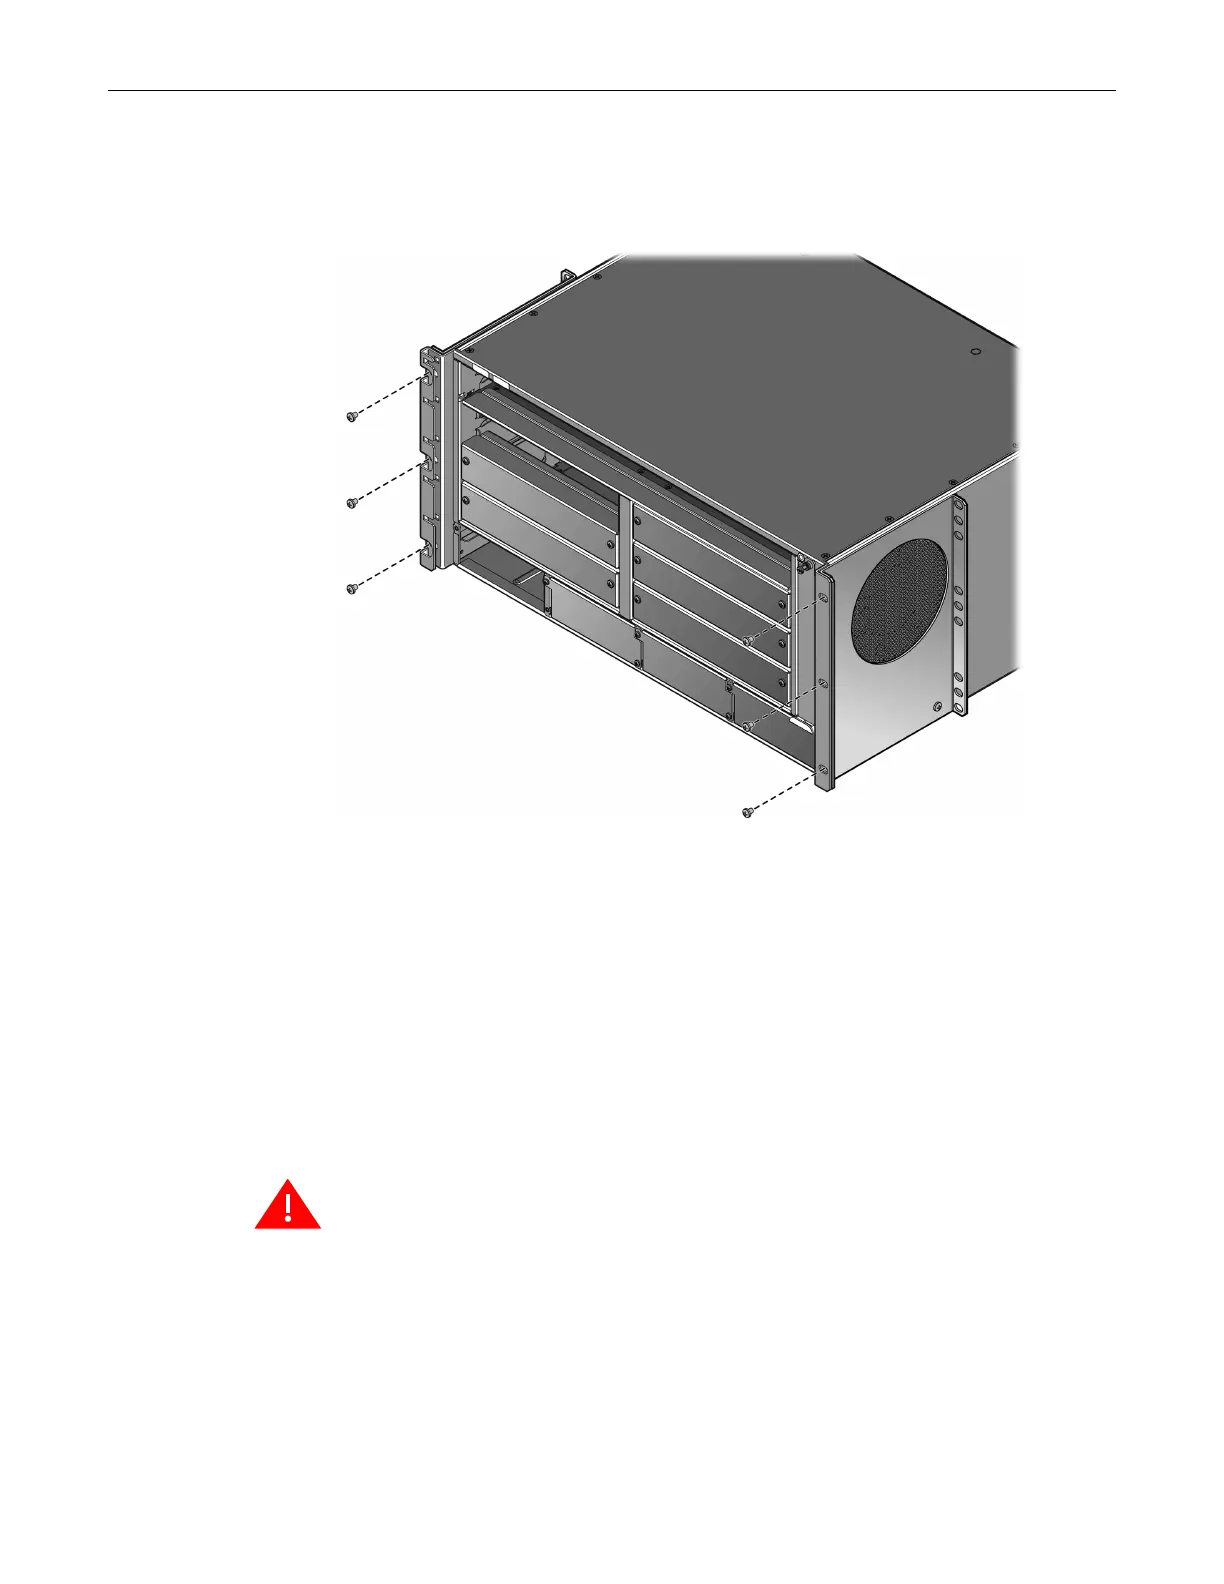
2. Attachthemid‐mountbracketstothefrontoftheK6chassiswiththesixblack10‐32panhead
screwssuppliedwiththemid‐mountbracketkit(threescrewsforeachbracket).See
Figure 3‐2.
Figure 3-2 Attaching the Mid-mount Brackets to the Front of the Chassis
Continueto“Mid‐MountingaKChassis”onpage 3‐7forthemid
‐mountingrackins tallation
procedure.
Rack Mounting the K Chassis
TheK6chassiscanbemountedintwowaysinastandard48.26‐centimeter(19‐inch)equipment
rack:
• FrontMountingaKChassis
• Mid‐MountingaKChassis
Ensurethatthereisatleast60centimeters(24inches)ofclearanceinfrontoftherackforchassis
installation.
Warning: If the rack is not secured to the floor, it is recommended that you install the chassis in the
bottom half of the rack. This helps prevent the rack from being top heavy.
Advertencia: Si el rack no esta asegurado al piso, es recomendable que instales el chasis en la
parte de abajo del rack. Esto ayuda a prevenir que el rack este demasiado pesado en la parte
superior.
Warnhinweis: Falls das Rack nicht mit Schrauben am Boden gesichert wird, sollte das Chassis in
der unteren Hälfte des Racks installiert werden, um ein kippen des Racks zu vermeiden.