Installing and Removing a Fan Tray
Enterasys K-Series K6 Chassis Hardware Installation Guide 3-17
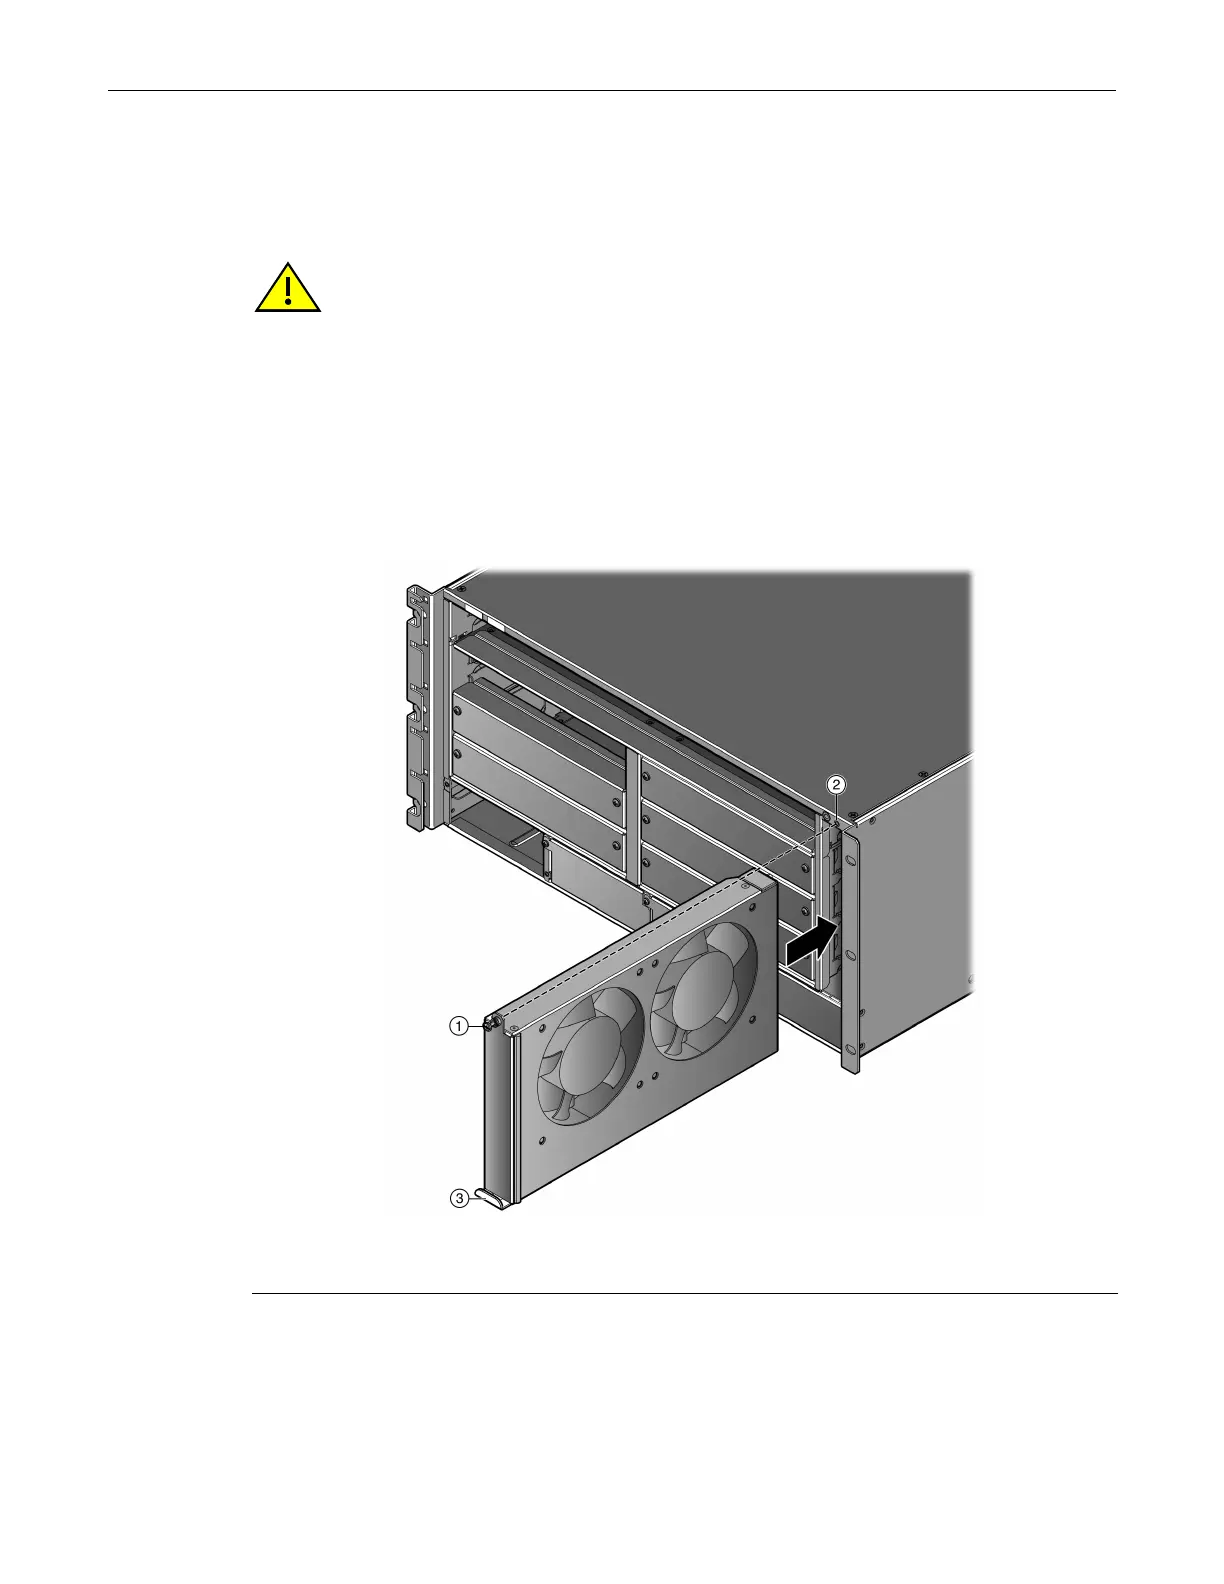
2. Holdthehandleofthefantraywithonehandandthebottomofthefantraywiththe other
hand.
Youshouldholdthefansothatthehandleisatthebottomofthefan.
3. Lineupthetopandbottomofthefantraywiththe slotguides
onthechassis.
4. SlidethefantrayintothechassisuntilthefaceplateofthetrayisflushwiththefaceoftheK6
chassis.
Ifthereisanystrongresistance,removethefantrayand reinsertit.
5. Tightenthecaptivescrewtosecurethefantraytothe K6chassis.
Figure 3-15 Installing the Fan Tray
Caution: In the following step, ensure that you do not force the fan assembly into place as it may
damage the self-aligning power/control connector in the chassis.
Precaución: En el siguiente paso, tenga cuidado de no colocar de manera forzada el sistema de
ventilación, porque puede dañar el conector de control de corriente con autoalineación del chasis.
1 Captive screw 3 Fan tray handle
2 Chassis screw hole