Mounting the SSA Switch
2-6 Installation
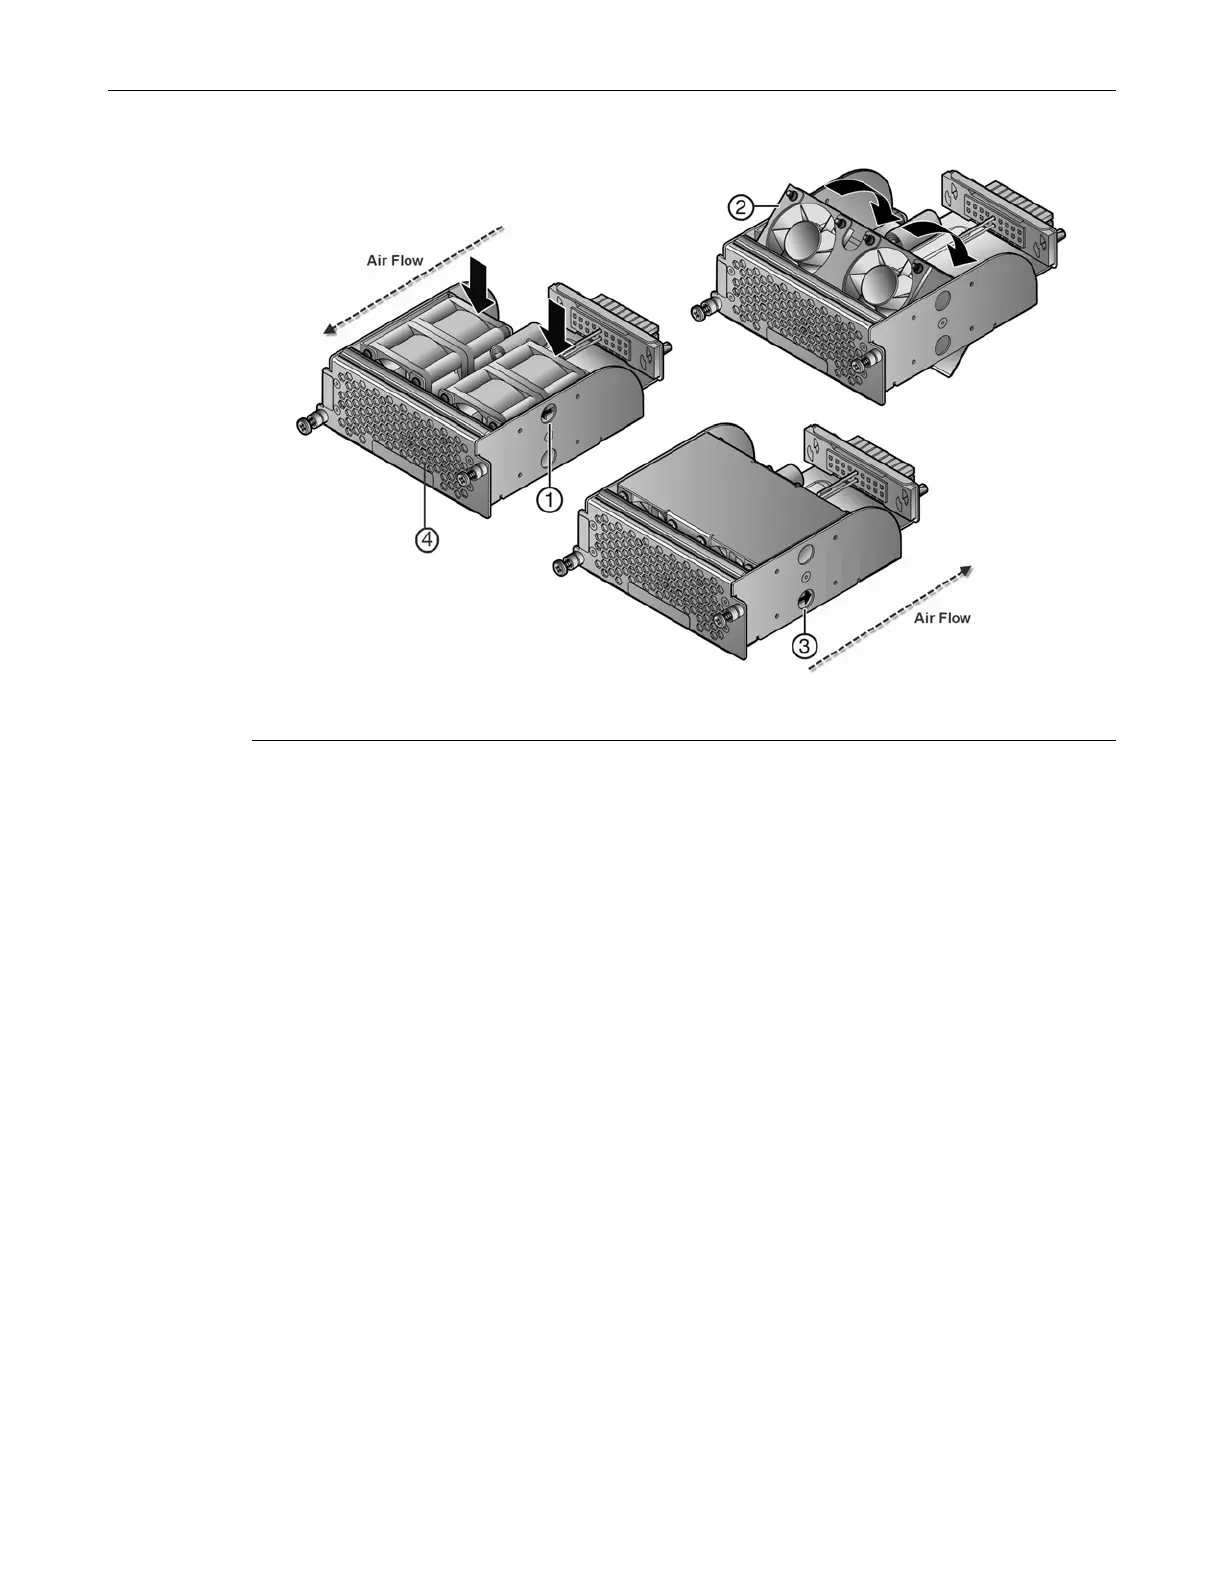
Figure 2-3 Reversing the Fan Module Air Flow
1.Callout 1 shows air flow from the I/O port side to the power supply side of the module.
2.Callout 3 shows air flow from the power supply side to the I/O port side of the module.
Reinstall the Fan Module
To reinstall the fan module:
1. Align the fan module with the fan module opening.
2. Insert the module into the fan module opening, applying enough pressure that the fan module
is flush with the device.
3. Secure the two fan module captive screws.
Rack Mount Ear Positioning
If you are installing the SSA switch using the SSA-FB-MOUNTKIT optional rack mount kit,
proceed to “Optional Rack Mount Rail Kit Installation” on page C-1.
When shipped from the factory, the SSA switch has rack mount ears attached to the edge of the
side of the switch containing the I/O ports in a flush mount configuration, as shown in callout 1 of
Figure 2-1 on page 2-3. If you are mounting the switch using the factory positioning of the rack
mount ears, go to “Securing the SSA Switch to the Rack” on page 2-9.
The rack mount ears can be repositioned providing three alternative mounting options.
Alternative mounting options are described in the following sections:
•“Flush-Mount Power Supply Facing Front Configuration” on page 2-7
•“Mid-Mount I/O Ports Facing Front Configuration” on page 2-8
•“Mid-Mount Power Supply Facing Front Configuration” on page 2-8
1 Air flow indicator arrow
1
3 Air flow indicator arrow
2
2 Fan unit in mid-reversal 4 Fan screen

 Loading...