2-Post Rack Mount Installation
Enterasys S-Series Stand Alone (SSA) Hardware Installation Guide C-9
Pre-Installation Tasks
This section details the tasks required before installing in a 2-post rack. The rack mount kit rail
assembly is pre-assembled for a 4-post rack installation. Before installing the rail to a 2-post rack:
• Remove the extension from each rack mount kit rail with extension assembly as described in
“Rack Mount Rail Assembly Extension Removal” on page C-9.
• Install a mid-backet in either a flush or mid-mount configuration to each rail as described in
“Mid-Bracket to Rail Assembly” on page C-9.
Rack Mount Rail Assembly Extension Removal
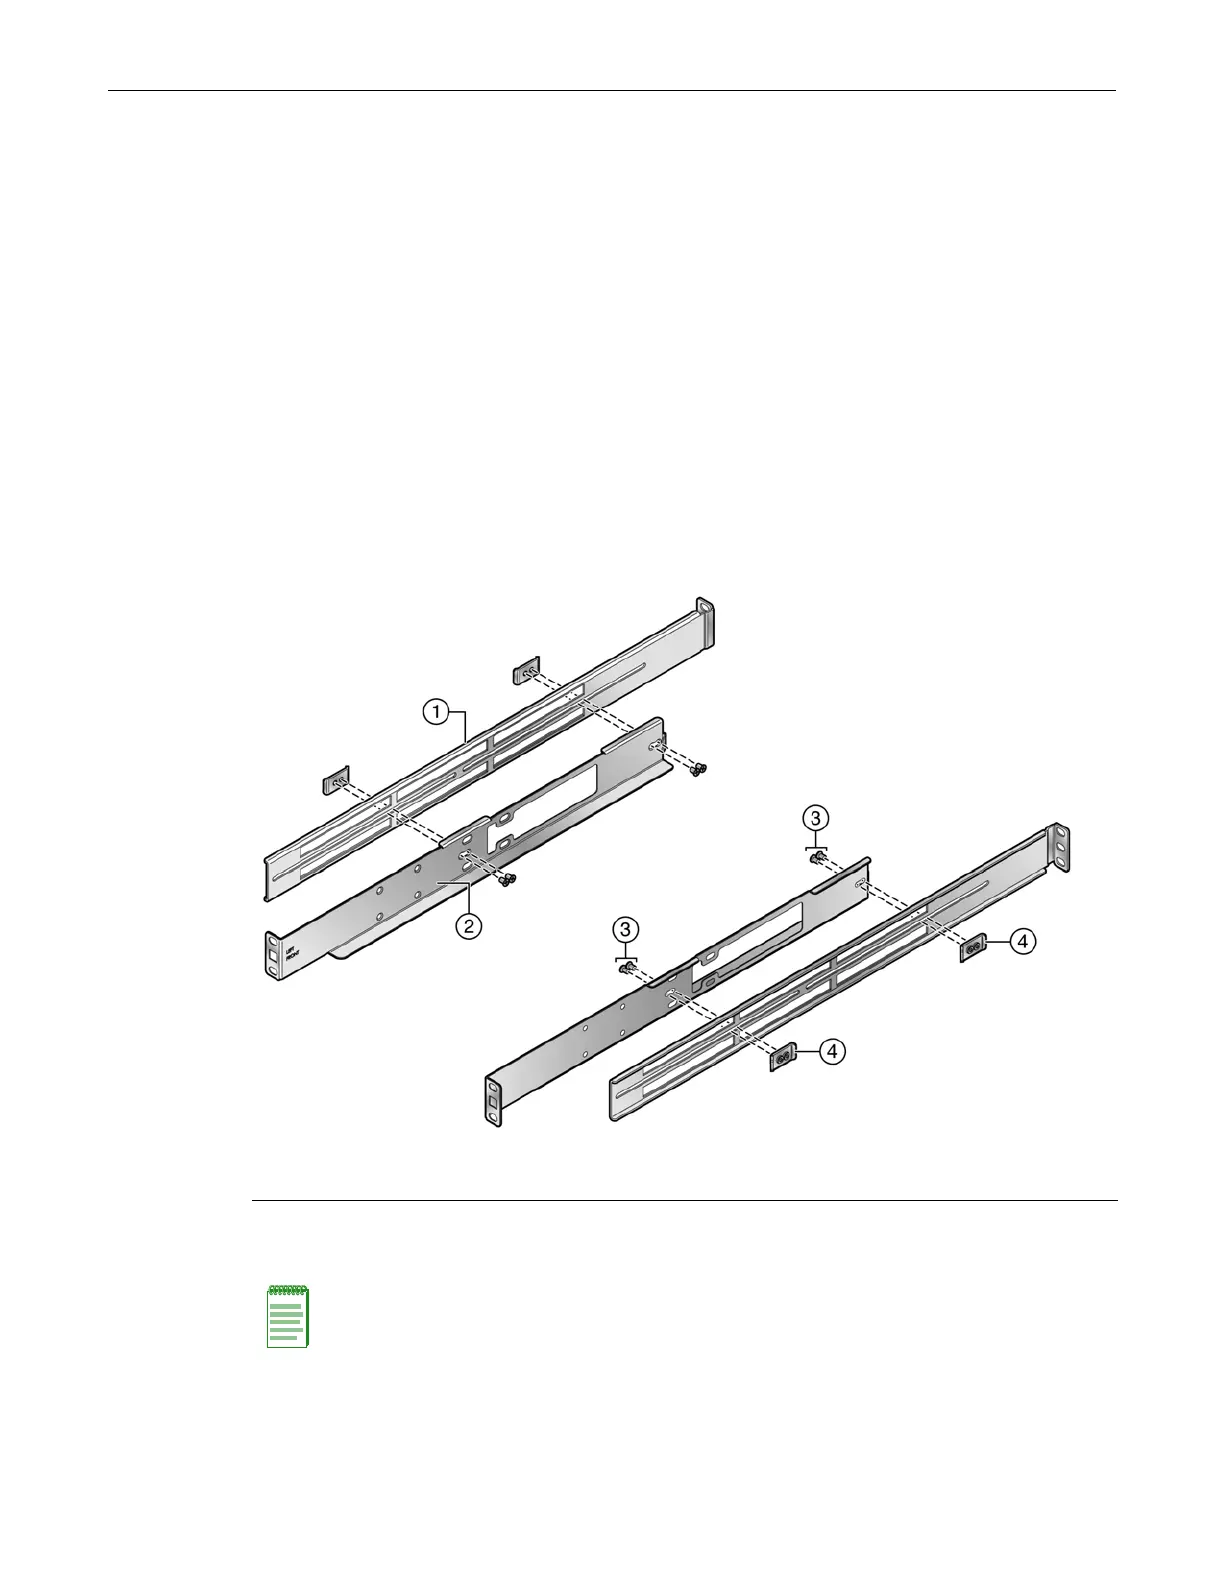
To remove the extension (callout 1) from the rack mount rail assembly, unscrew two screws from
each of two assembly clips (callout 4) as shown in Figure C-7.
Retain the four screws (callout 3) from both mount rail assemblies for securing the mid-bracket to
the rail (callout 2). Both the extensions and the assembly clips are not used for a 2-post rack
installation.
Figure C-7 Removing the Extension from the Rack Mount Rail Assembly
Mid-Bracket to Rail Assembly
The mid-bracket is used to secure the rack mount rail to the rear flange of the rack post in a flush
mount configuration or to the front flange of the rack post in a mid-mount configuration.
1 Rack mount rail assembly extension 3 Rail assembly clip screws (4 per assembly)
2 Rack mount rail 4 Rail assembly clips (2 per assembly
Note: The rack post must have holes on both the front and rear flanges to properly secure the rack
mount rail in either a 3 inch or 7.25 inch flush 2-post rack configuration. The rack post must have
holes on the front flange to secure the rack mount rail in a mid-mount 2-post rack configuration.

 Loading...