4-Post Rack Mount Installation
C-6 Optional Rack Mount Rail Kit Installation
Rack Mount Rail with Attached Extension Assembly Installation
Refer to Figure C-4 as you perform the following procedure. You must supply eight rack screws to
install the rack mount rails in the equipment rack.
To install the rack mount rail with extension assembly:
1. Adjust the length of the two assemblies (callout 1) to agree with the distance between the
outer face of the vertical rack posts. The screws (callout 5) holding the assembly together may
need to be loosened slightly to allow for the adjustment. Retighten any loosened screws once
the adjustment has been made.
2. Install the side of the assembly labeled “right front” (callout 2) on the front (cool air inlet) right
rack post. Secure the assembly to both the front and rear posts, using rack appropriate screws
or fasteners that you supply.
Do not use the middle hole when securing the assembly to the rack post. The middle hole is
used to secure the adapter plate (previously installed on the chassis) to the assembly.
3. Repeat Step 2 for the assembly labeled “left front”.
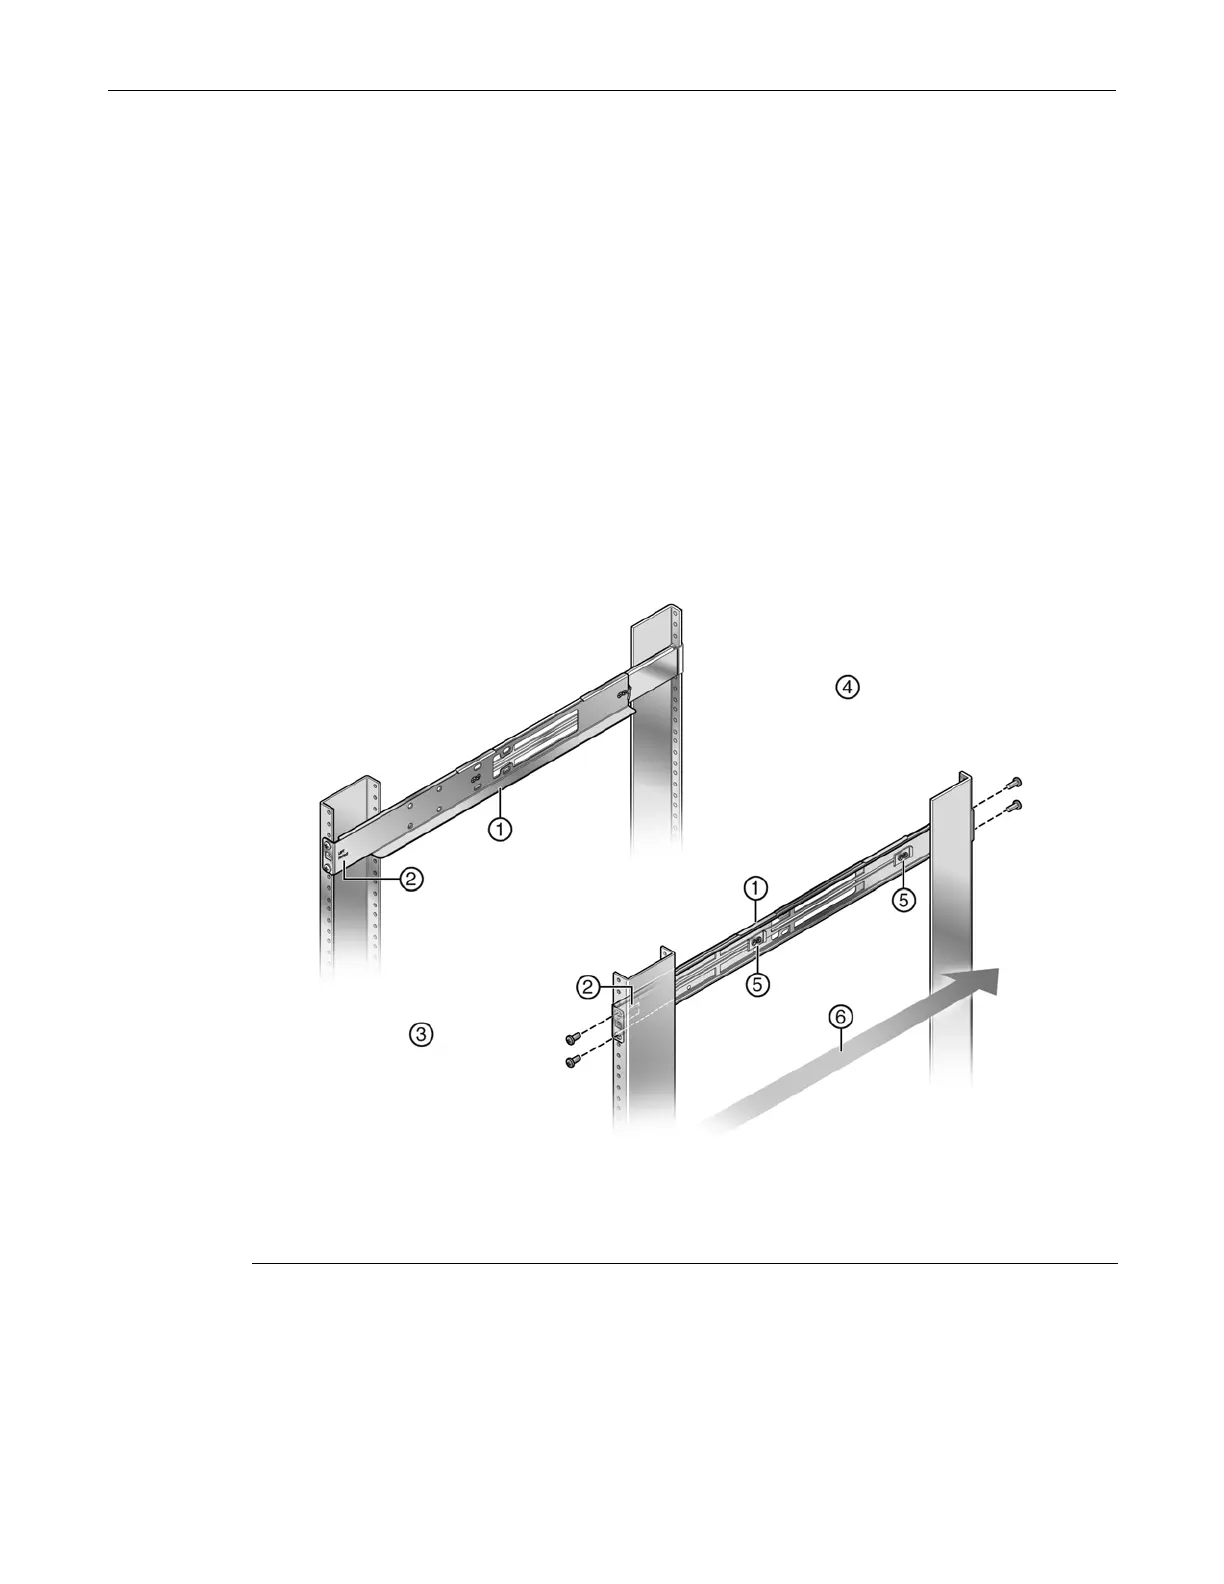
Figure C-4 Installing the Rack Mount Rail with Extension Assemblies
1 Rack mount rail with extension assembly 4 Rack rear (hot air outlet)
2 Right/left front assembly label location 5 Rail assembly adjustment screws
3 Rack front (cool air inlet) 6 Air flow direction

 Loading...