Installing the Power Supplies
2-12 Installation
Installing the Power Supplies
If you are installing only one power supply, you must put the power supply in the left power
supply bay (labeled PS1). The SSA switch ships without a coverplate for the PS1 bay.
To install the power supplies in the SSA switch:
1. Use appropriate antistatic protection when handling power supplies.
2. Perform a visual verification of the power supply air flow direction, verifying that the power
supply air flow direction agrees with the installed fan module air flow direction. For details,
see “Power Supply Air Flow and Switch Fan Module Air Flow” on page 2-4.
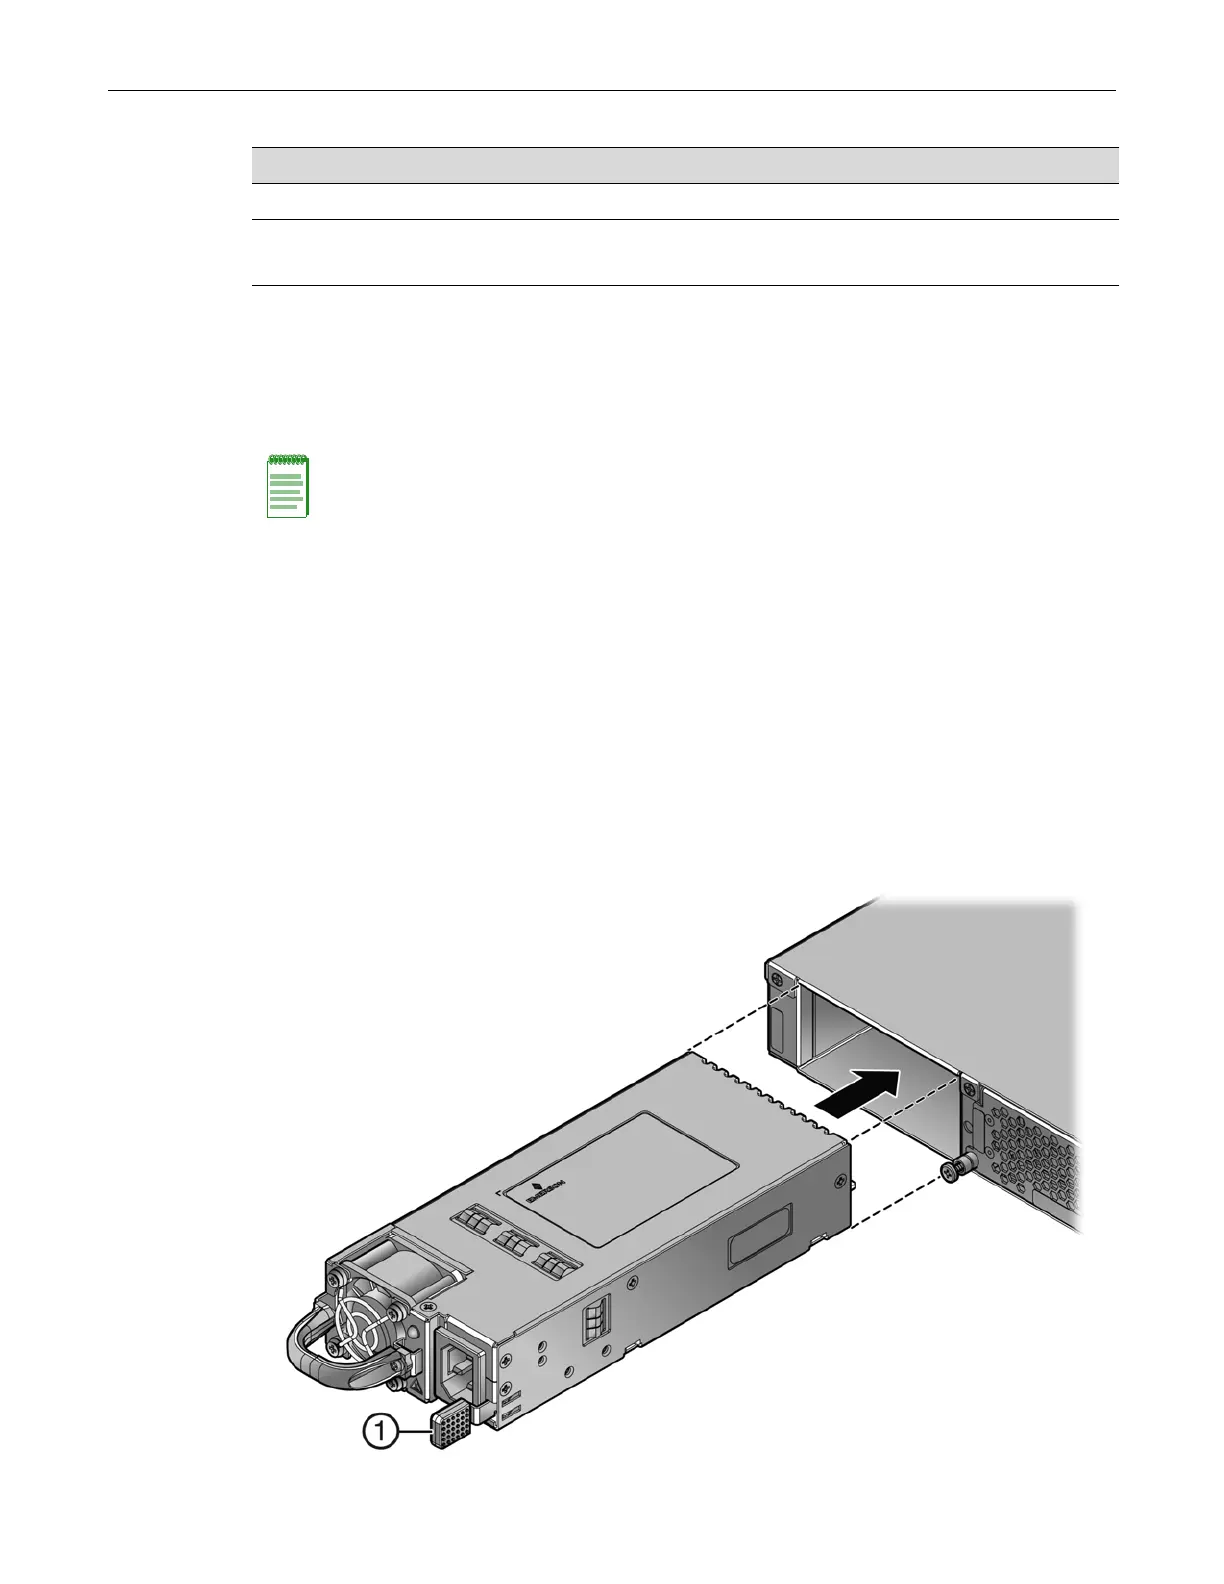
3. Holding the power supply by the handle and bottom, align the power supply with the left
power supply bay (labeled PS1).
4. Slide the power supply forward until it is plugged into the chassis connector and the lock tab
clicks to the right. Pull on the power supply handle to ensure that the power supply is firmly
in place. See Figure 2-9.
Figure 2-9 Installing a Power Supply
Table 2-4 Contents of SSA Power Supply Carton
Item Quantity
Power supply (SSA-FB-AC-PS-A or SSA-FB-AC-PS-B) 1
For USA shipments: NEMA Power Cord 5-15, C13, R/A, SHLD
Type of power cord is dependent on country of installation.
1
Note: For proper operation, the SSA switch must have a power supply in PS1 at all times while the
SSA switch is powered up.

 Loading...