2-Post Rack Mount Installation
C-10 Optional Rack Mount Rail Kit Installation
You can position the mid-bracket on to the rail in the following configurations:
• 3 inches in from the rack mount rail ear for securing to the rear rack post flange in a 3 inch rack
post flush mount configuration. See Figure C-8.
• 7.25 inches in from the rack mount rail ear for securing to the rear rack post flange in a 7.25
inch rack post flush mount configuration. See Figure C-9.
• 7.25 inches in from the rack mount rail ear for securing to the front rack post flange for a mid-
mount configuration (the rear rack post flange is not used in a mid-mount configuration). See
Figure C-10.
The 2-post rack mount rail can be installed in both a flush mount or mid-mount configuration. In a
flush mount configuration, the rack mount rail is secured to both the front and rear flange of either
a 3 inch or 7.25 inch rack post.
Mid-Bracket to Rail 3 Inch Flush Mount Assembly
To secure the mid-bracket to the rail for a 3 inch post flush mount assembly:
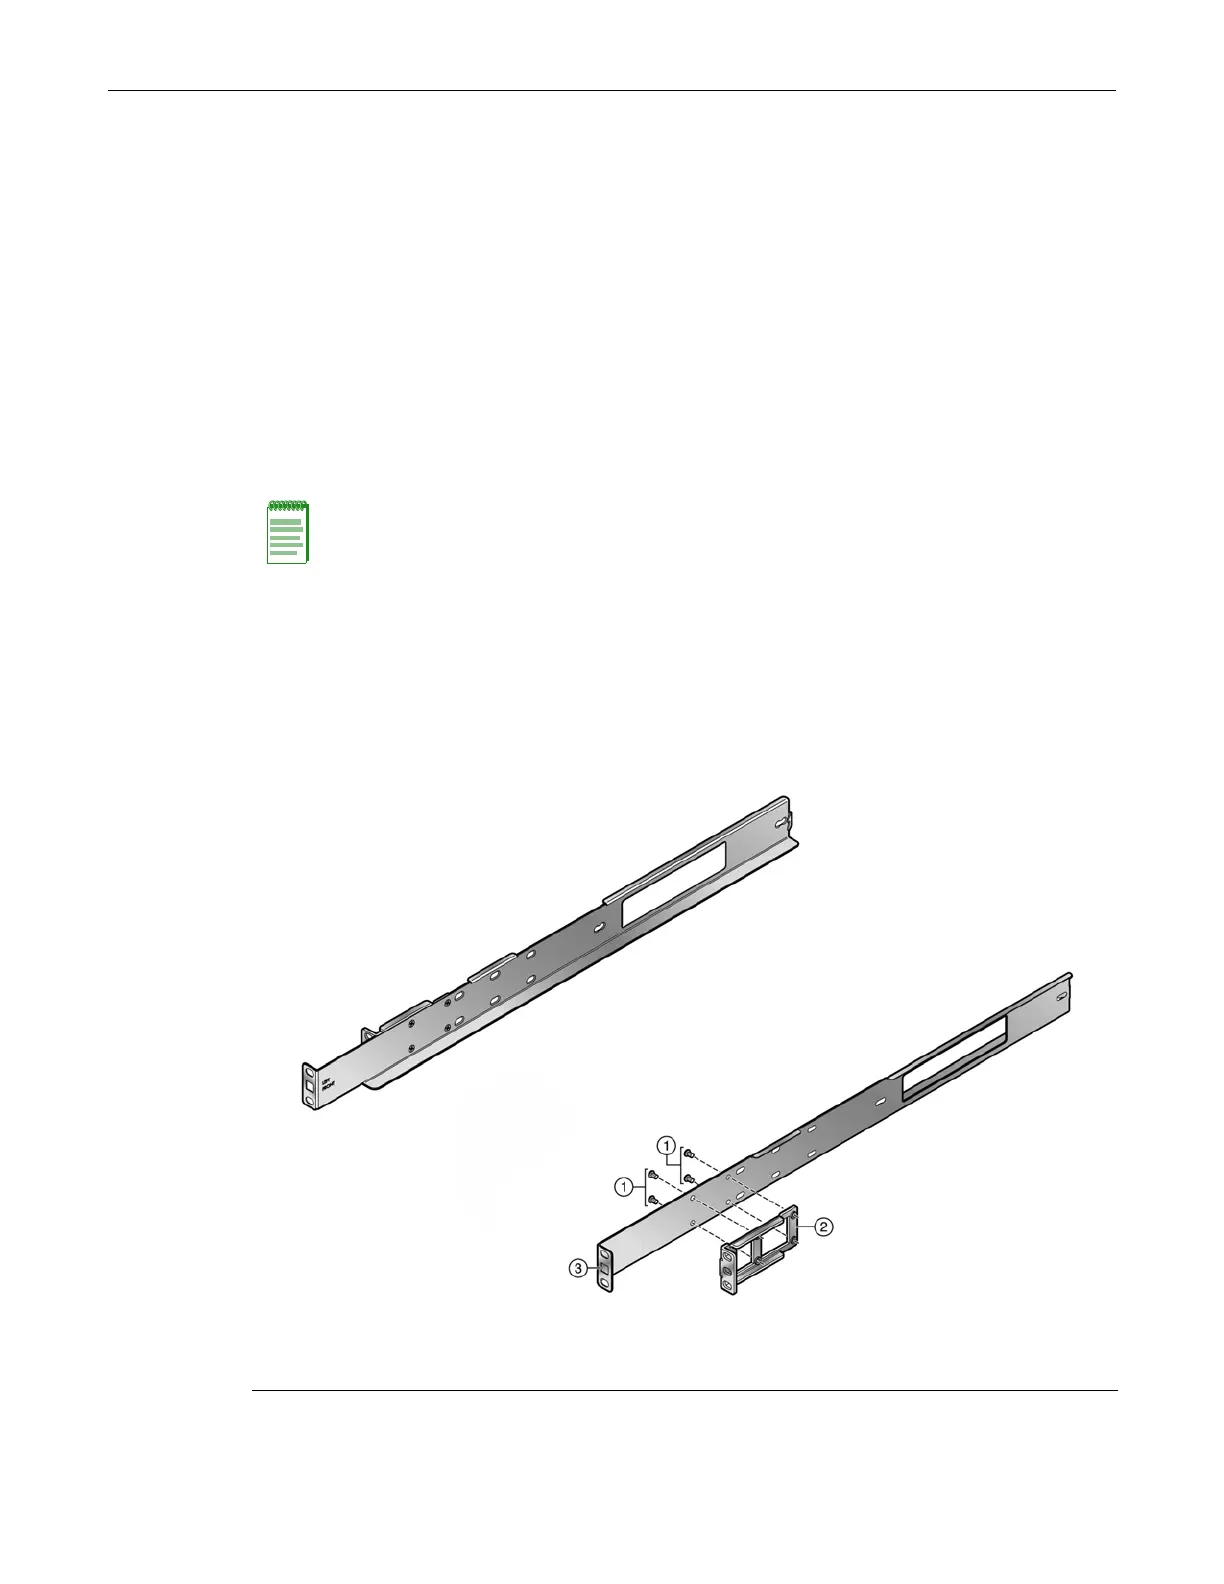
1. Align the mid-bracket (callout 2) with the four rail holes closest to the rail ear (callout 3) as
shown in Figure C-8 for both rails.
2. Insert and secure the four screws (callout 1) from the rack mount extension assembly for both
rails.
Figure C-8 Securing Mid-Bracket to Rail 3 Inch Flush Mount
Note: If you are installing the rack mount rail in a flush mount 7.25 inch rack post or a mid-mount
configuration, proceed to “Mid-Bracket to Rail 7.25 Inch Flush Mount or Mid-Mount Assembly” on
page C-11, otherwise continue here.
1 Four screws from extension rack assembly 3 Rail ear
2 Mid-bracket
 Loading...