SC-F2000 Revision C
DISASSEMBLY & ASSEMBLY Disassembly and Assembly Procedure 152
Confidential
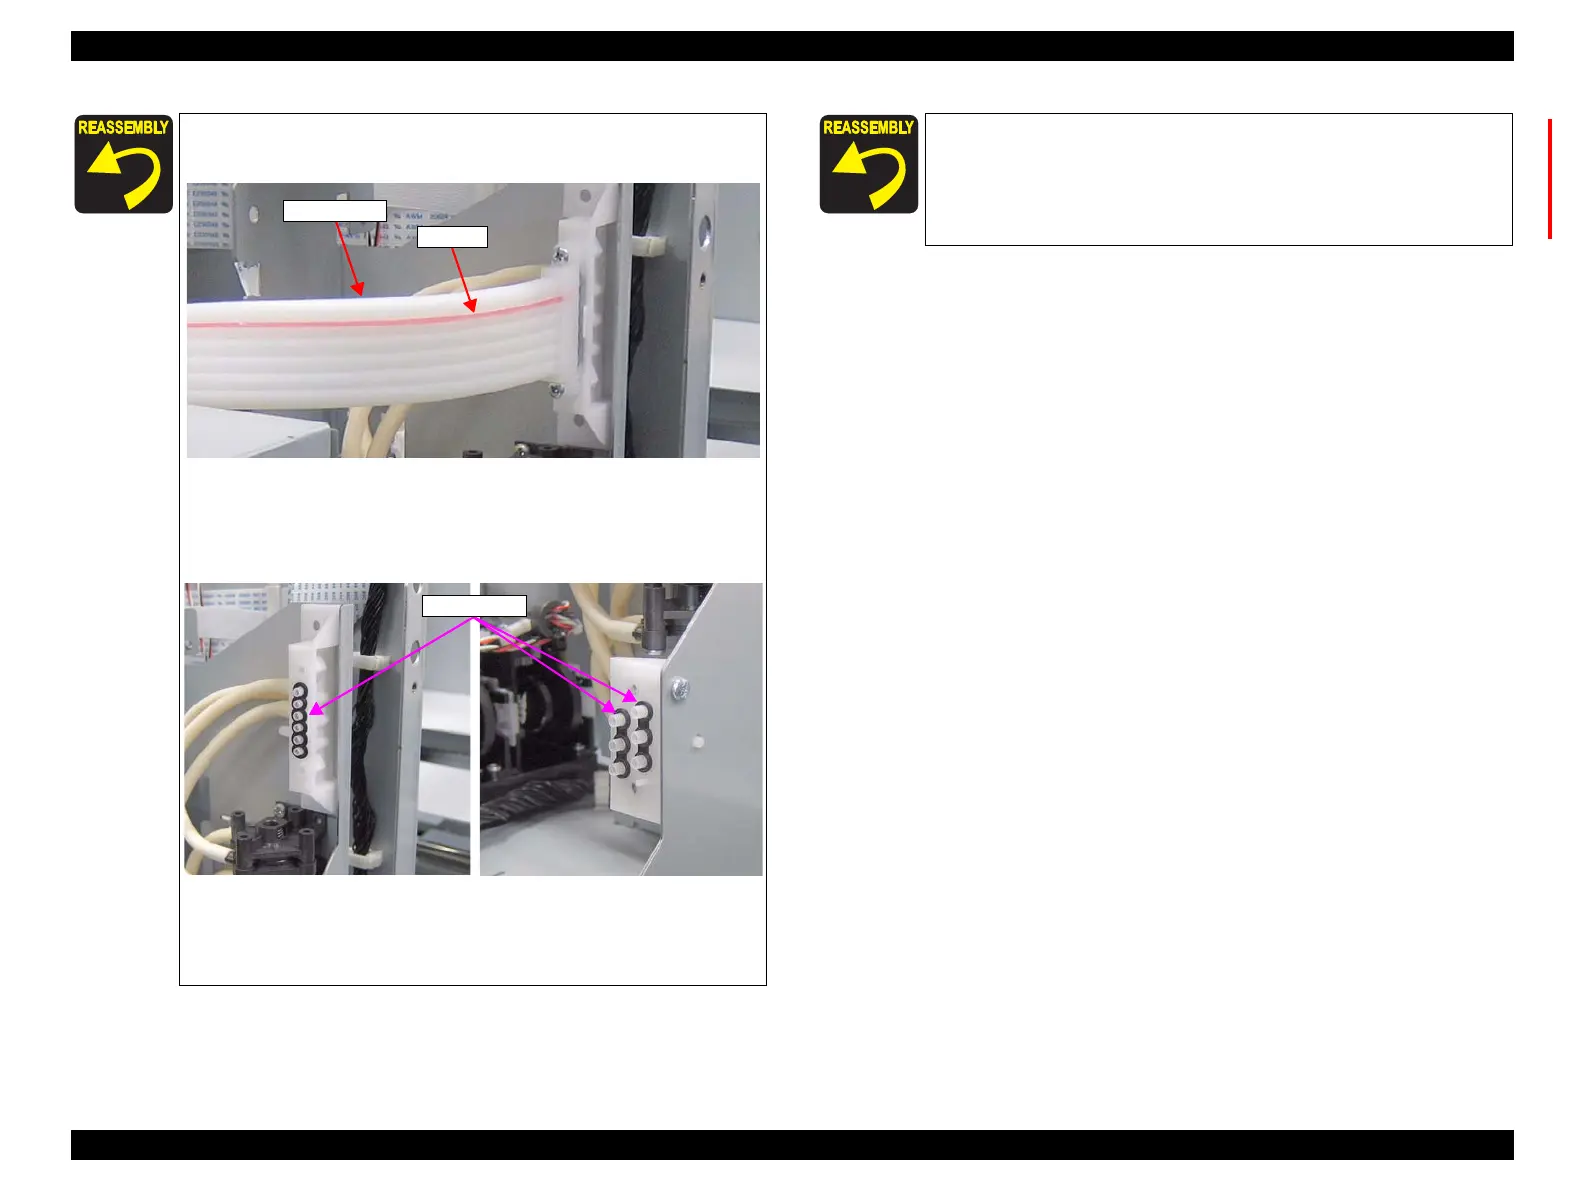
Connect the TUBE ASSY so that the Red line on it comes to the
upper side.
Before installing the joint, make sure the Joint Rubbers are
attached to it.
Before attaching the Joint Rubber, let it get wet with cleaning
liquid.
Make sure to tighten the screw that secures the tubes using a
torque driver with the following torque.
0.39 ± 0.05 N/m (Tube of the RIGHT INK HOLDER ASSY)
0.29 ± 0.05 N/m (TUBE ASSY)
Always use new Joint Rubbers.
Insert only Joint Rubber per line between upper Joint and
lower Joint.
Confirm there are no foreign objects attached on the Joint
Rubbers.
 Loading...


