SC-F2000 Revision C
DISASSEMBLY & ASSEMBLY Disassembly and Assembly Procedure 151
Confidential
3.4.5.14 BUFFR ASSY
1. Perform the Ink eject.
2. Remove the PRINTER COVER. (p72)
3. Remove the RIGHT HOUSING PLATE. (p74)
4. Remove the RIGHT COVER ASSY. (p88)
5. Remove the LEFT HOUSING PLATE. (p73)
6. Remove the LEFT COVER ASSY. (p86)
7. Remove the REAR COVER SUB ASSY. (p77)
8. Remove the REAR COVER. (p79)
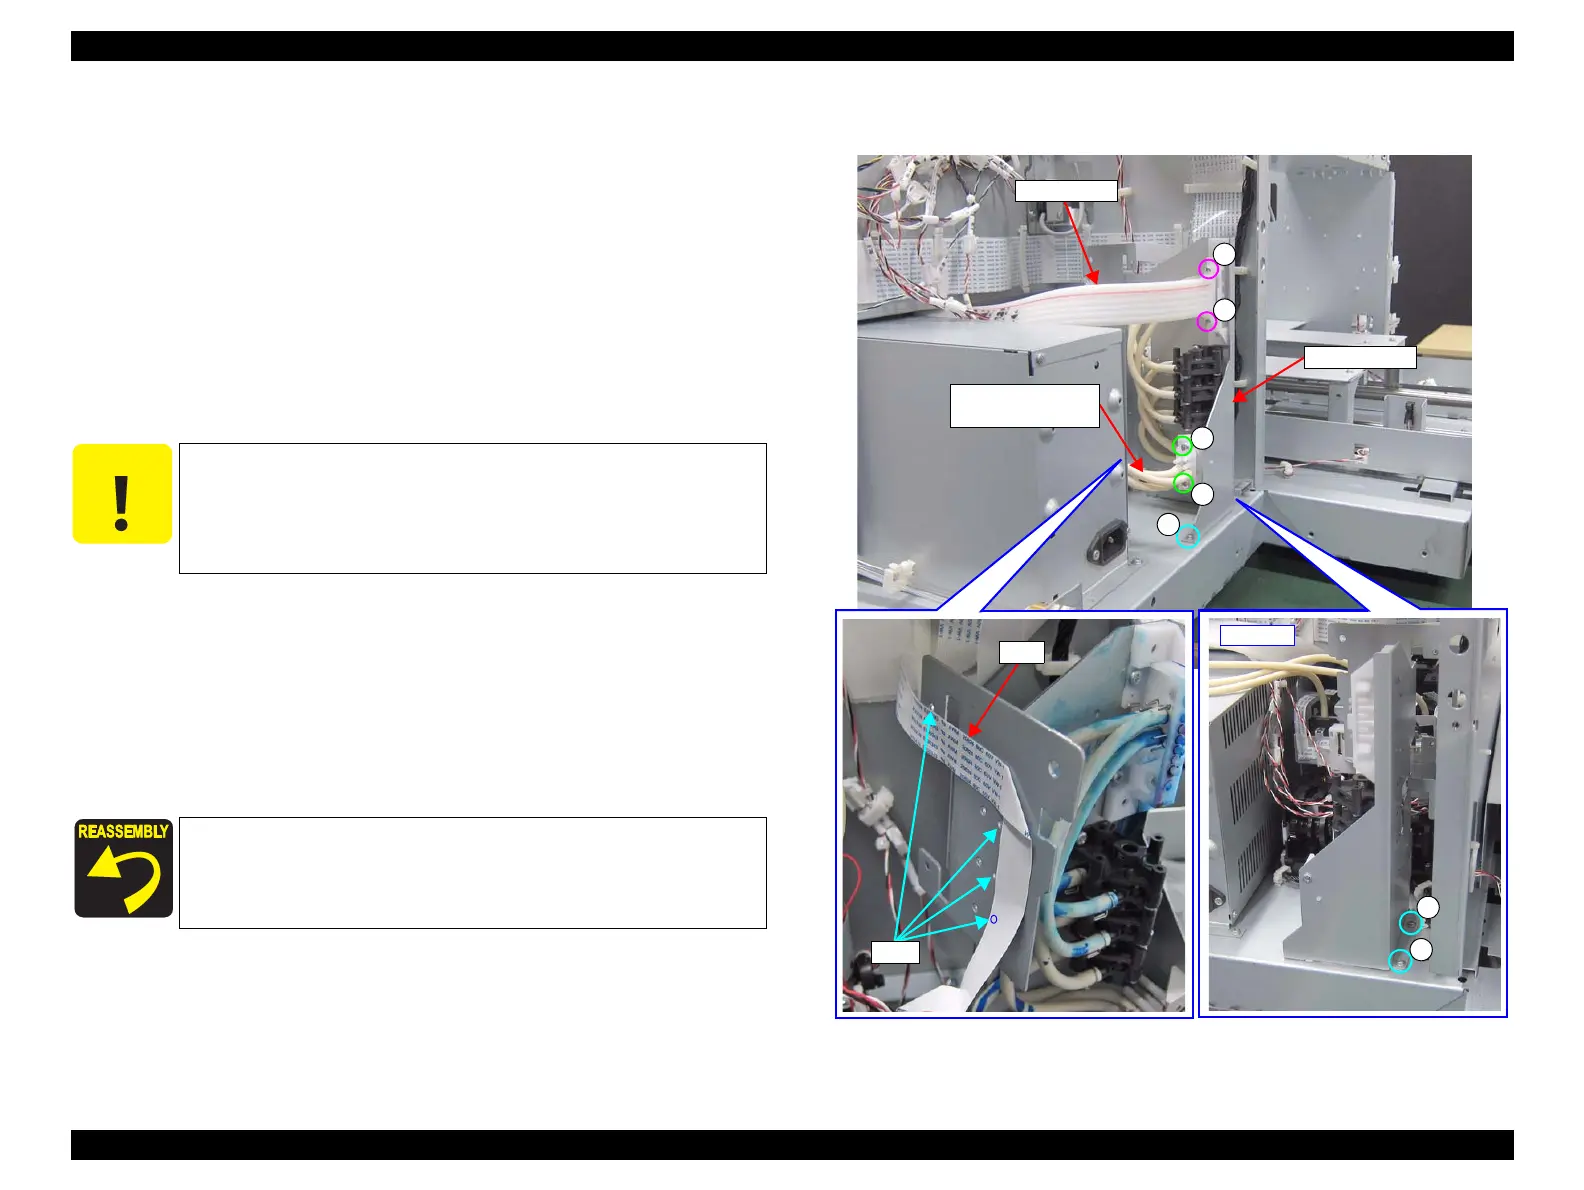
9. Remove the two screws, and remove the TUBE ASSY.
A) Silver M2.5x16 Bind machine screw (Bit No.1): 2 pcs
10. Remove the two screws, and remove the tube of the RIGHT INK HOLDER
ASSY.
B) Silver M3x10 Bind machine screw: 2 pcs
11. Peel off the FFC from the BUFFR ASSY.
12. Remove the three screws, and remove the BUFFR ASSY.
C) Silver M3x6 Cup S-tite screw: 3 pcs
Figure 3-120. Removing the BUFFR ASSY
When the tubes is removed at the following step, ink may drip
off from the tubes. Prepare a waste cloth in advance and be
careful not to contaminate the surroundings.
When replacing the BUFFER ASSY, keep the joints of tubes
up. Otherwise ink may leak.
Attach the FFC aligning the holes of the frame with double-sided
tape. (See Figure 3-120)
BUFFR ASSY
A
C
B
B
TUBE ASSY
Tube (RIGHT INK
HOLDER ASSY)
A
 Loading...


