SC-F2000 Revision C
DISASSEMBLY & ASSEMBLY Disassembly and Assembly Procedure 75
Confidential
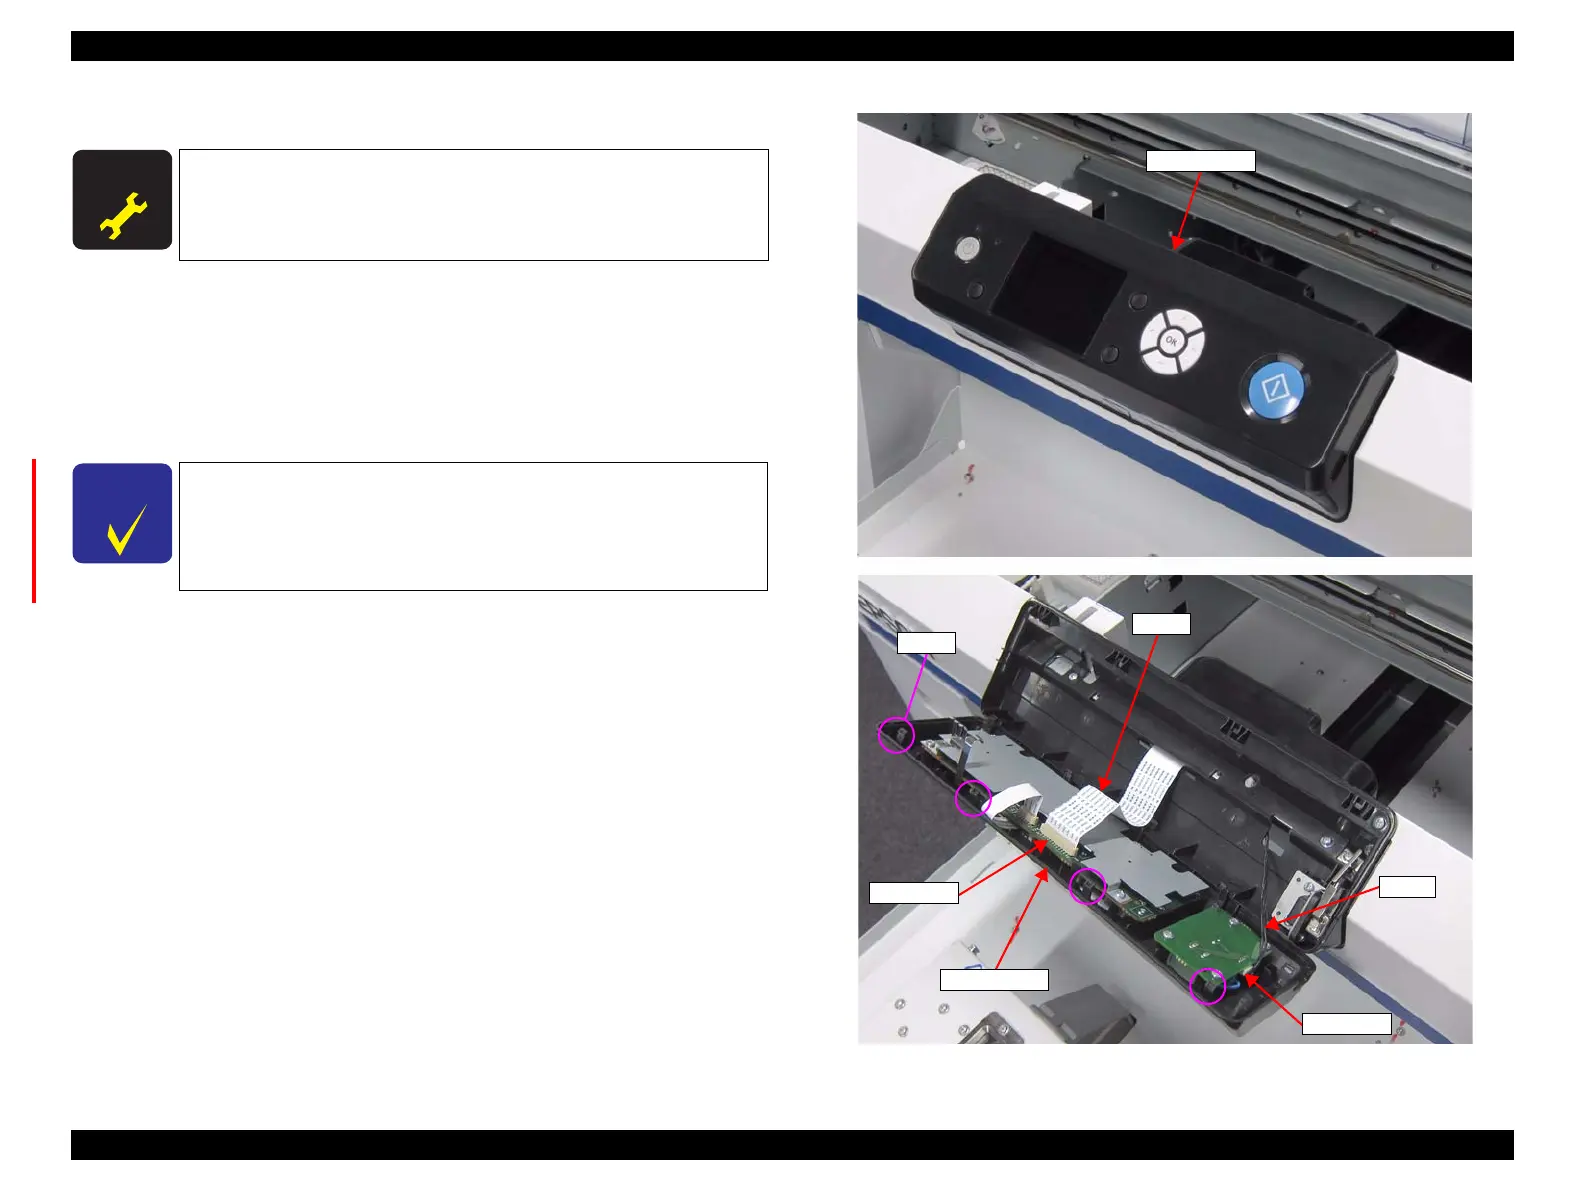
3.4.3.4 PANEL ASSY
1. Open the PRINTER COVER.
2. Disengage the four hooks that secure the PANEL ASSY using a tool such as a
slotted-head screwdriver.
3. Disconnect the cable and FFC from the connectors of the board, and remove the
PANEL ASSY.
x
Figure 3-18. Removing the PANEL ASSY
A D J U S T M E N T
R E Q U I R E D
When replacing/removing this part, refer to “4.1.2 Adjustment
Items and the Order by Repaired Part” (p194) and make sure to
perform the specified operations including required adjustment.
The printer cannot light the LCD based on old firmware which
dose not support 2.7 inches LCD when the switch is turned on after
inches LCD assembled. In this case, please update the firmware.
The new firmware which supports 2.7 inches LCD also supports 2.5
inches LCD.
Cable
FFC
Hook
Connector
PANEL ASSY
Connector
 Loading...


