EPSON Stylus Photo R1900/R2880/R2000/R2000s/SC-P400 Series Revision I
Adjustment Adjustment 157
5.2.4.2 Adjusting Method of the Colorimetric Calibration
The following illustrates the overall workflow.
Figure 5-21. Overall Workflow
1. Connect the printer and the calibrator with the PC to which the Colorimetric
Calibration Tool for the printer is installed using USB cables. Then turn the printer
on.
2. Start up the Colorimetric Calibration Tool.
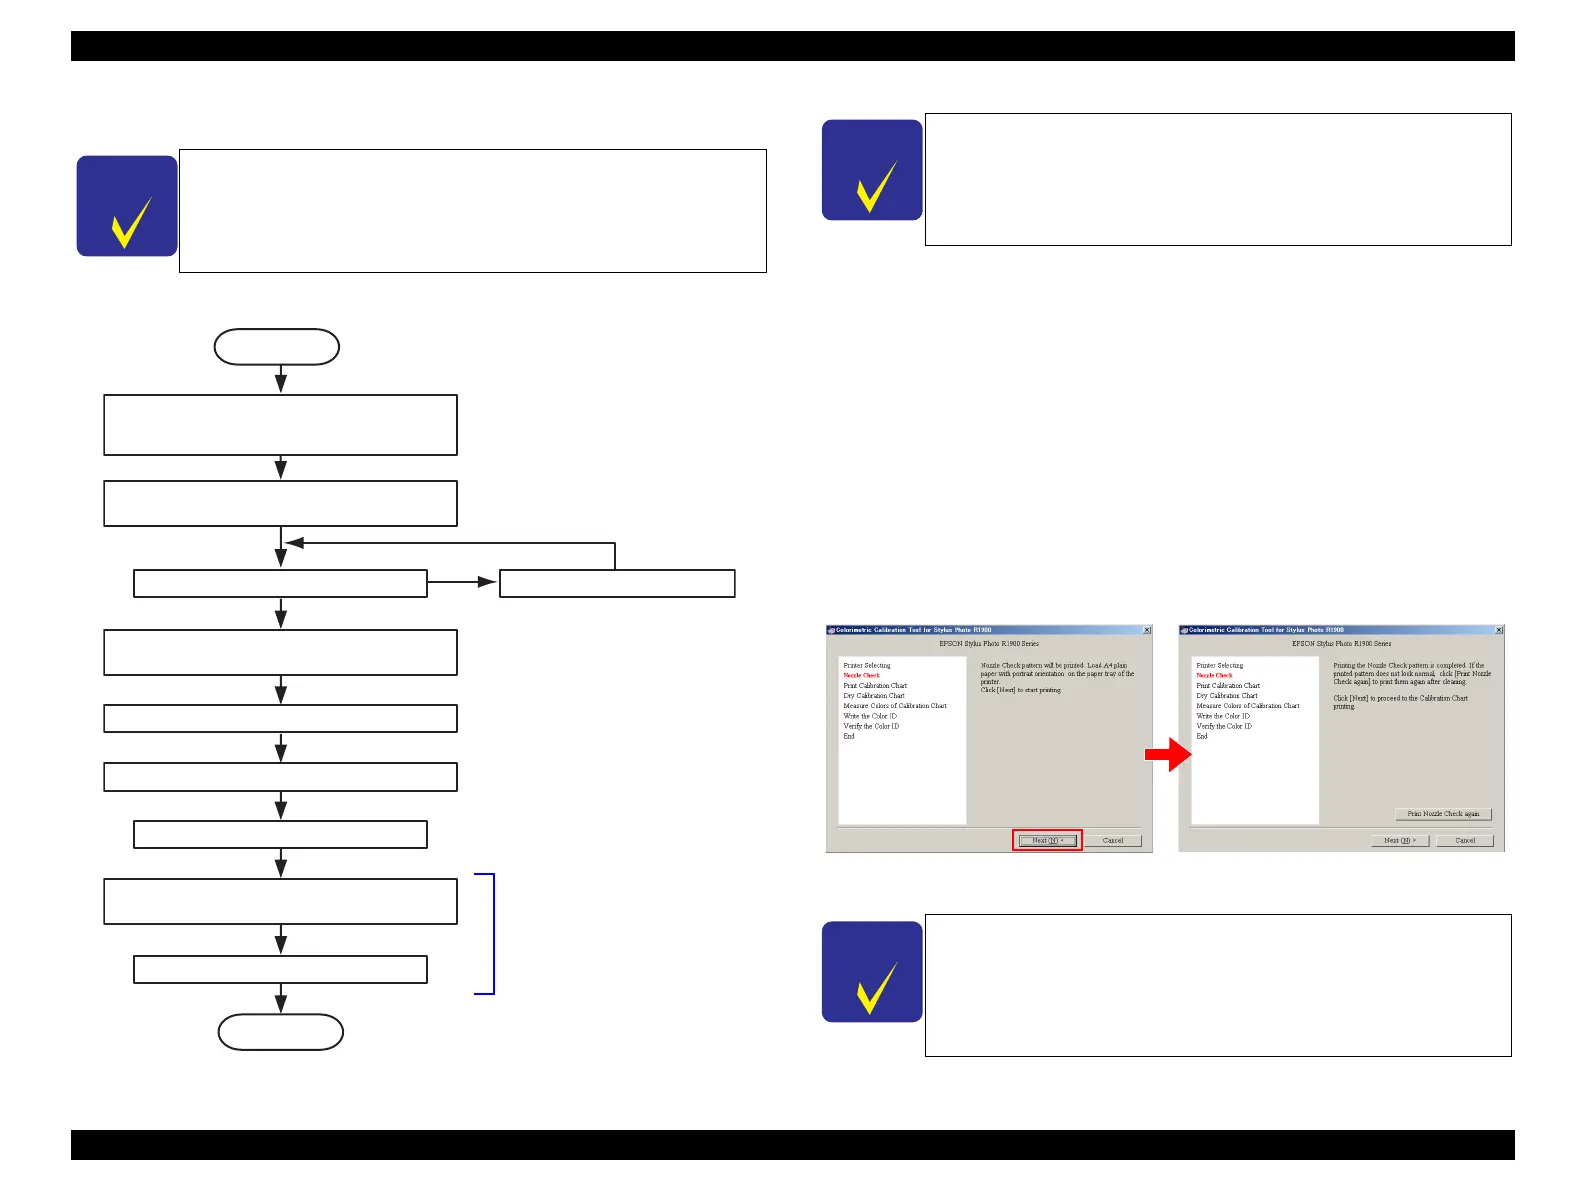
3. Load one sheet of A4 or letter-size plain paper, and click “Next” to print a nozzle
check pattern.
4. Check the printed nozzle check pattern.
When there are broken lines or missing segments
Run a head cleaning from the printer driver, then reprint a nozzle check
pattern and check it.
When there are no broken lines or missing segments
Click “Next” to go to the Calibration Chart print screen.
Figure 5-22. Printing and checking a nozzle check pattern
The Color ID Calibration Chart is designed to be printed in a
completely non-compensated state. Therefore, there is no need to
delete an existing Color ID from EEPROM when printing out a
Calibration Chart.
Printing of a Calibration Chart
∗
USB ID / printing date/time / nozzle check pattern
Drying of the Calibration Chart (five minutes)
Confirmation of USB ID / printing date/time
Measure the Calibration Chart.
Convert the color values (Lab) to Color ID
from color measurement data.
Write the Color ID to a printer.
Printing of a nozzle check pattern
Head cleaning
Remove each ink cartridge, and shake it
four or five times, then reinstall it.
Connect the printer and calibrator to the PC,
and start the Colorimetric Calibration Tool.
The Colorimetric Calibration Tool
performs this process automatically.
START
END
OK
NG
Install the printer driver for Stylus Photo R1900/Stylus Photo
R2880 and USB driver for the calibrator to the PC in advance.
To prevent inks from settling down at the bottom, remove the
ink cartridges, and shake them four or five times, then reinstall
them to the printer before starting.
If there are broken lines or missing segments, repeat the head
cleaning until they are eliminated.

 Loading...


