EasyManuals Logo

Epson Stylus Photo R2000 Series User Manual

Epson Stylus Photo R2000 Series
230 pages
To Next Page IconTo Next Page
To Previous Page IconTo Previous Page
Page #187 background imageLoading...
Page #187 background image
Stylus Photo R1900/R2880/R2000/R2000s/SC-P400 Series Revision I
Stylus Photo R2000/R2000s Disassembly 187
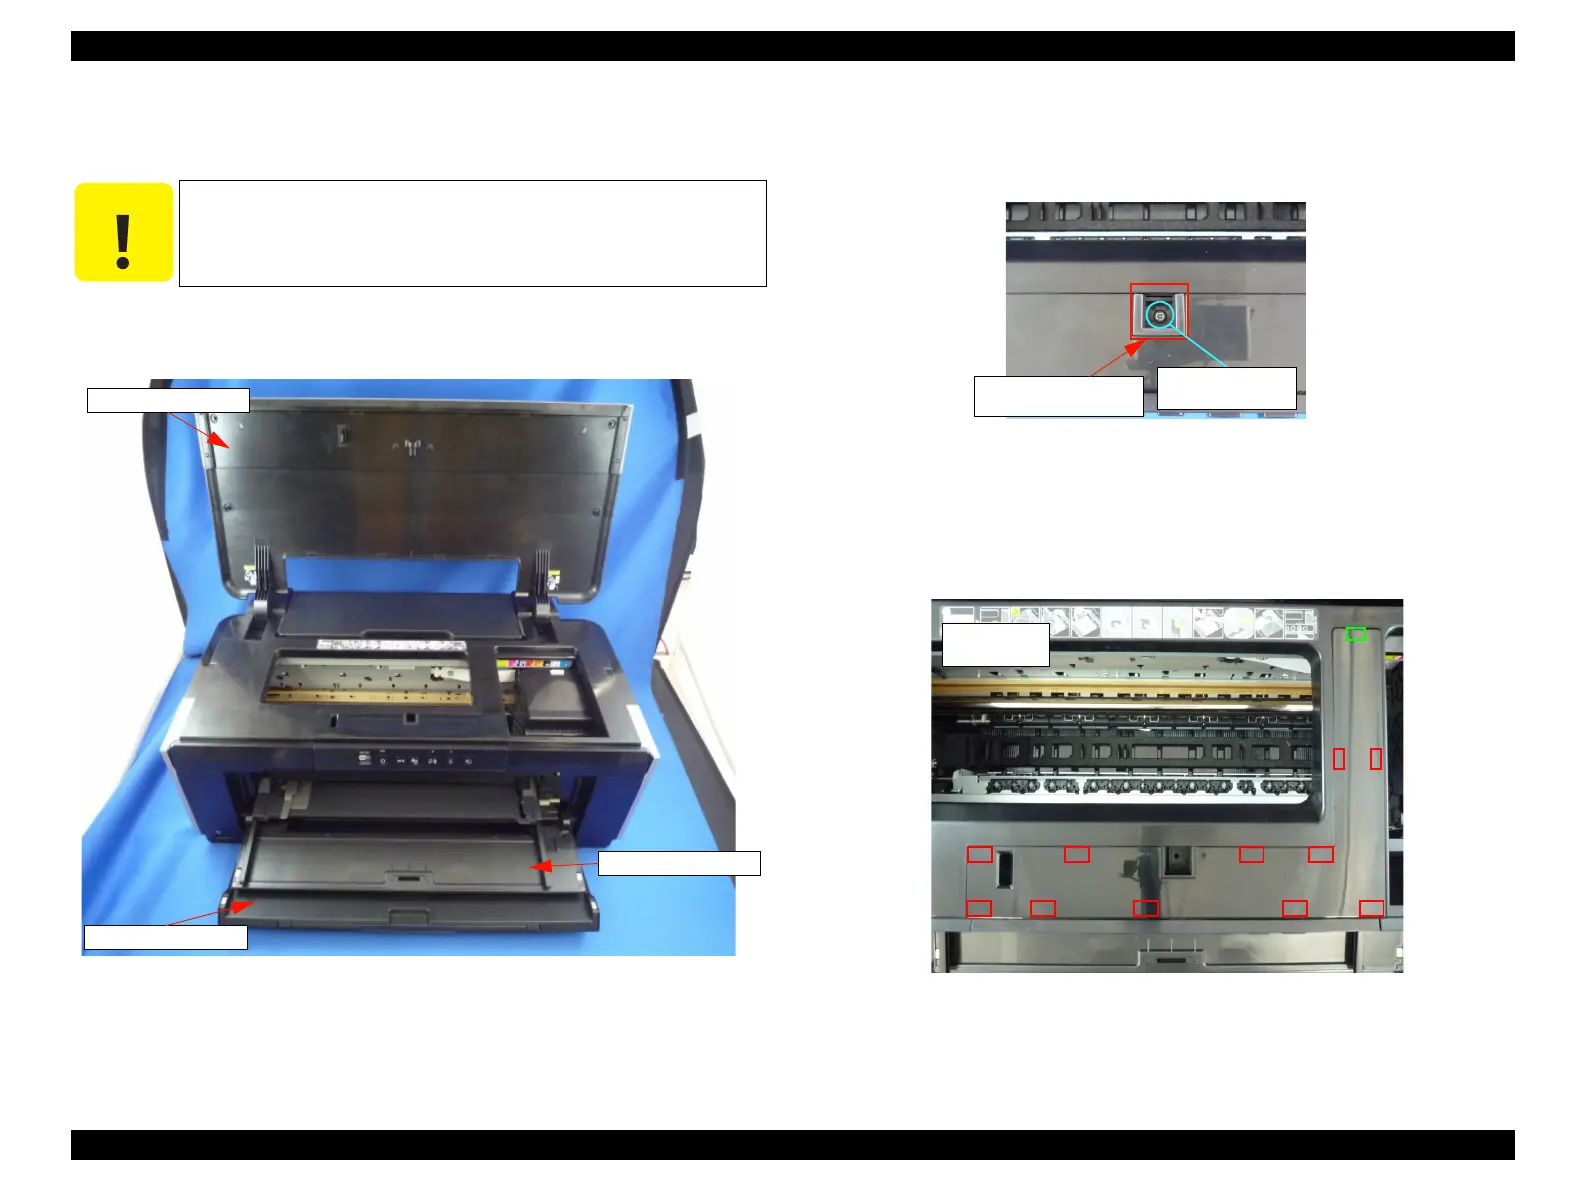
Panel FFC Cover
1. Open the Printer Cover.
2. Open the Front Cover and the CDR Tray Base
Figure 8-3. Removing the Panel FFC Cover (1)
3. Remove the screw (C.B.P 3x10) (x1) of the part for fixing the Panel FFC
Cover, and remove the part.
Figure 8-4. Removing the Panel FFC Cover (2)
4. Disengage the hooks (x11) of rear-side of the Panel FFC Cover, and pull
out the rib (x1), remove the Panel FFC Cover.
Figure 8-5. Removing the Panel FFC Cover (3)
C A U T I O N
Before opening the Front Cover and the CDR Tray Base, unlock
the Carriage. (Refer to "4.1.6 Locking/Unlocking the Carriage and
Opening/Closing the CDR Tray Base (p75)")
Printer Cover
Front Cover
CDR Tray Base
Part for fixing
Panel FFC Cover
C.B.P 3x10
(6±1kgf.cm)
Hook
Rib

Table of Contents

Other manuals for Epson Stylus Photo R2000 Series

Questions and Answers:

Question and Answer IconNeed help?

Do you have a question about the Epson Stylus Photo R2000 Series and is the answer not in the manual?

Epson Stylus Photo R2000 Series Specifications

General IconGeneral
Print TechnologyInkjet
Max Print Resolution5760 x 1440 optimized dpi
Number of Ink Colors8
Borderless PrintingYes
Operating SystemsWindows, Mac OS
Ink TypeUltraChrome Hi-Gloss 2
Ink ColorsCyan, Magenta, Yellow, Red, Orange, Matte Black, Photo Black, Gloss Optimizer
Ink Droplet Size1.5 picoliters
ConnectivityUSB, Ethernet, Wi-Fi
Media Sizes Supported4" x 6", 5" x 7", 8" x 10", 11" x 14", 13" x 19"
Media Types SupportedPlain paper, photo paper, fine art paper, canvas
InterfaceUSB, Ethernet

Related product manuals