EasyManuals Logo

Epson Stylus Photo R2000 Series User Manual

Epson Stylus Photo R2000 Series
230 pages
To Next Page IconTo Next Page
To Previous Page IconTo Previous Page
Page #81 background imageLoading...
Page #81 background image
EPSON Stylus Photo R1900/R2880/R2000/R2000s/SC-P400 Series Revision I
Disassembly And Assembly Removing the Housings 81
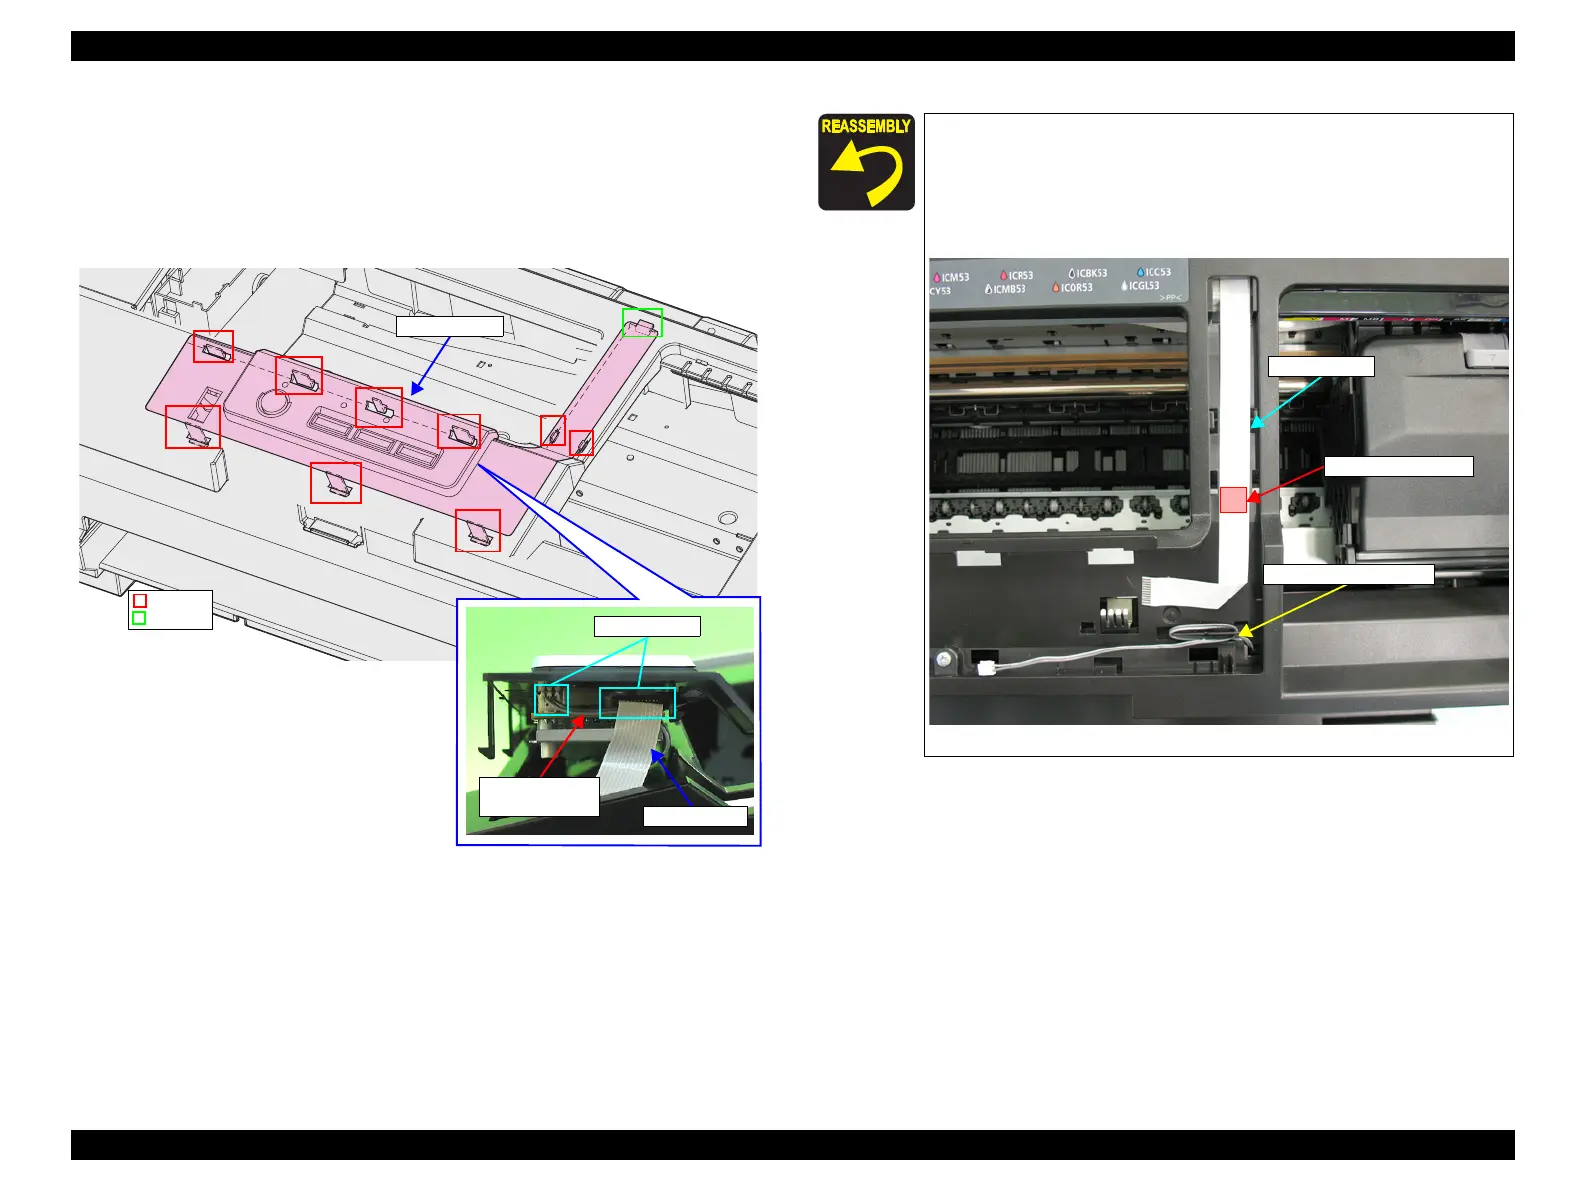
3. Disengage the nine hooks on the bottom of the Panel Unit, and remove the Panel
Unit while pulling out its tab.
4. Remove the Panel FFC from the Panel Unit. Refer to Figure 4-15.
5. Disconnect the Panel FFC and CDR Sensor cable from the Panel Board connectors
and remove the Panel Unit.
Figure 4-14. Removing the Panel Unit (2)
Hook
Tab
Connector
CDR Sensor
cable
Panel FFC
Panel Unit
Be careful not to get the Panel FFC caught underneath the
hooks on the Panel Unit.
Secure the Panel FFC with double-sided Tape on the Panel
Unit.
Route the CDR Sensor cable as shown in the following figure.
Figure 4-15. Reinstalling the Panel Unit
Panel FFC
CDR Sensor cable
Double-sided Tape

Table of Contents

Other manuals for Epson Stylus Photo R2000 Series

Questions and Answers:

Question and Answer IconNeed help?

Do you have a question about the Epson Stylus Photo R2000 Series and is the answer not in the manual?

Epson Stylus Photo R2000 Series Specifications

General IconGeneral
Print TechnologyInkjet
Max Print Resolution5760 x 1440 optimized dpi
Number of Ink Colors8
Borderless PrintingYes
Operating SystemsWindows, Mac OS
Ink TypeUltraChrome Hi-Gloss 2
Ink ColorsCyan, Magenta, Yellow, Red, Orange, Matte Black, Photo Black, Gloss Optimizer
Ink Droplet Size1.5 picoliters
ConnectivityUSB, Ethernet, Wi-Fi
Media Sizes Supported4" x 6", 5" x 7", 8" x 10", 11" x 14", 13" x 19"
Media Types SupportedPlain paper, photo paper, fine art paper, canvas
InterfaceUSB, Ethernet

Related product manuals