89
10.4.4.2.6 Updating self-signed Certificates
10.4.4.2.6.1 Update Top Page
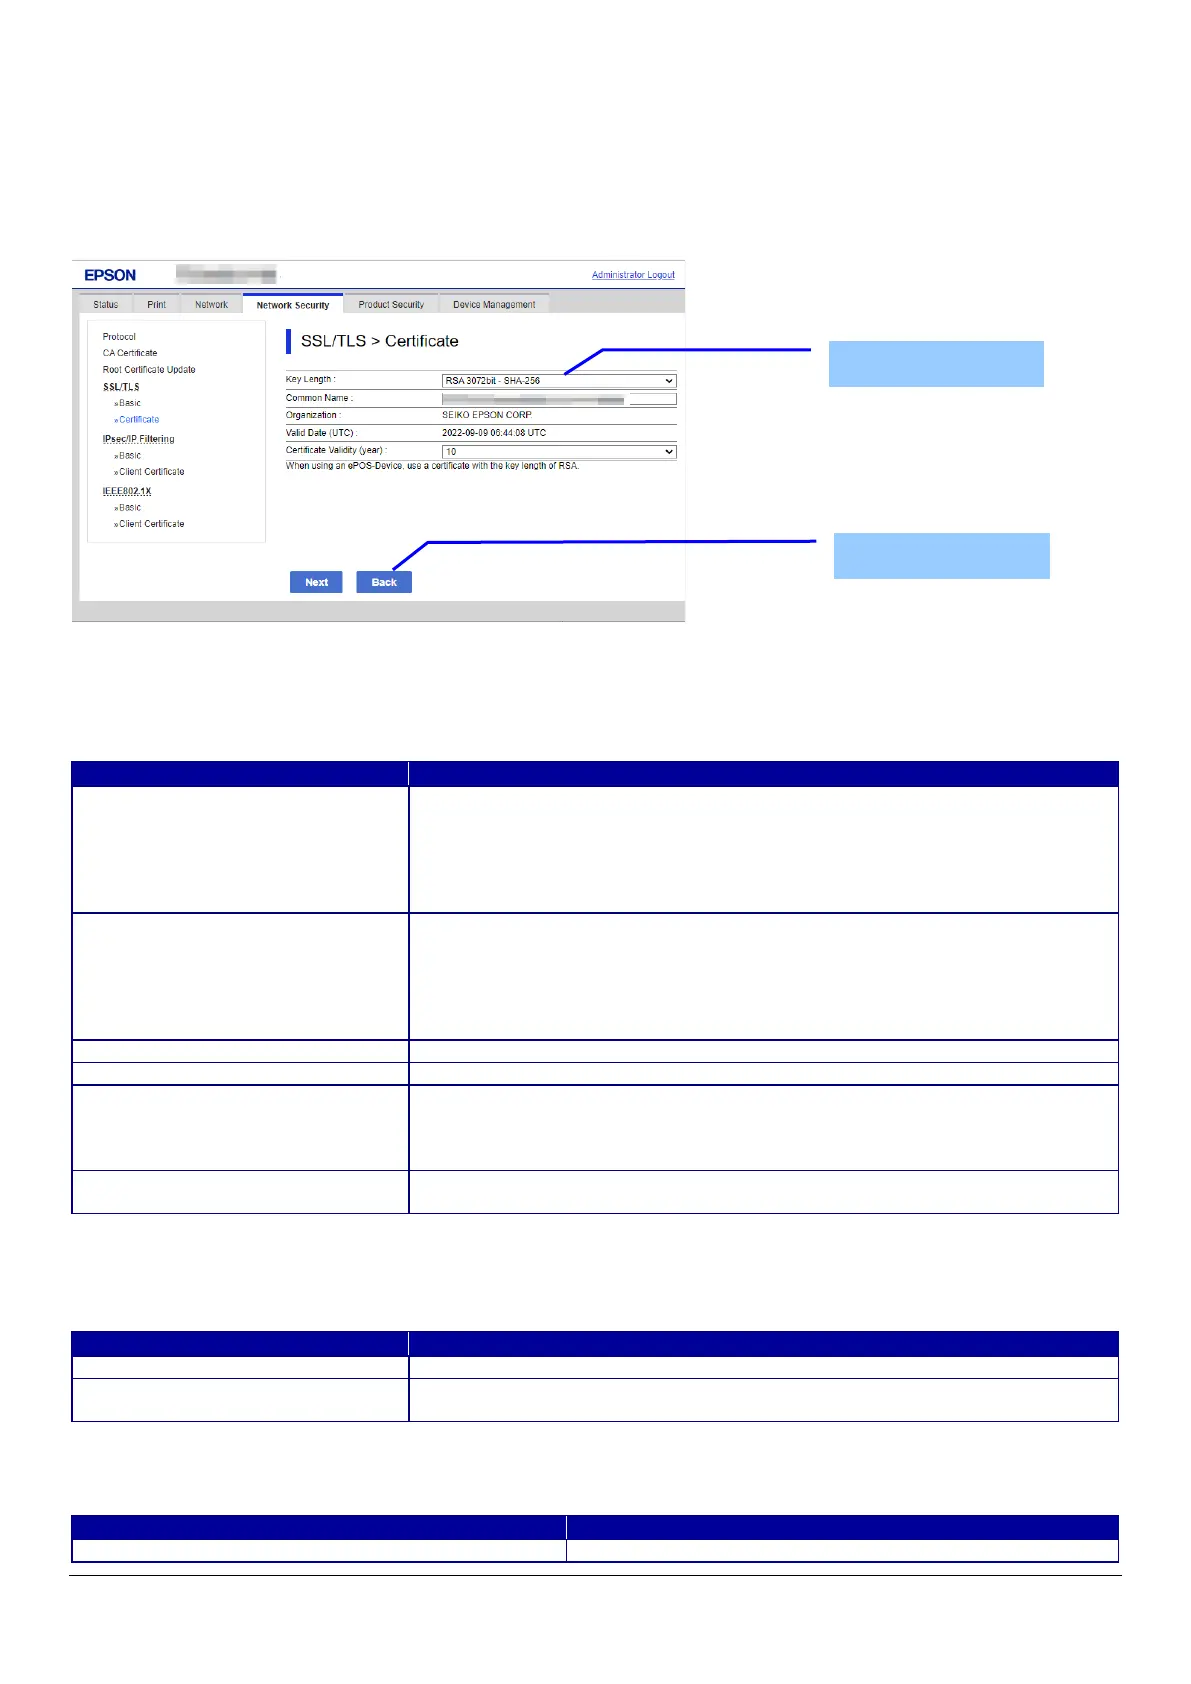
This page is shown after ‘Update’ for the import is pressed in the self-signed certificate settings.
The following figure shows the layout of the page for updating the self-signed certificate that is already embedded in the printer.
10.4.4.2.6.1.1 Image
Figure 10-36 Updating self-signed Certificates
10.4.4.2.6.1.2 Setting Items
Table 10-81 Setting Items
NOTE: You can enter multiple names.
10.4.4.2.6.1.3 Button
Table 10-82 Button
When the “Next” button is pressed, Web Config displays a pop-up window with the following message if it recognizes an error in
the entered value.
Table 10-83 Error Pop-up
Use the drop-down list to choose the public key size for updating the self-signed
certificate.
"RSA 1024bit - SHA-1" / "RSA 2048bit - SHA-256" / "RSA 3072bit - SHA-256" / "EC
256bit - SHA-256" / "RSA 4096bit - SHA-384" / "EC 384bit - SHA-384" / "EC 521bit -
Use the text box to input a common name for generating CSR.
Entering information is mandatory for generating CSR.
Set a string with from 1 to 128 characters in the IPv4 address, IPv6 address, host
name, or FQDN format.
Commas (",")(0x2c) have a special meaning as control characters. See the NOTE
"SEIKO EPSON CORP." -Fixed
Shows the date and time for the client
"Certificate Validity (year)"
Use the drop-down list to select a year for the valid term of the self-signed
certificate.
"1" / "2" / "3" / "4" / "5" / "6" / "7" / "8" / "9" / "10"
"To use ePOS-Device, use a Certificate
which Key Length is RSA."
Button at the bottom of the main frame for updating the self-signed certificate.
Button at the bottom of the main frame for going back to the top page of the
certificate settings.
"Invalid value below. ¥n -%s¥n -%s¥n…"
Shows the warning with the items of the mis inputted value.
Button
 Loading...