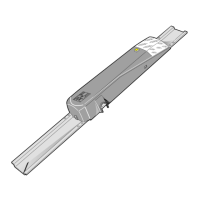
A1400 AIR RDT 99 532119 04 - Rev. C
101
102
0.0
RESET/SETUP
DL2
DL11
MAIN
F1
USB
+
-
F
ERR
BAT1
OPEN
EMERG
BAT2
SIC
_
OP
SIC
_
CL
J10
J14
J11
J12
J13
V G
I
I+
I-
J5
V G
E
E+
E-
J6
V G
S1
G
T
J1
V G
S2
G
T
J2
V G
S3
G
T
J3
V G
S4
G
T
J4
J17
V RX TX G
J8
E1 G E2
J7
T1 G
T2
R1
G R2
J9
V G 01 02 02
J22
J21
V
G
I1
I2
G
I3
I4
V
J18
G CH CL G
J23J24
J25
F2 F3F1
103
F3
1 1
1
2
4
3
1
6
6
Nm
Translation of the original instructions
ENGLISH
Emergency battery replacement
F
Before proceeding, disconnect mains power supply.
If battery charge is insufficient, automation operation is prevented;
the door remains OPEN (ERROR status) until the emergency battery
charging cycle is completed. Only SETUP may be performed in any
case despite the battery being down.
It is recommended to charge the emergency batteries before
commissioning, to avoid waiting time for the charging cycle after
performing SETUP.
The battery must be charged exclusively by using the electronics
module for A1400 AIR RDT
1. Disconnect the battery from the board E1400 RD.
2. Loosen the 2 screws with washer
101-
and disassemble
the battery.
3. Mount the new battery 101-
.
4. Connect the battery to the board E1400 RD.
Electronic board replacement
F
Before proceeding, disconnect the mains power supply and disconnect
the emergency battery.
!
The block including the main and auxiliary board must be replaced.
NEVER intervene on the components of the board!
It is recommended to Download the data to USB memory for the next
update (Upload) of the new board 78.
1. Remove all connections.
2. Remove the screw 102- and the screw with washer
102-.
3. Remove the board from the support.
4. Insert the new board in the fastening housings 102-.
5. Fasten with the screw and screw with washer .
!
The washer 102- assures board earthing.
6. Restore all connections.
7. Program the new board.
If the programming files previously saved on USB memory stick are
available, make the update (Upload) 78.
8. Perform SETUP 63.
Replacing the fuses
F
Before proceeding, disconnect the mains power supply and disconnect
the emergency battery.
1. Remove the fuse F1 by pressing and turning anti-clockwise.
Remove fuses F2 and F3 by gently using a screwdriver as a lever.
2. Assemble the new fuse.
!
Only use the indicated fuses 103.
F1 8 A T (delayed)
F2 2 A F (quick)
F3 2.5 A T (delayed)
 Loading...