A1400 AIR RDT 98 532119 04 - Rev. C
99
2
1
3 2
1 2 3
6
2,5
Nm
1
100
3
2
Translation of the original instructions
ENGLISH
1 1
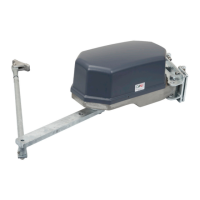
Motor_1
AUX Motor
Perform steps 1, 2, 11, 12, 13, 18 of the sequence for 2 million cycles.
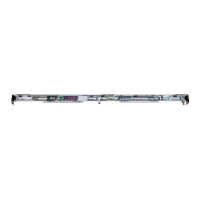
Belt replacement
Only perform steps 1 and 9 of the sequence for 2 million cycles.
Replacement of mechanical stops
Only perform steps 7 and 19 of the sequence for 2 million cycles.
Replacement of safety cables
1. Remove the safety cables from the casing.
2. Assemble the new cables 23and 48.
19.2 MAINTENANCE TECHNICIAN SAFETY
RISKS
PERSONAL PROTECTIVE EQUIPMENT
REQUIRED TOOLS
2.5
8
6
F
Before any maintenance operation, disconnect the mains power
supply and disconnect the emergency battery.
!
The installer/maintenance technician is bound to comply with the
safety instructions and recommendations provided in this manual.
Signal maintenance work in progress and prevent access to the area.
Do not leave the work site unattended.
The work area must be kept tidy and clear upon completing main-
tenance.
Do not proceed with modifications or repairs of any motorisation
component.
The repairs must exclusively be performed by an Authorised Repair
Centre.
The warranty shall be forfeited in the event of tampering with
components.
For replacements, use only FAAC original spare parts.
The batteries and electronic components must not be disposed of
with household waste but delivered to authorised disposal and
recycling centres.
19.3 REPLACEMENTS
Per 2 million cycles
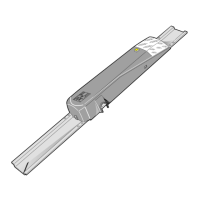
1. Remove the belt after loosening it from the leaf fittings.
2. Extract each motor from its support after removing the screws
99---.
3. Loosen the screws 100- of each carriage and lower the leaves
to the ground with screw .
4. Release the leaves from the carriages by removing screws
100-.
5. Temporarily store the leaves away, using all precautions to prevent
risks of fall.
6. Loosen screw 100- and lower the counter wheel to remove
each carriage.
7. Remove the mechanical stops.
8. Remove the lower guide shoe.
9. Assemble the new shoe 32.
10. Assemble the new vibration damper rubber pads on the support
11. Assemble the new motors on their support.
12. Tighten the screws 99---.
13. Assemble the new mechanical stops 22.
14. Assemble the new carriages on the leaves 33.
15. Install and adjust the leaves 3339.
16. Mount and adjust the new belt 4344.
17. Adjust the new mechanical stops 46.
For 1 million cycles
!
Comply with the tightening se-
quence --.
 Loading...