Page 35 of 97 PN: 106417-05
• To add an active profile to support a device, click the Add button under the Active Profiles
heading. This will present a drop-down menu underneath the Current profile column.
• Once the Profile for the device has been selected from the drop-down list, set Node-ID (Modbus address) for
any device attached to ProtoNode. The Node-ID needs to be uniquely assigned between 1 and 255. This
specification must match the device’s network settings.
• Then press the “Submit” button to add the Profile to the list of devices to be configured.
• Repeat this process until all the devices have been added.
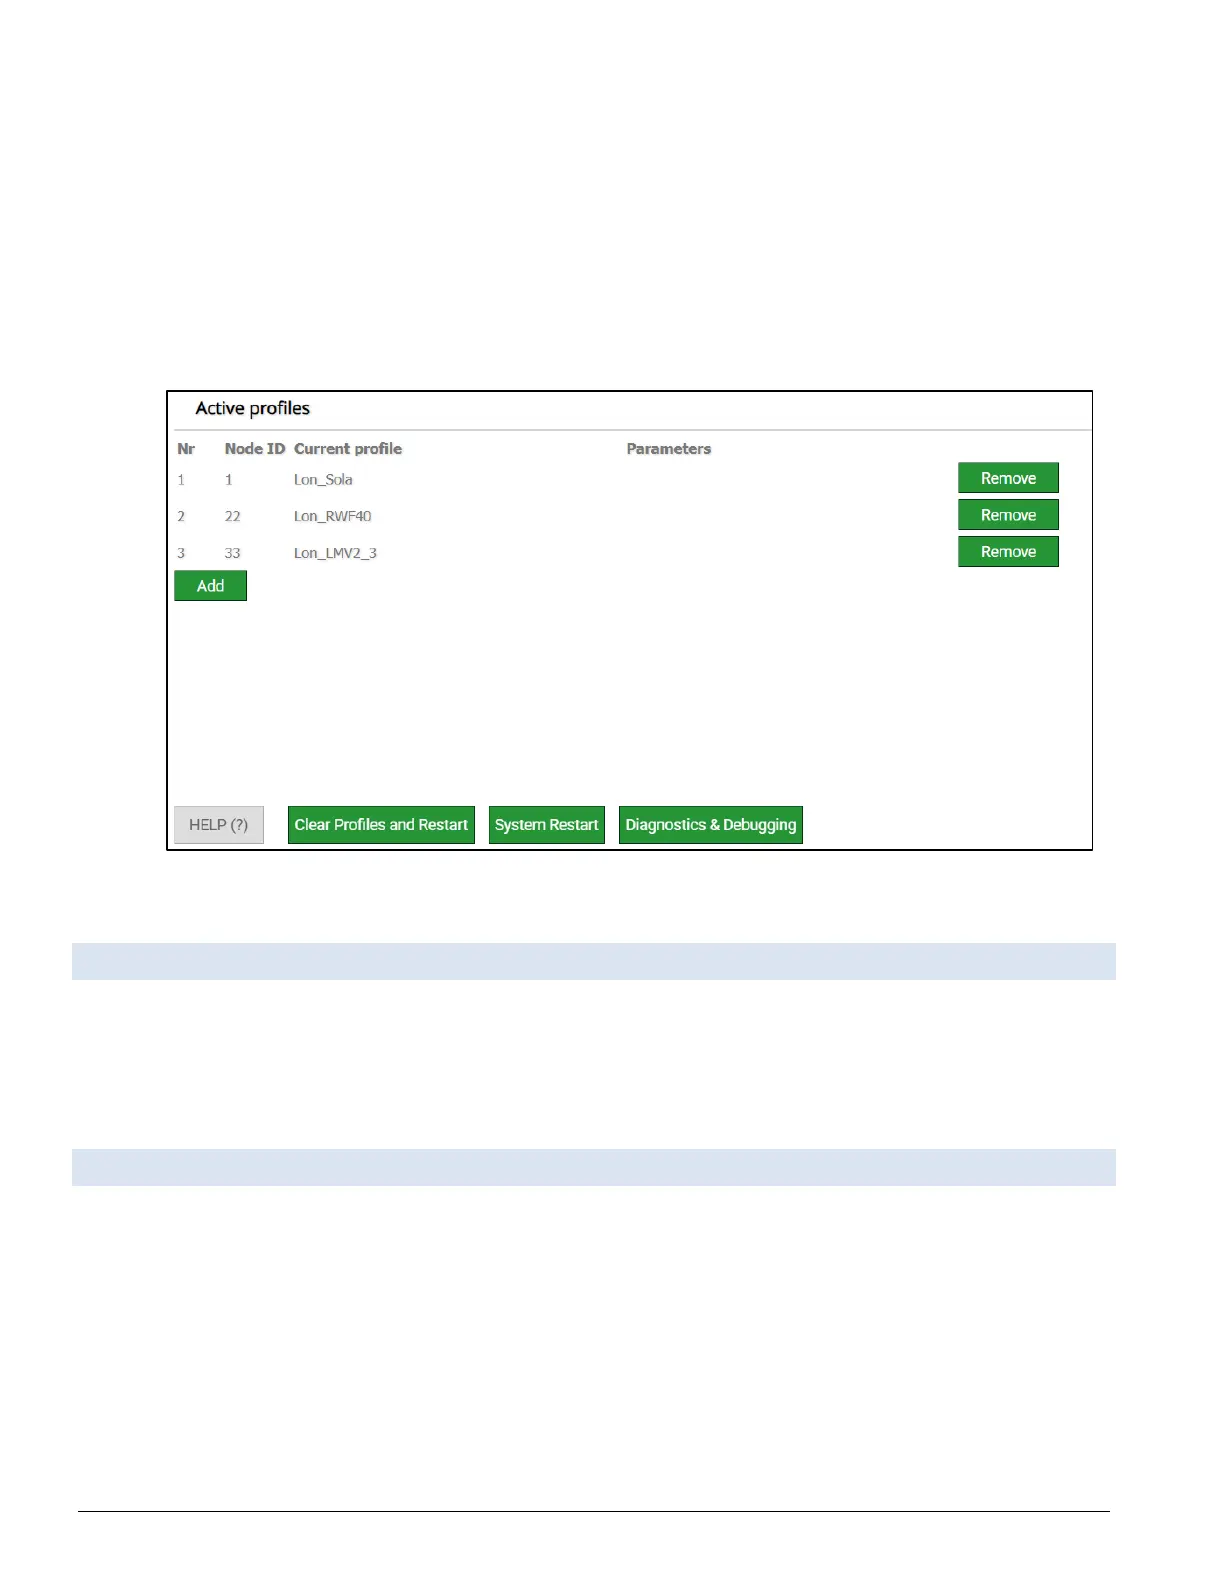
• Completed additions are listed under “Active profiles” as shown below.
Figure 6-4: Manually Added Profile List
6.4 Verify Device Communications
• If using a serial connection, check that TX and RX LEDs are rapidly flashing. See Section
8.4 LED Functions for information and images.
• Confirm the software shows good communications without errors. See Section 8.2 Viewing Diagnostic
Information).
6.5 How to Start the Installation Over: Clearing Profiles
• At the bottom-left of the page, click the “Clear Profiles and Restart” button.
• Once restart is complete, all past profiles discovered and/or added via Web Configurator are
deleted. The unit can now be reinstalled.