10 Measurement
PIOX S72* 10.4 Start of the measurement
117
UMPIOX_S72xV1-9EN, 2022-05-15
Input of the measuring point number
• Enter the number of the measuring point.
• Press ENTER.
For the activation of text input see Special functions\Dialogs/Menus\Measuring point no.
Input of the sound path number
• Enter the number of sound paths.
• Press ENTER.
Adjustment of the transducer distance
The recommended transducer distance will be displayed. The transducer distance is measured between the inner edges
of the transducers. In case of a measurement in diagonal arrangement on very small pipes, a negative transducer
distance is possible.
• Mount the transducers on the pipe and adjust the recommended transducer distance.
• Press ENTER.
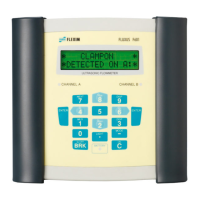
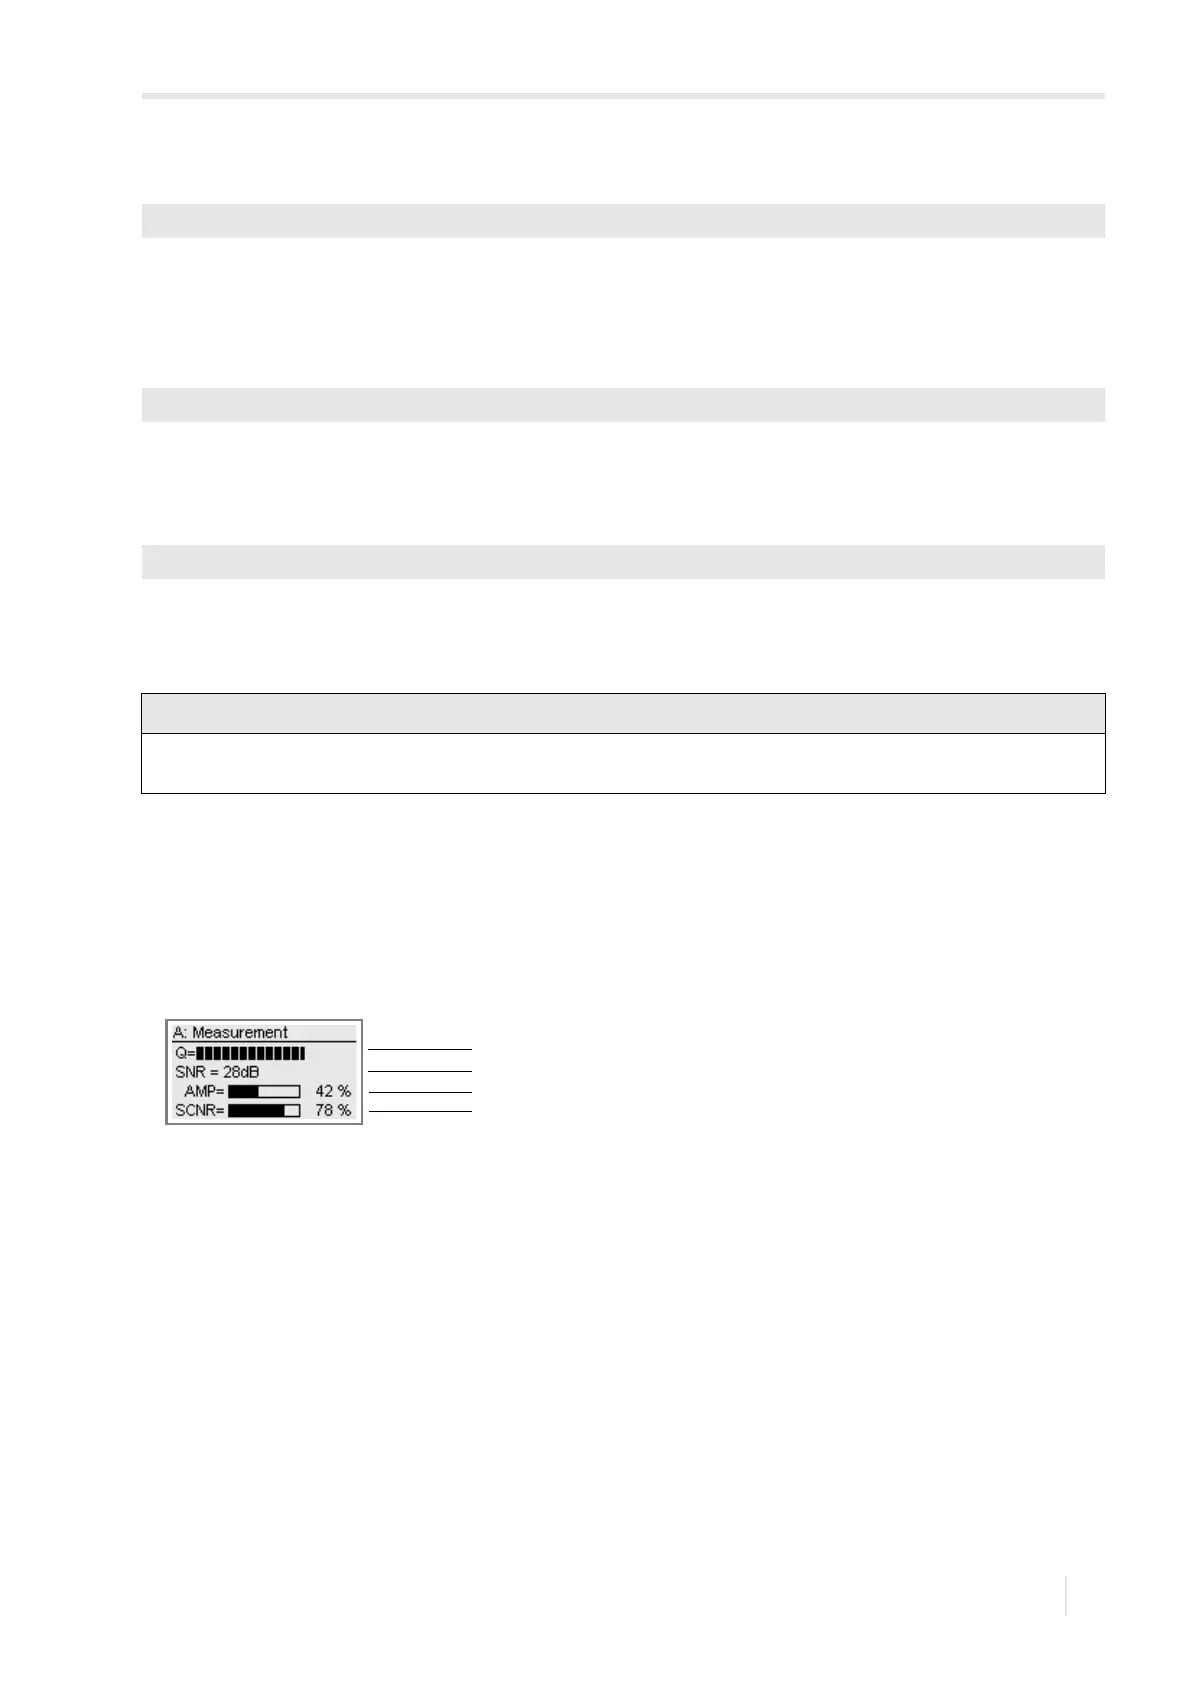
The diagnostics window is displayed.
The amplitude of the received signal is displayed by bar graph AMP.
The bar graph SCNR shows the ratio of the useful signal an the correlated noise signal.
Measurement\Measuring point no.
Measurement\Sound path
Measurement\Transducer distance
The accuracy of the recommended transducer distance depends on the accuracy of the entered pipe and fluid
parameters.
Fig. 10.1: Diagnostics window
1 – additional diagnostic value
2 – additional diagnostic value
3 – amplitude (bar graph)
4 – SCNR value (bar graph)