This document does not contain any export-controlled information.
Configuration and Operation
39
Quasar CP-6302 Range User Guide - Ver. 8 - January 31, 2021
·
Overwrite
The original image in the FTP site will be overwritten by the new uploaded file with a static
filename.
Click SAVE after configuring the settings.
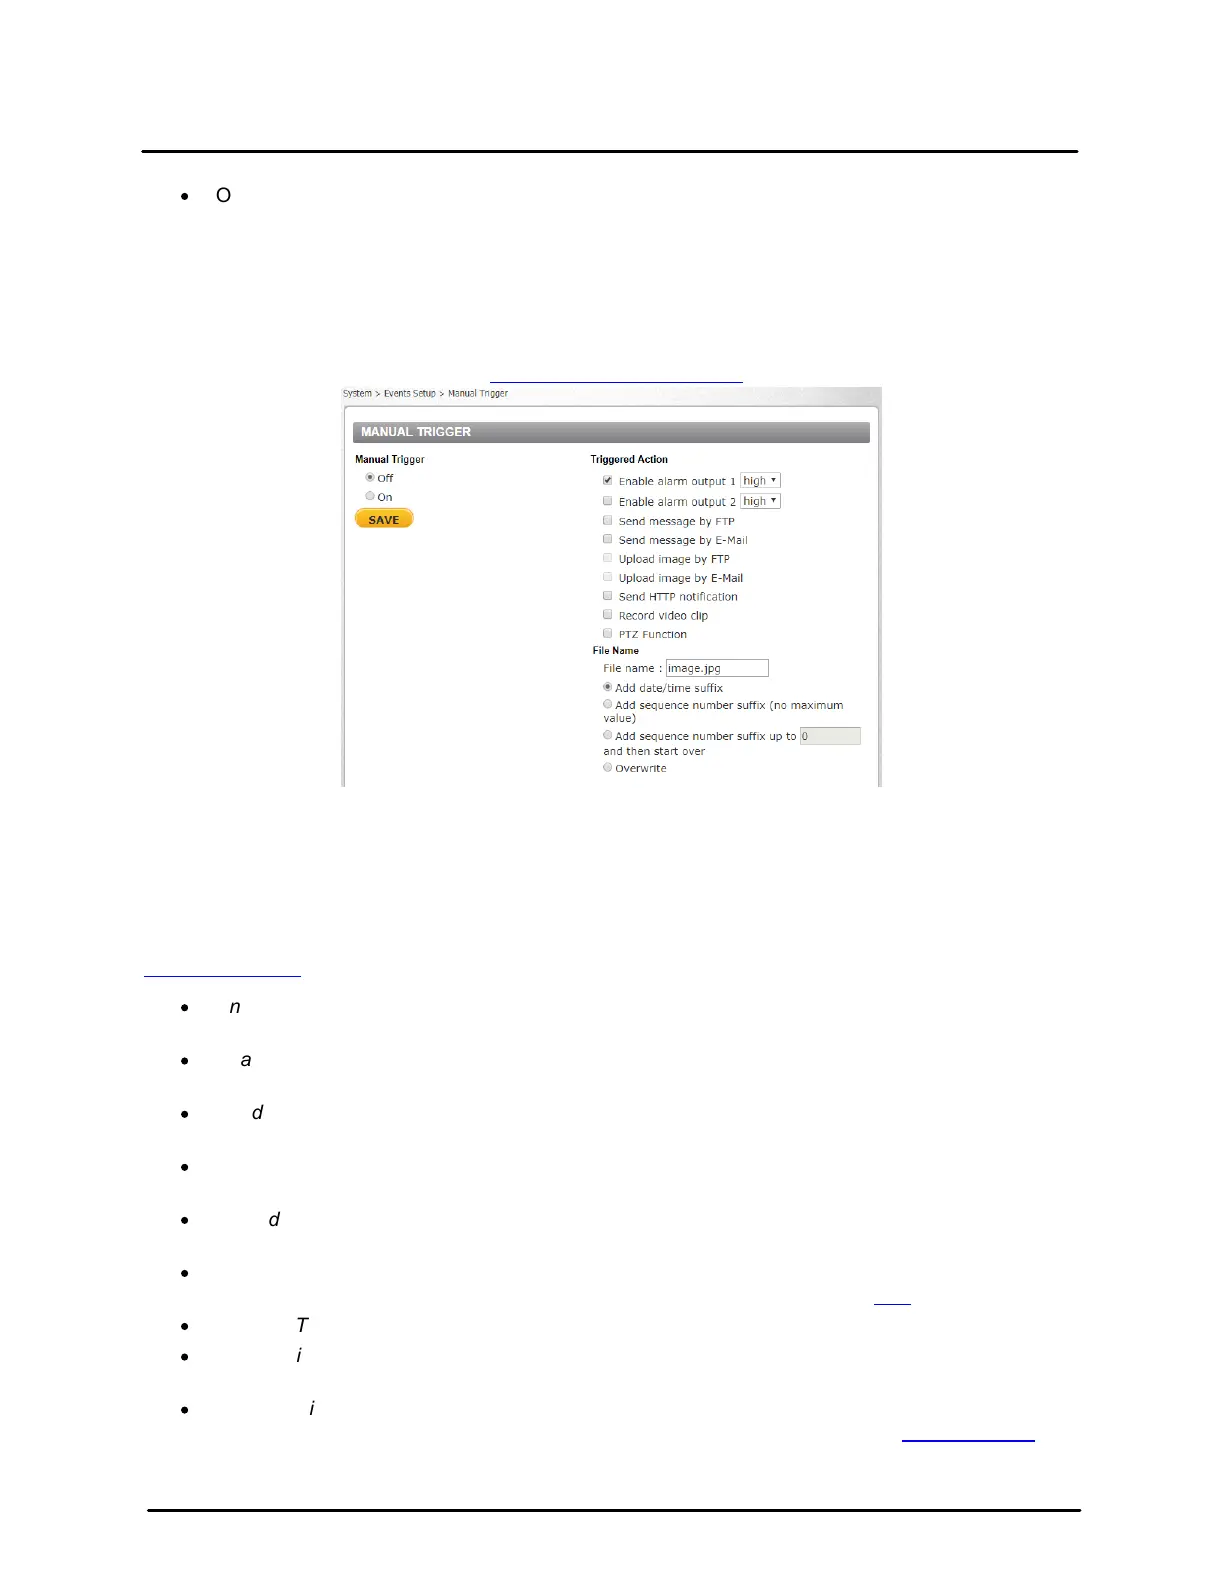
5.3.4.5 Manual Trigger
The Manual Trigger screen is used to specify an alarm to be manually triggered. You can define action
to take when an alarm occurs from the System > Events Setup > IO screen.
Manual Trigger Screen
Manual Trigger
Select Off or On to activate this function. The default is Off.
Triggered Action
The Administrator can specify various alarm actions to take when an alarm is triggered. See the
Triggered Actions section for a detailed description of the actions. The following options are available:
·
Enable alarm output 1 – Check this box and select the predefined type of alarm output (low or
high) to enable alarm relay when a network failure is detected.
·
Enable alarm output 2 – Check this box and select the predefined type of alarm output (low or
high) to enable alarm relay when a network failure is detected.
·
Send Message by FTP – The Administrator can select whether to send an alarm message by
FTP when an alarm is triggered.
·
Send message by E-Mail – The Administrator can select whether to send an alarm message by
e-mail when an alarm is triggered.
·
Upload Image by FTP – Selecting this option enables you to assign an FTP site and configure
various parameters.
·
Upload image by E-Mail – Select this checkbox to assign an e-mail address for sending the
image captured by a triggered alarm. The e-mail address is entered in the Mail screen.
·
Send HTTP notification – Select this checkbox to send a notification by HTTP.
·
Record video clip – Select this box in order to save the alarm-triggered recording to your
microSDXC card or to the NAS.
·
PTZ Function – Select this checkbox to set a Preset, Sequence, Auto Pan, or Pattern; Function
line; or Dwell time. These functions can be configured in more detail from the Settings > PTZ tab.
Click SAVE after configuring the settings.

 Loading...