This document does not contain any export-controlled information.
Configuration and Operation
89
Quasar CP-6302 Range User Guide - Ver. 8 - January 31, 2021
Click Open to open the iris.
Click Reset to reset the iris.
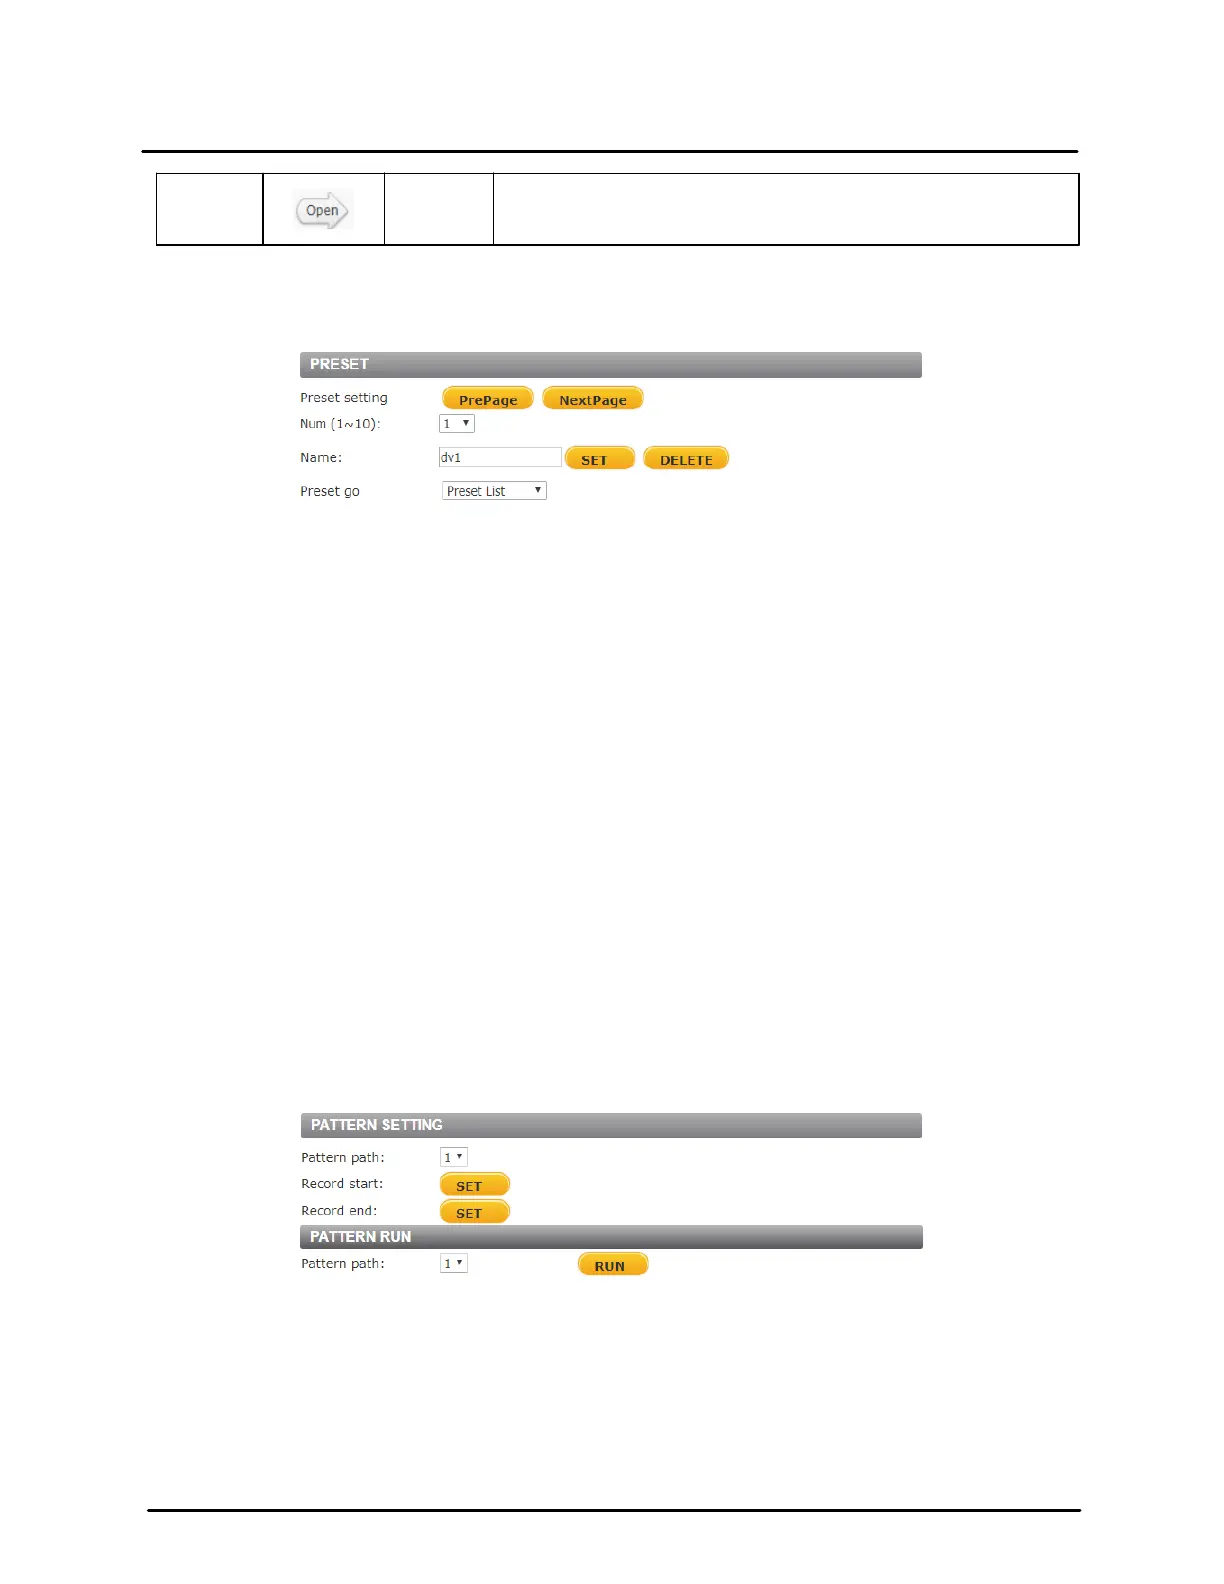
5.7.1 Preset
The PTZ tab opens on the Preset screen.
Preset Screen
On this screen you can program up to 256 Presets to target a specific view in the Live View pane.
To program a Preset Point
1. Move the cursor to the Live View pane.
2. Left-click and drag the red pointer to the desired position.
3. Adjust the fine zoom/focus ratio.
4. Under Preset setting, assign an unused number to the Preset Point from the drop-down menu.
Click PrePage or NextPage for additional numbers.
5. From the Num drop-down menu, select a number from 1-10.
6. In the Name text box, enter a friendly name for the Preset Point.
7. Click SET to save settings.
To move the camera to a Preset position
1. From the Preset go drop-down menu, select the desired Preset Point.
2. Use the PrePage or NextPage buttons located under Preset setting for additional numbers. The
camera moves to the target position.
To delete a Preset
1. Select the desired Preset Point from the drop-down menu.
2. Click DELETE to remove the Preset.
5.7.2 Pattern
From the Pattern page, up to four Pattern Lines may be defined. A Pattern Line is a stored route defined
through manual adjustment of pan, tilt, and zoom.
Pattern Line Screen
To set up a Pattern Line
1. Select a path number from the Pattern path drop-down menu.
2. In the Live View pane, move the cursor to the desired start point of the Pattern path.
3. Use the PTZ controls to set the desired start point view.
4. Click Record start: SET.
5. Use the PTZ controls to define the path within the Live View pane.
6. Click Record end: SET when finished.

 Loading...