OmniSTAR 8200HP User Manual
Issue 1.07, 10/2008
13
Operation
Before operating the receiver for the first time, ensure that you follow the
following installation instructions.
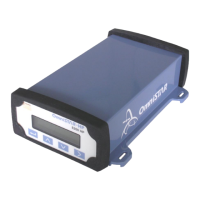
1. Mount the 8200HP receiver in a suitable place (see also page 9).
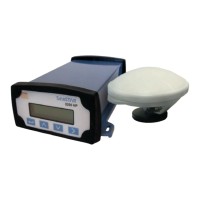
2. Mount the OmniSTAR antenna in a suitable place (see also page 10).
3. Connect the antenna cable to the antenna and the receiver, making sure
the right angle connector is connected to the antenna. Secure the
antenna cable using tie wraps.
4. Connect the data/power cable to port A of the 8200HP receiver. If
desired, also connect the data connector (9 pin sub D connector).
5. Connect the power leads to a suitable (10-32 V DC) power supply.
Getting Started
The purpose of this section is to get you started with the 8200HP as quickly as
possible. The guide will address receiving the satellite data carrier, and then
checking the functionality and status of the HP Process.
Generally, when the receiver is supplied to you it will be configured for the
mode and data link(s) you have subscribed to. In most cases getting up and
running will be a case of connecting the appropriate cables and applying power
to the system.
Communicating with the Receiver
Communicating with the receiver is possible using the receiver’s front panel
and LCD screen, the AgRemote program on a Microsoft Windows-based
computer or Viewall on a PDA. The AgRemote program will communicate with
the 8200HP through a standard serial port using the TSIP-protocol. AgRemote
will copy the front panel interface (LCD screen and buttons) to your desktop,
providing you with a familiar interface when the receiver’s front panel is hard to
reach. Because the 8200HP’s display is small, the receiver uses a number of
menus and submenus to access all of the receiver’s possible information and
configuration screens.
Starting the Receiver
The receiver’s software resides in read-only memory. As such, the unit “self-
boots” when turned on and undergoes a complete self-test. When the receiver
is first turned on, it will show the following boot sequence:
Starting Up (followed by a progress indicator bar on the second line of
the display)