Chapter 1. General Installation Instructions
8 AquaTrans™ AT600 User’s Manual
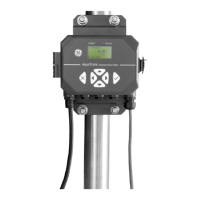
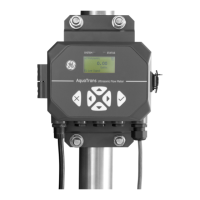
1.8 Mounting the Clamp-on Fixture and Transducer System
The AT600 transducer system includes one or two clamp-on fixtures, two transducers and one transducer
cable. One clamp-on fixture is shipped with both transducers installed and the transducer cable connected
to the transducers. This fixture is the default setup for most applications. If a second fixture has been
ordered, it is shipped empty.
Transducers available for use with the AT600 flow meter are listed in Table 1 below.
The AT600 clamp-on fixture and AT6 transducer system can be installed on pipe sizes 2 in. (50 mm). For
optimum performance in any specific application, either a two-traverse or one-traverse installation can be
chosen. Because the maximum pipe size for a single clamp-on fixture is 250 mm for 2 MHz transducers or
320 mm for 1 MHz and 0.5 MHz transducers, the detailed installation requirements differ based on the
calculated transducer spacing and the chosen number of traverses. Refer to Table 2 below to find the
parameters for your specific configuration.
IMPORTANT: See “Sensor Setup” on page 66 to calculate the required transducer spacing. A two traverse
installation is recommended for most applications.
IMPORTANT: If there is any type of coating or protective layer on the outer pipe surface, it must be removed at
the locations where the transducers and couplant contact the pipe surface.
Table 1: Available Transducers
Model Frequency Fixture Pipe Sizes
AT6 2, 1, 0.5 MHz AT600 2 in. (50 mm)
CF-LP
1
4 MHz CF-ES 0.5-2 in. (15-50 mm)
UTXDR
1
4 MHz SPCF 0.5-8 in. (15-200 mm)
C-RS
2
1, 0.5 MHz GCF 2 in. (50 mm)
C-PT
2
2, 1, 0.5 MHz GCF 2 in. (50 mm)
1
Go directly to: “Installing a CF-ES Clamp-On Fixture and Transducer System” on page 20.
2
Go directly to: “Installing a General Clamping Fixture and Transducer System” on page 20.
Table 2: AT600 Clamp-On Fixture Installation
Pipe Size Range
Transducer
Frequency (MHz)
Number of
Traverses
Transducer Spacing
(mm)
Number of
Fixtures
mm inches
50 to 100 2 to 4 2 4 32 to 250 1
100 to 150 4 to 6 2 2 32 to 250 1
50 to 150 2 to 6 2 1 0 to 250 2
100 to 300 4 to 12 1 2 50 to 320 1
300 to 600 12 to 24 1 2 320 to 940 2
600 to 1500 24 to 60 1 1 >320 2
200 to 300 8 to 12 0.5 2 50 to 320 1
300 to 900 12 to 36 0.5 2 320 to 940 2
>900 >36 0.5 1 >320 2
 Loading...