Appendix E: Installing Wall Mount Units
Pre-Installation Preparation
E-2 Service Manual
E.1 Pre-Installation Preparation
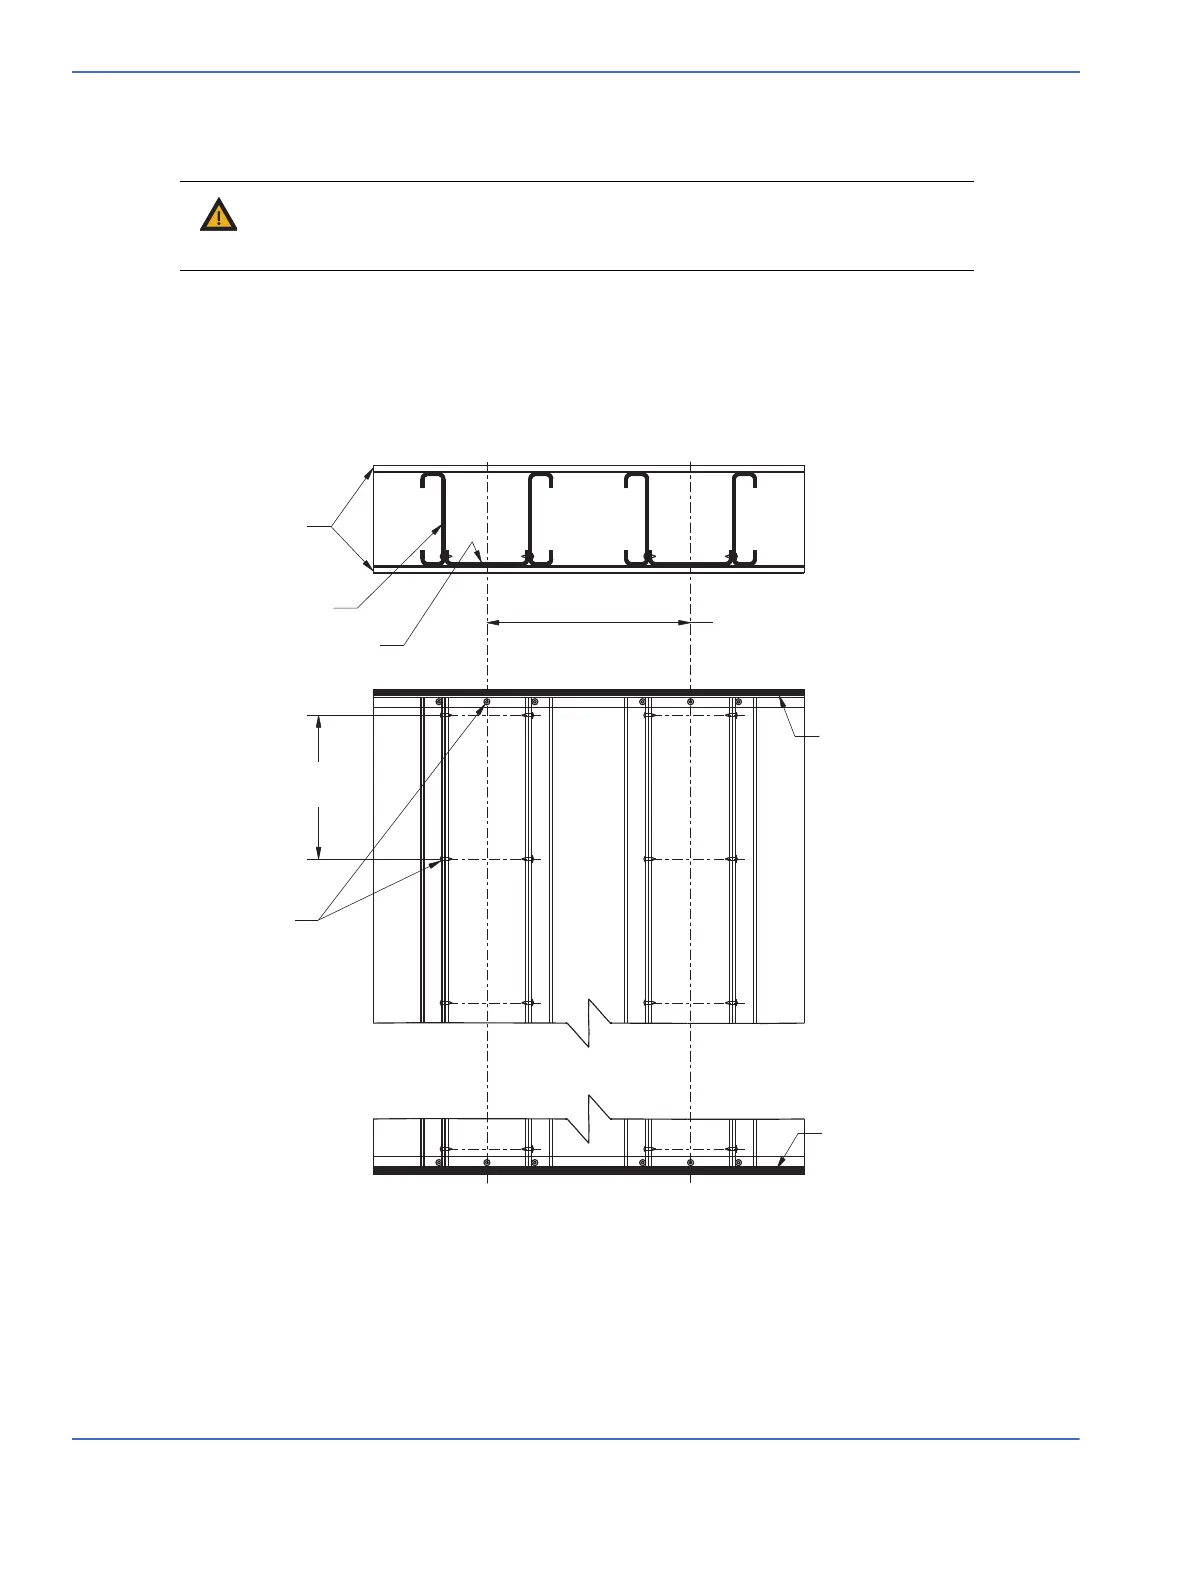
The wall mount bracket needs to be installed on a flat-surfaced wall with drywall being 5/8” (1.6 cm) or
thicker. A pattern of two drywall studs (25 gage minimum) and one drywall track (25 gage minimum) at 8.5”
(21.5 cm) centers form the basic “rough in” for installing each Wall Mount Warmer unit (See Figure E-1).
Verify that the studs and track are securely fastened together at 12” (30.5 cm) intervals and to both the floor
and ceiling tracks with #10 sheet metal screws.
Warning: A safety factor of 4 is required if the hospital uses their own wall design.
Upon installing the Wall Mount bracket, the bracket shall be applied and tested with
4X load (equivalent to 131 lb or 59.4 kg) to confirm the safety factor.
FIGURE E-1. Wall Cross Section
Top View
Front View
CEILING TRACK
SHEET METAL
SCREWS
FLOOR TRACK
12"
(30 CM)
DRYWALL
8.5" O.C.
(21.5 cm O.C.)
STUD
TRACK