Chapter 4: Installing the Ripple-2 Node
1. Detach all the node housing lid bolts with a torque wrench and open the lid to expose the module
slots.
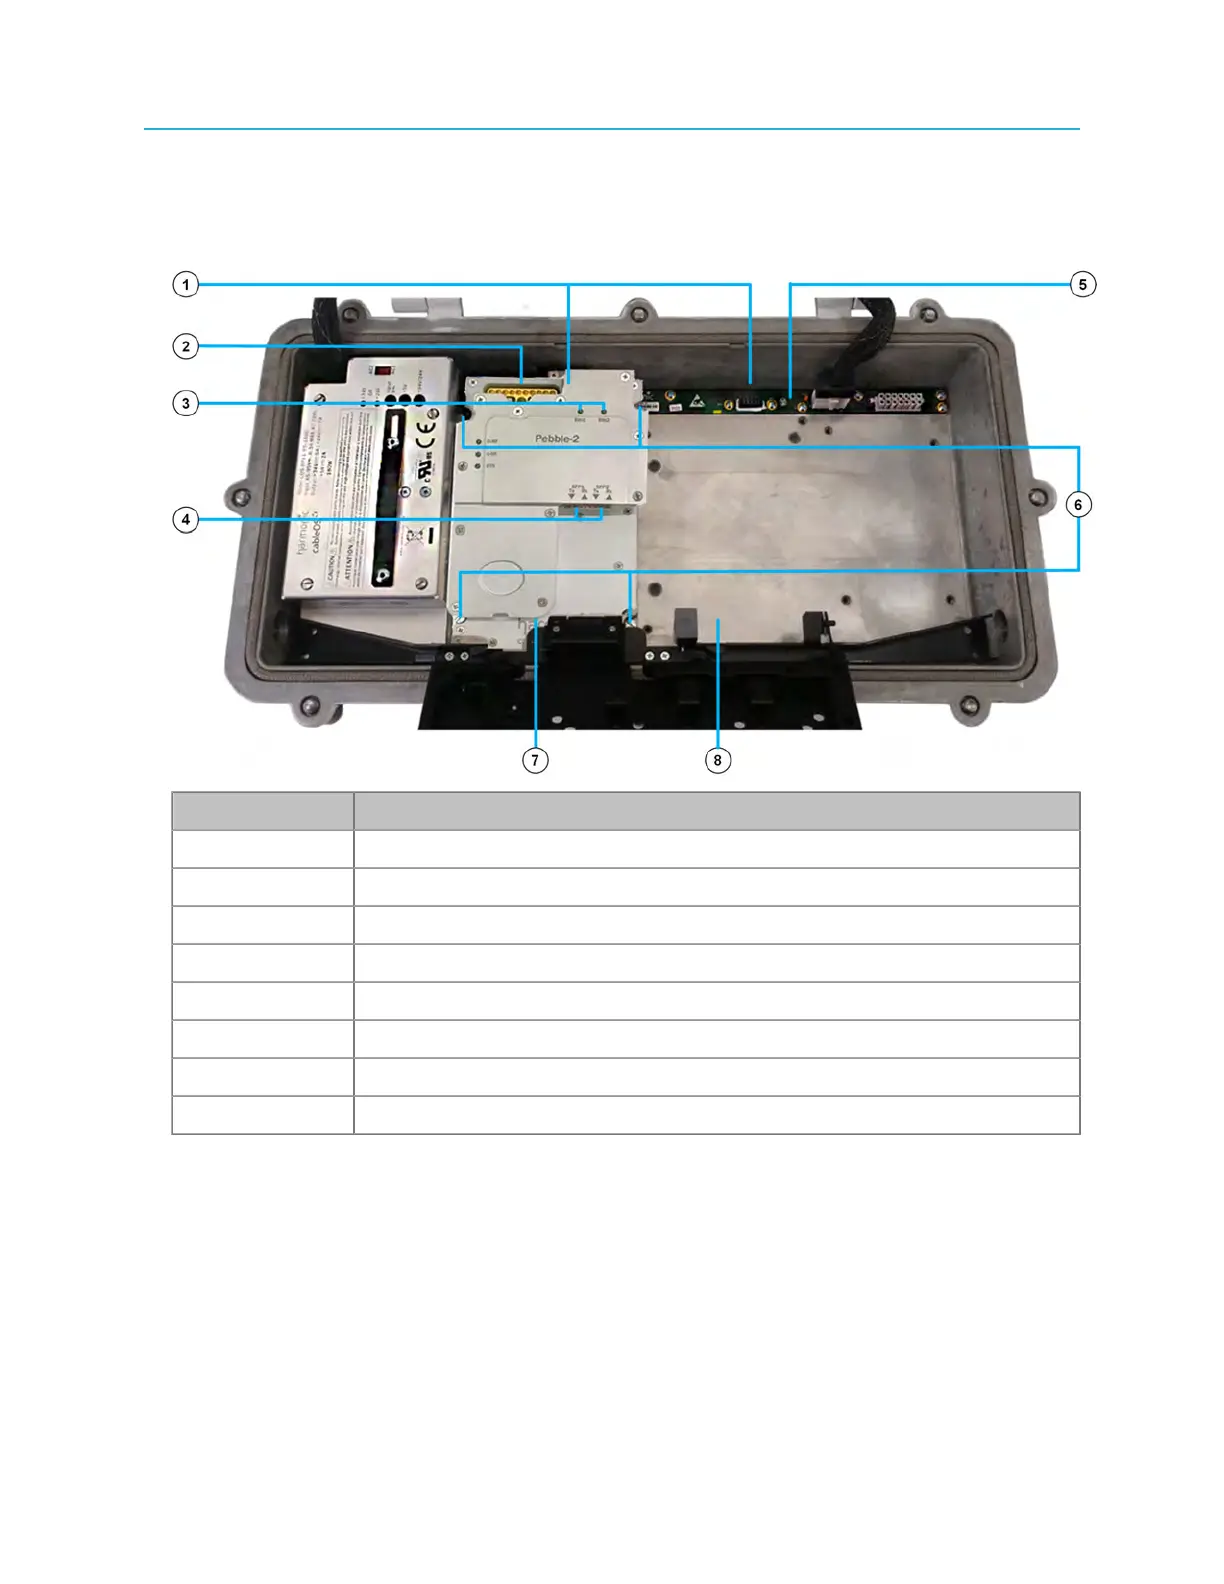
Figure 4-2: Pebble-2 module installed in module slot 1, empty module slot 2
Number Description
1 Module connectors
2 HD-AFI RF cable connectors
3 Status LEDs
4 SFP+ ports
5 Lid motherboard
6 Mounting screws
7 Module slot 1 (Pebble-2 installed)
8 Module slot 2 (empty)
2. Use the guide pins to align the Pebble-2 module connector with its mate connector on the lid
motherboard.
3. Firmly push the module down into the motherboard connector.
4. Secure the module with the four mounting screws using a medium flat-blade screwdriver.
5. Use HD-AFI cables to connect the Pebble-2 to the RF tray.
If you are installing the module on site as part of a new installation, continue to other installation
procedures as needed without closing the housing. For example, connect the coaxial cables and the
fiber cables, install the SFP+ transceivers and connect the fiber cables to them etc.
34