Chapter 4: Installing the Ripple-2 Node
2. Open the node housing with the torque wrench.
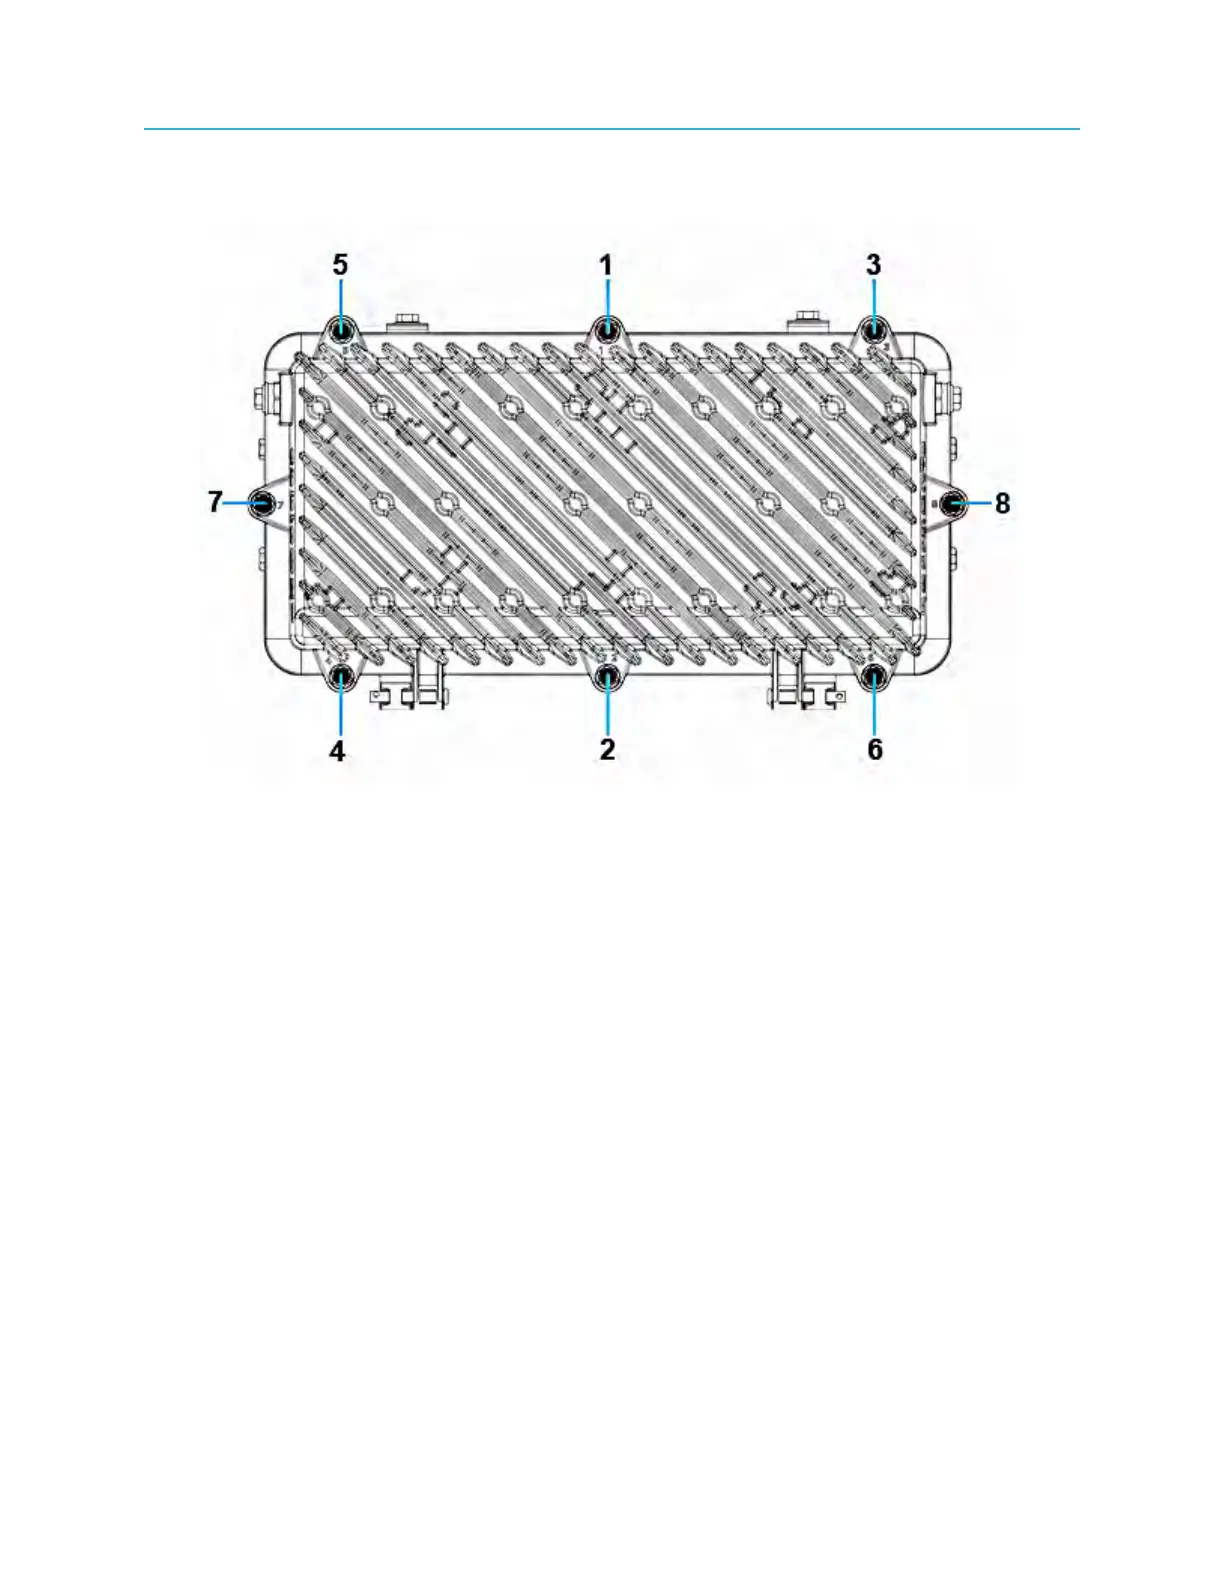
a. Loosen the housing bolts in the order (from 1 to 8) as shown on the lid flange next to each bolt.
Figure 4-6: Ripple-2 node lid bolt tightening sequence
b. Open the lid with caution to avoid damaging any internal modules or cables that may be present.
3. Install a heat-shrink tube over the cable before inserting the stinger into the port.
4. Thread the rotational cable nut onto the RF input nut and tighten to manufacturer-recommended
torque with the torque wrench.
5. Perform heat-shrink.
6. Install O-ring watertight plugs into unused RF ports.
Installing and removing SFP+ modules
The SFP+ (Small Form Factor Pluggable) modules convert optical signals into electrical signals and the
reverse.
The Pebble-2 module has two SFP ports, SFP1 and SFP2. SFP+ transceivers can be installed into ports
SFP1 and SFP2, however this installation procedure describes connecting the fiber cables only to the
transceiver in SFP1.
38