Chapter 4: Installing the Ripple-2 Node
6. Removing the SFP+ transceiver module:
a. Attach an ESD-preventive wrist strap to your wrist and to the ESD ground connector or a bare
metal surface on your chassis.
b. Disconnect the network fiber-optic cable or network copper cable from the SFP Transceiver Module
connector.
c. For optical SFP transceivers, immediately reinstall the dust plugs in the SFP transceiver optical
bores and the fiber-optic cable LC connectors.
TIP: For reattachment of fiber-optic cables, note which connector plug is transmit (TX) and
which is receive (RX).
d. Release and remove the SFP Transceiver Module from the socket connector.
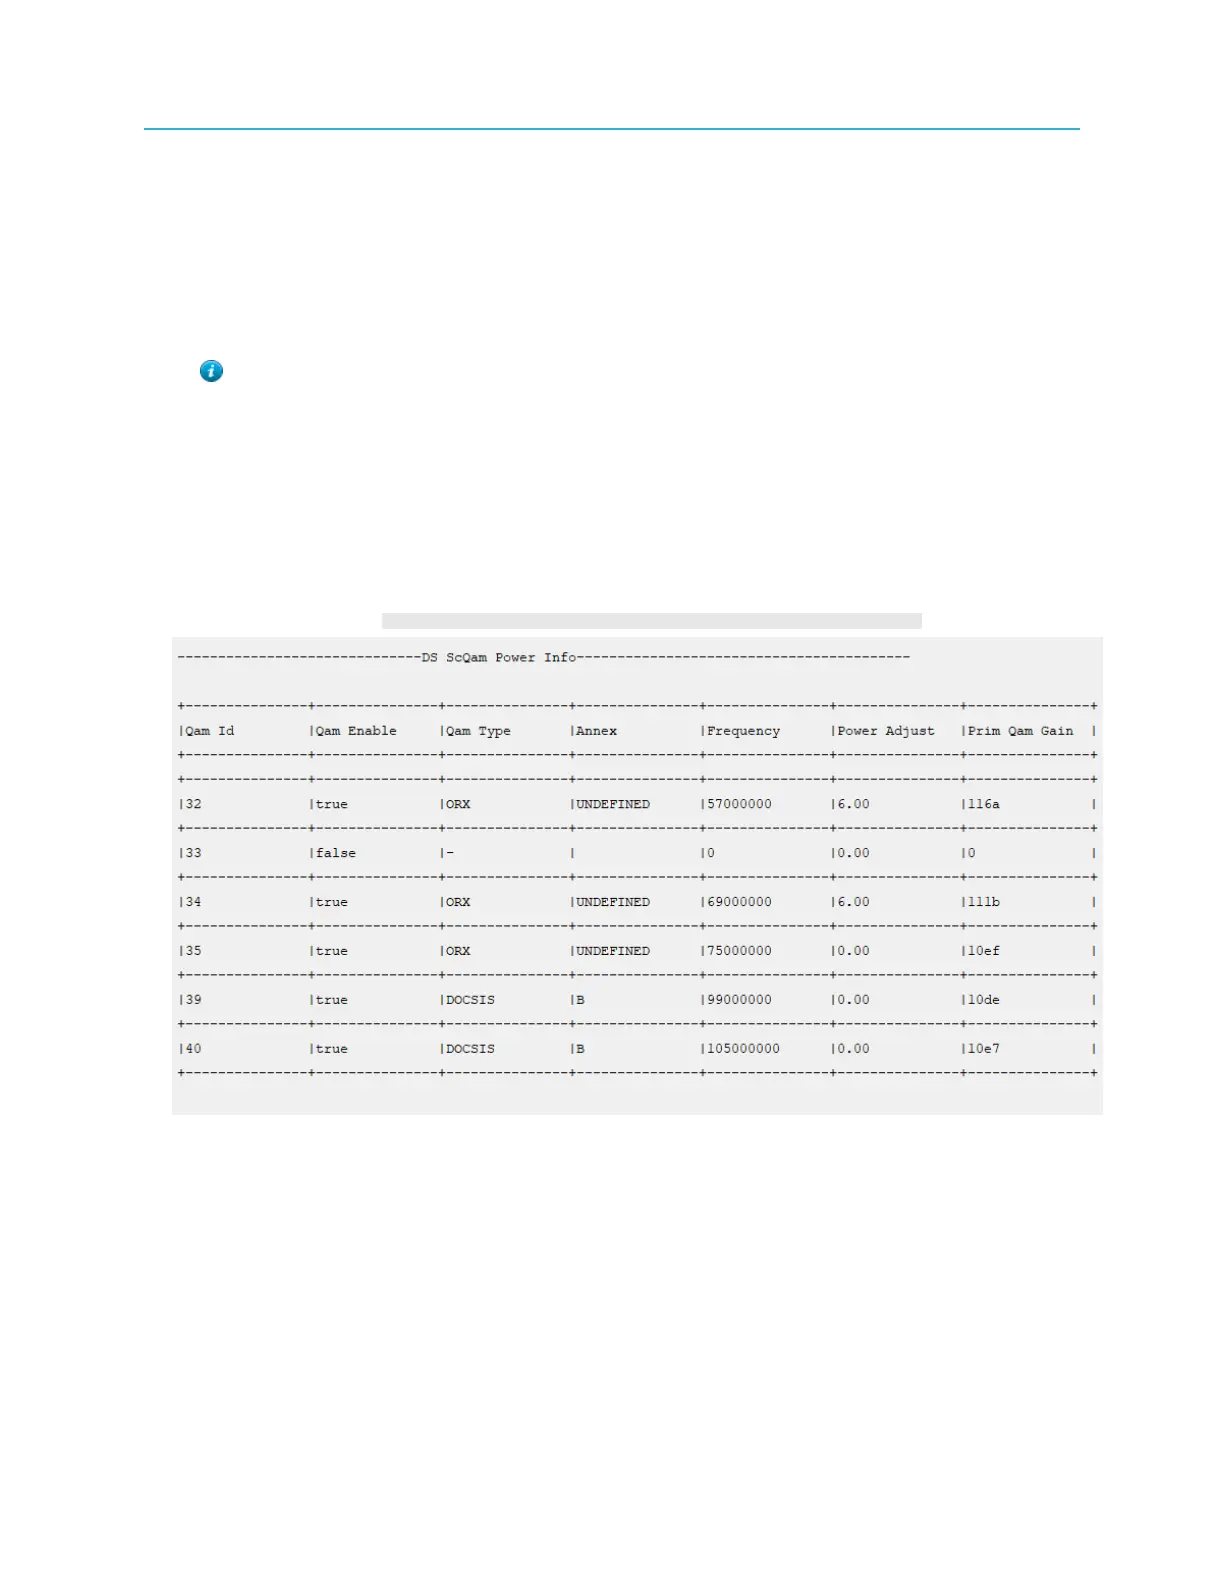
Reviewing the configuration
To review the configuration the following table can be extracted using the RPD CLI.
1. Login as the admin on the RPD.
2. Execute the command: [00:20:A3:24:1D:03]RPD#show running-config rf
Remote FTTx Switch installation
The following procedures are specific to Remote FTTx Switch deployment:
• Install a Jetty-1 module
• Install Fin-1 Remote OLTs or 1G/10G Ethernet connectors (in SFP+ compliant packages)
◦ Typical installation: One 10G Ethernet SFP+ for uplink plus up to five Fin-1 Remote OLTs
• Connect fiber cables to the Jetty-1 module
• Testing SFP+ Modules
40